Monday, April 14, 2008

A Pearl Of A Snack

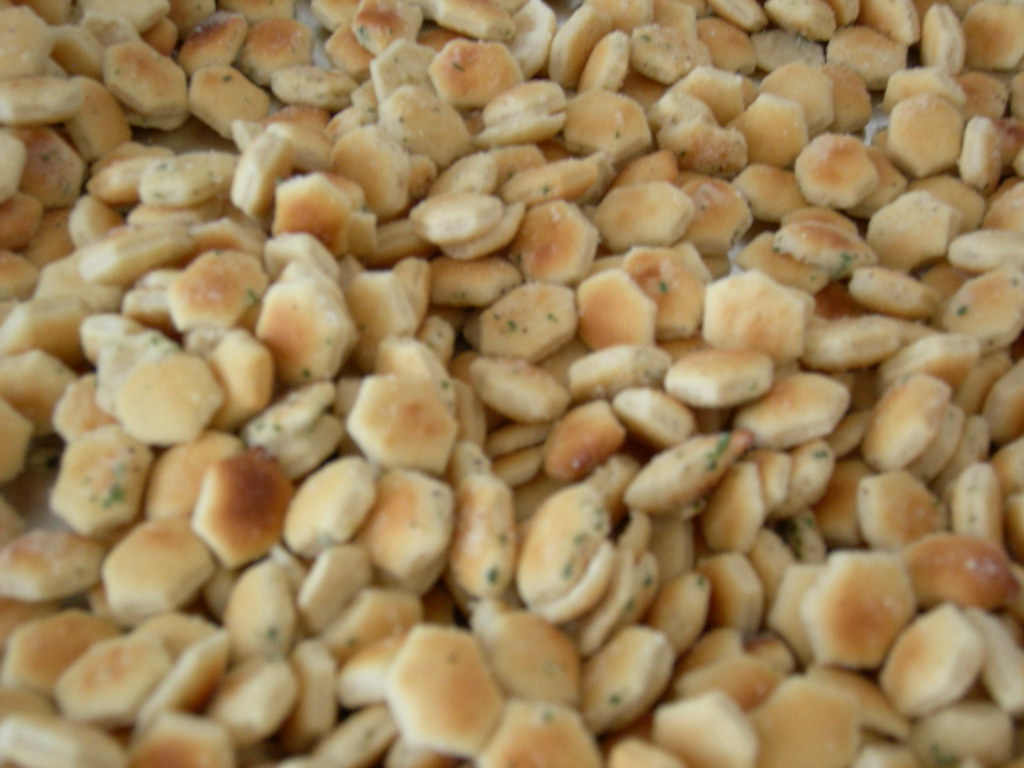
Ranch Oyster Crackers


Looking for a super simple and highly addictive snack? Oh baby have I found one! Ranch Oyster Crackers are on the list as a must-make munchie for my next soiree. Aside from the 20 minute bake time, these tasty little nibbles took about 5 minutes to make, and I spent less than $5 on the ingredients. What's not to love about a snack like that? And to boot, the crackers are relatively low fat.

I omitted the dill weed and the lemon pepper, and cut back on the oil a smidge, and this little snack came out great.

Ranch Oyster Crackers

1 (1 ounce) package ranch dressing mix
1/2 teaspoon dried dill weed
1/4 cup vegetable oil
1/4 teaspoon lemon pepper (optional)
1/4 teaspoon garlic powder (optional)
5 cups oyster crackers

Preheat oven to 250 degrees F (120 degrees C).

In a large mixing bowl, combine ranch dressing mix, dill weed, vegetable oil, lemon pepper, and garlic powder. Mix well. Add oyster crackers to the mixture and mix to coat the crackers. Pour the crackers onto a cookie sheet.

Bake for 15 to 20 minutes, stirring gently halfway through the baking time.

Labels: , , , , , ,

Sunday, April 13, 2008

Slow Cookin' Goodness

So let's play a little catch up shall we? The economy sucks, so the job hunt has been on like crazy in my Culinarily Obsessed house. But the cooking continues, more than usual actually. Funny thing about having to watch your budget, keeps you from eating out as much, thus you're in the kitchen more. But hey, I'm not complaining, I get to try out new recipes, save money and eat healthier than I would have by going out.

One of those new recipes I tried a while back was a yummy pot roast recipe. For a long while, the use of the slow cooker was left to my Big Bad Dad aka Mr. Picky Eater. It's a simple appliance, but I never touched the thing, I was always worried I'd undercook or worse overcook something. I've started using the thing and I'm starting to like it. Another thing I like, no scratch that I LOVE is AllRecipes. It is definitely my go-to site when I'm searching for a recipe. A while back I spotted a slow cooker pot roast recipe that had about a bazillion rave reviews, so I figured I had to give it a shot, I mean how can a bazillion people be wrong about a recipe yanno?

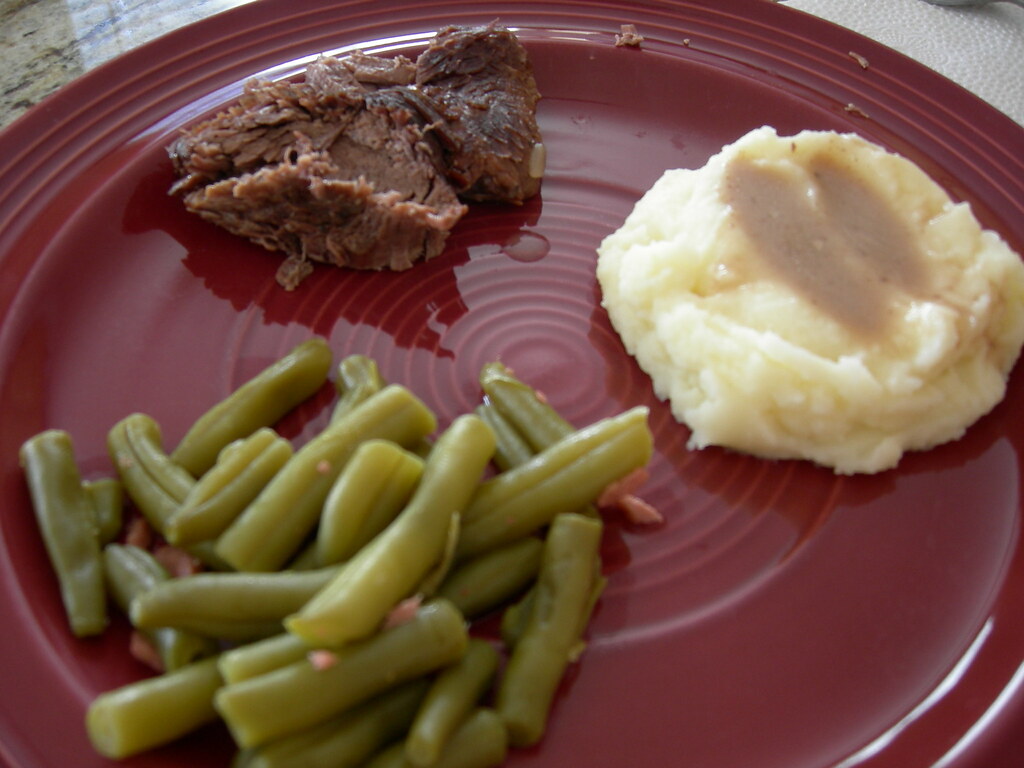
awesome slow cooker pot roast dinner


Awesome Slow Cooker Pot Roast

2 (10.75 ounce) cans condensed cream of mushroom soup
1 (1 ounce) package dry onion soup mix
3/4 cup water
5 1/2 pounds bottom round roast

In a slow cooker, mix cream of mushroom soup, dry onion soup mix and water. Place pot roast in slow cooker and coat with soup mixture.

Cook on High setting for 3 to 4 hours, or on Low setting for 8 to 9 hours.

A lot of the review critiqued the "gravy" in the recipe which didn't turn out to be much of a gravy in my opinion. I served the pot roast alongside mashed potatoes, and the so-called gravy, which was flavorful was great mixed into the potatoes. It was hardly thick enough to be considered a gravy though, but hey I'm not complaining. Will this be a repeat for us? Oh yeah.

Labels: , , , , ,

Saturday, March 15, 2008

No Pudge Fudge Pie

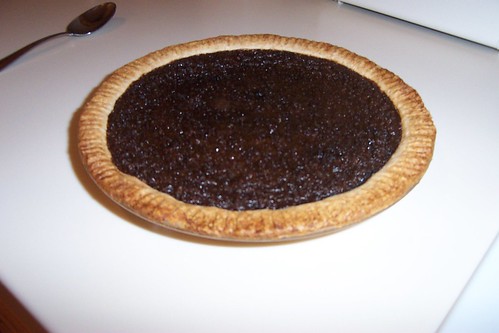
I'm reaching waaaay into the archives with this recipe. It's one I definitely haven't made in a long time, so you won't find many vivid adjectives to desccribe this pie, but trust me it was GOOD! If you're a regular around here you know I've got a killer sweet tooth, and I'm a serious chocaholic. I don't experiment with the lower fat, more guiltless versions of recipes as much as I should, but you'll catch a few guiltless recipes around here from time to time. This yummy chocolate pie is one of those recipes.

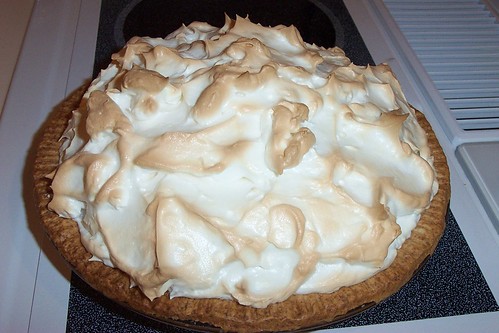
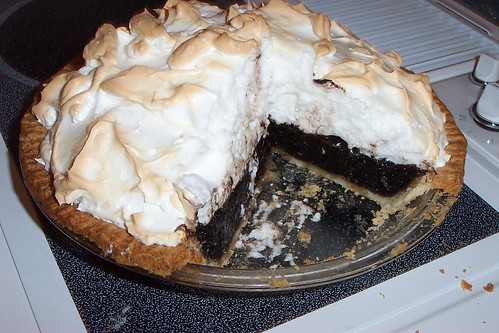
I found this recipe for Low-Fat Chocolate Fudge Pie on the Cooking Light website. I keep the recipe as written, with one minor change - instead of whipped cream, I wanted to top the pie off with some delicious, fluffy meringue. I love whipped cream, but the meringue was absolutely the perfect touch.

Chocolate Fudge Pie

Chocolate Fudge Pie Part 3

Chocolate Fudge Pie YUM

Low-Fat Chocolate Fudge Pie

1/2 (15-ounce) package refrigerated pie dough (such as Pillsbury)
1 cup packed brown sugar
1/2 cup unsweetened cocoa
1 tablespoon all-purpose flour
3/4 cup 2% reduced-fat milk
1/3 cup light-colored corn syrup
1 tablespoon butter, melted
1 teaspoon vanilla extract
2 large eggs
2 large egg whites
1 cup frozen fat-free whipped topping, thawed*
1/2 teaspoon unsweetened cocoa (optional)

*Substitute whipped topping for 1 recipe meringue (see recipe below)

Preheat oven to 350°.
Fit dough into a 9-inch pie plate. Fold edges under; flute. Place pie plate in freezer until ready to use.

Combine brown sugar, 1/2 cup cocoa, and flour in a large bowl. Combine milk and next 5 ingredients (milk through egg whites); stir with a whisk until well blended. Add milk mixture to brown sugar mixture; stir until combined.

Pour mixture into crust. Bake at 350° for 40 minutes or until just set. Cool on a wire rack to room temperature. Cover; chill at least 4 hours. Spread whipped topping evenly over filling; sprinkle with 1/2 teaspoon cocoa, if desired. (Or top with prepared meringue.)

Yield: 10 servings (serving size: 1 wedge)

FAT 8.6g per slice

Meringue

3 egg whites
1/4 teaspoon cream of tartar
3/4 cup white sugar

In large bowl, beat egg whites and cream of tartar with electric mixer until foamy. Gradually add sugar, beating until mixture forms stiff peaks.

To bake: Preheat oven to 350 degrees F (175 degrees C.) Bake pie in the preheated oven for 10 to 15 minutes, or until golden brown.

Labels: , , , , , ,

Sunday, March 02, 2008

Snickety Snickerdoodles

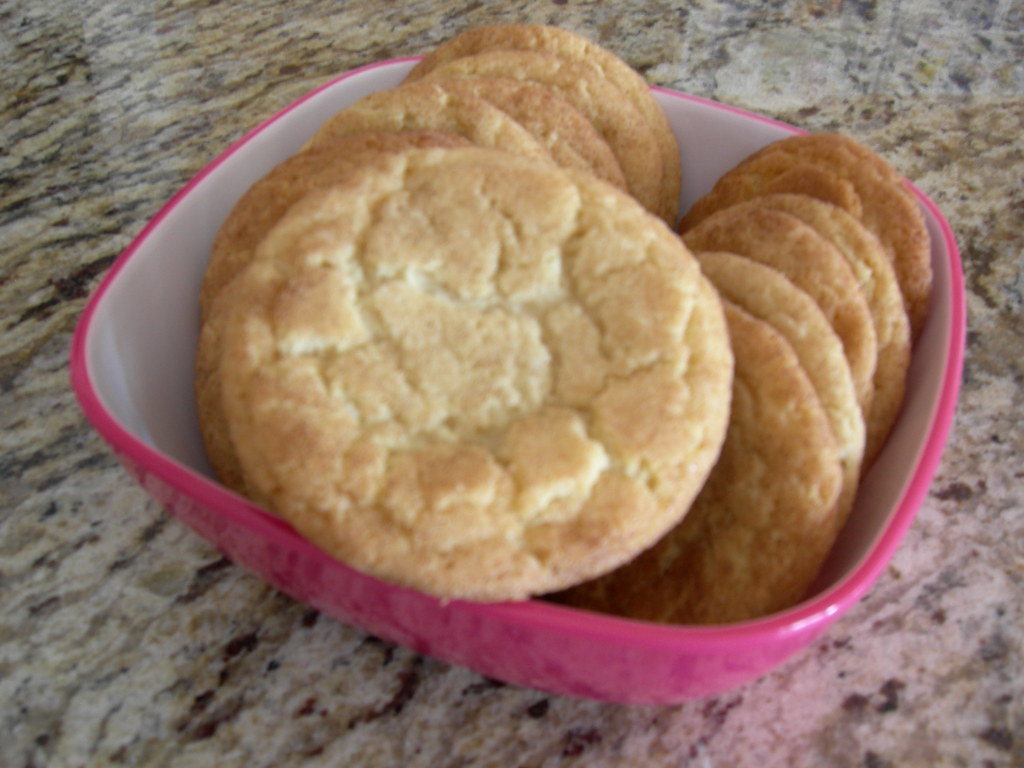
I'm a sucker for a good cookie, and I'm always craving the adventure of a new recipe. I remember eating snickerdoodles as a kid, but my experience with them was minimal. Snickerdoodles just weren't a cookie we had around my house. I remember them as buttery, soft and chewy with a wonderful crispness on the outside from the cinnamon sugar that coats them. I've seen the recipe for "Mrs. Sigg's Snickerdoodles" over and over on allrecipes. When I see a recipe with a high rating from a huge number of people I figure it's probably pretty good and worth giving a try.

Overall I was pretty happy, they had a nice flavor, but weren't as buttery as I would like. I made an adjustment to the cinnamon sugar mixture. When mixing it looked like there wasn't nearly enough sugar so I doubled the amount and found that was perfect for me. I also refrigerated the dough for about 30 minutes before prepping it for the oven, since I was going to be rolling it in my hands I thought that would be a good idea.
Mrs. Sigg's Snickerdoodles


Snickety Snickerdoodles

1/2 cup butter, softened
1/2 cup shortening
1 1/2 cups white sugar
2 eggs
2 teaspoons vanilla extract
2 3/4 cups all-purpose flour
2 teaspoons cream of tartar
1 teaspoon baking soda
1/4 teaspoon salt
4 tablespoons white sugar
2 teaspoons ground cinnamon

Preheat oven to 400 degrees F (200 degrees C).

Cream together butter, shortening, 1 1/2 cups sugar, the eggs and the vanilla. Blend in the flour, cream of tartar, soda and salt. Shape dough by rounded spoonfuls into balls.

Mix the 3 tablespoons sugar and the cinnamon. Roll balls of dough in mixture. Place
2 inches apart on ungreased or parchment lined baking sheets.

Bake 8 to 10 minutes, or until set but not too hard. Remove immediately from baking sheets to cooling rack.

Makes approximately 48 cookies

Labels: , , , , ,

Sunday, February 24, 2008

Reliving Christmas

It's weird, I don't drink eggnog, don't like it one bit. But last Christmas a friend's wife sent over a big plate of various cookies, most were edible but nothing to die for. Except one cookie really stuck out with me, and that was the Eggnog Cookie. I had never had these before or even heard of them, and when it came time to plan my baking schedule this past Christmas I knew I had to make some Eggnog Cookies. I wasn't able to get the recipe from said friend, so I searched the web and when I came up empty handed I enlisted the help of my friends over on the Bakespace forum, and was given the perfect recipe. The original cookie had icing, but the recipe from Bakespace did not so I figured I could wing it and come up with my own icing, but after baking the cookies and doing a tastetest I nixed the icing idea because the cookies were so good as is.

These Eggnog Cookies, are not your average cookie. They're soft and a little cakey, not chewy or crispy at all. Not typically what I go for, but these are great, and I love the hint of spice with that extra boost from the nutmeg sprinkled on top. And if you manage to keep these cookies around for more than a few days you'll be fooled into thinking you just baked them because they keep their freshness well.

Don't forget to add these to your "must bake" list for next Christmas!

eggnog cookies


EGGNOG COOKIES

2 ½ c. flour
1 t. baking powder
½ t. cinnamon
½ t. nutmeg
3/4 c. butter
1 1/4 c. sugar
½ c. eggnog
1 t. vanilla
2 egg yolks
1 T. nutmeg, for sprinkling

Preheat oven to 300°. In a large mixing bowl, combine flour, baking powder, cinnamon and nutmeg. In another bowl, cream butter and sugar; add eggnog, vanilla and egg yolks. Beat with an electric mixer on medium speed until just combined. Stir flour mixture into eggnog mixture until uniform. Drop by teaspoonfuls onto ungreased cookie sheet; sprinkle cookies lightly with nutmeg. Bake for 23-25 minutes or until bottoms are light brown.

Labels: , , , , , ,

Friday, February 22, 2008

Biscotti Brings Me Back

Hello? Anybody out there? After all my time away, quite possibly not, but I'll cross my fingers that someone is still reading my little ol blog. There has obviously been no blogging for quite some time, but amid the fiascos that are my life, I have continued to bake, and bake some delicious things I have! Bear with me, and I promise to do my best to catch everyone up on my baking adventures, and mix in a few stories about my crazy life.

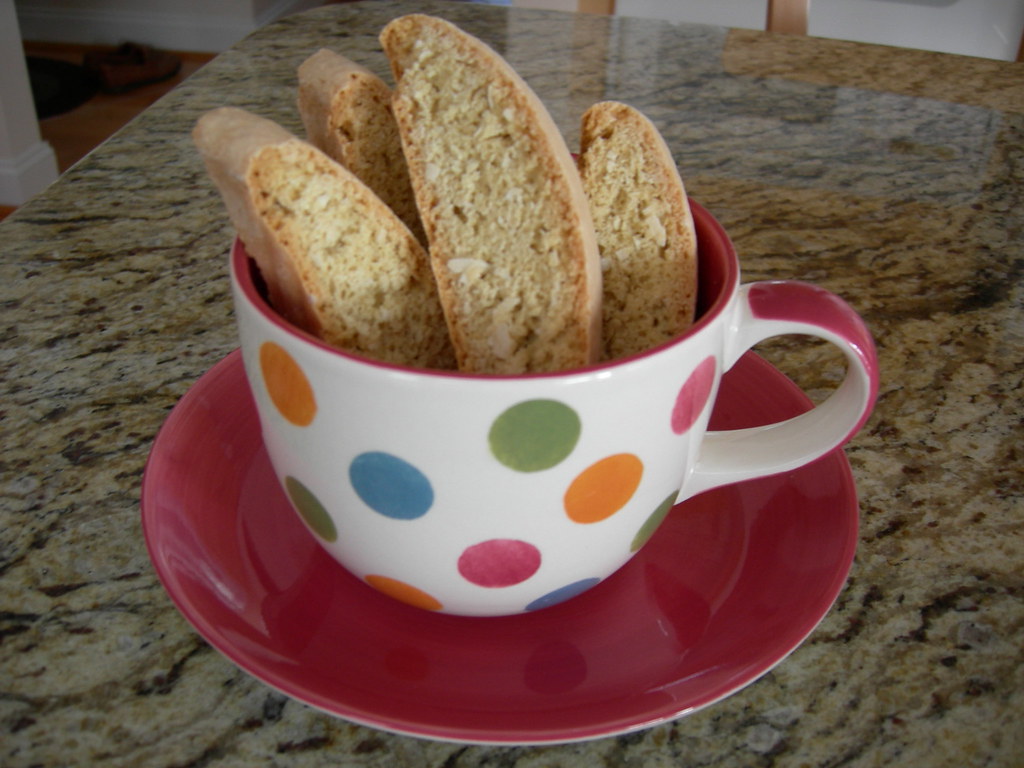
Christmas, which is when I went on my most recent blogging hiatus, was of course filled with many day long kitchen adventures. One of my favorite new recipes, which I included in my foodie gift bags, is this Coconut Biscotti recipe. I love, love, love biscotti, and I think this is my new favorite. The coconut flavor is not overpowering, it's just right. I found myself sneaking one of these every morning with my coffee until suddenly there were no more. Thankfully the biscotti are pretty low fat, so I wasn't too ridden with guilt.

coconut biscotti


Coconut Biscotti
From Cooking Light

2 cups all-purpose flour
3/4 teaspoon baking powder
1/4 teaspoon salt
1/4 teaspoon baking soda
1/8 teaspoon grated whole nutmeg
3/4 cup sugar
1 teaspoon vanilla extract
2 large eggs
1 cup flaked sweetened coconut


Preheat oven to 300°.
Lightly spoon flour into dry measuring cups; level with a knife. Combine flour and next 4 ingredients (through nutmeg). Place sugar, vanilla, and eggs in a large bowl; beat with a mixer at medium speed 2 minutes or until thick. Add flour mixture and coconut; stir to combine (dough will be very sticky). Turn dough out onto a heavily floured surface; knead lightly 7 or 8 times. Shape dough into a 15 x 3-inch roll. Place roll on a baking sheet lined with parchment paper, and pat to 1-inch thickness. Bake at 300° for 40 minutes or until roll is golden brown. Cool for 5 minutes on a wire rack.

Cut roll diagonally into 20 (1/2-inch-thick) slices; stand slices upright on baking sheet. Bake 20 minutes (cookies will be slightly soft in center but will harden as they cool). Remove from baking sheet; cool completely on wire rack.

Yield
20 cookies (serving size: 1 biscotto)

2.5 grams of fat

*The original recipe called for 1 1/2 cups flour, but the dough was entirely too sticky.

Labels: , , , , , ,

Saturday, December 08, 2007

Black Bottom Goodness

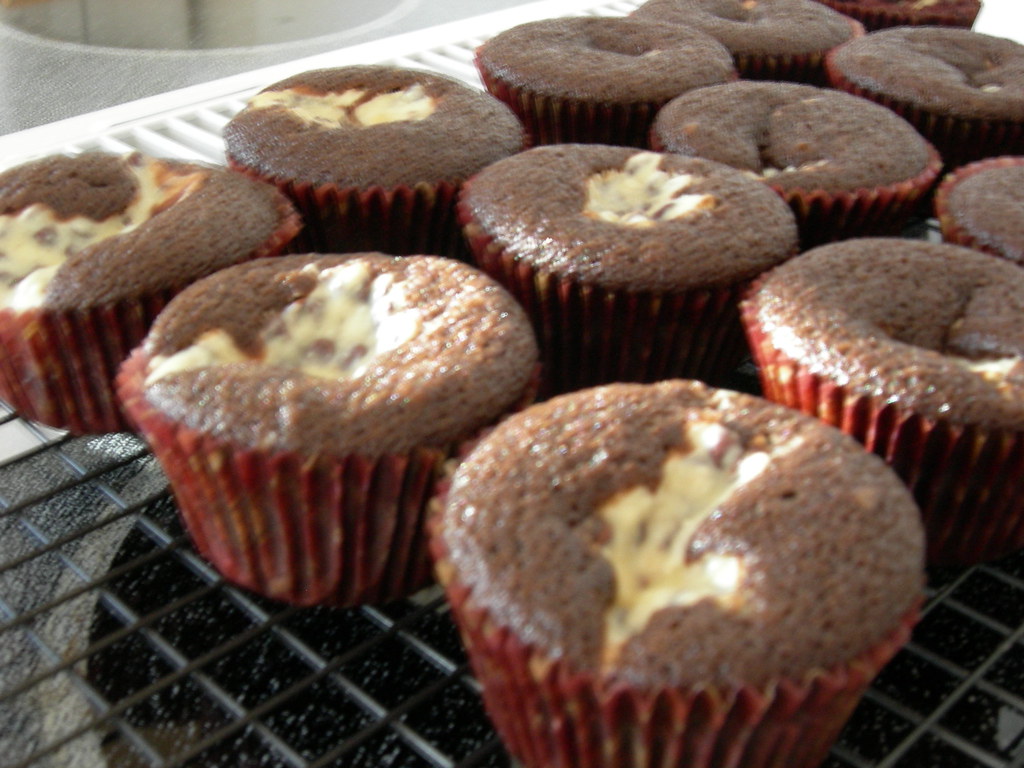
I tasted my first ever black bottom cupcake when I baked up a batch several months ago. The earlier version was covered in chocolate glaze and known by another name, cream cheese-stuffed chocolate cupcakes. From that first cupcake I knew I was a fan. Chocolate, cake in the form of a cupcake, and cream cheese, what isn't to love?

This recipe got rave reviews on allrecipes, and truly couldn't have been easier. The recipe as it appears on allrecipes yields twice as much cream cheese filling as it does cake batter, so through trial I ended up making two batches of cake batter. Next time? I'll just make one double batch. Even with a double batch of cupcake batter, which ends up with about 30 cupcakes you still have a generous amount of filling in each cupcake. They were delish the first day, but after refrigerating them over night I thought they were even better. I don't know what it is, but something about cold chocolate cake, all moist and dense, it's hard to resist. Yum!

Black Bottom Cupcakes


Black Bottom Cupcakes

Filling

1 (8 ounce) package cream cheese, softened
1 egg
1/3 cup white sugar
1/8 teaspoon salt
1 cup miniature semisweet chocolate chips

Cake Batter

3 cups all-purpose flour
2 cup white sugar
1/2 cup unsweetened cocoa powder
2 teaspoon baking soda
1 teaspoon salt
2 cup water
2/3 cup vegetable oil
2 tablespoon cider vinegar
2 teaspoon vanilla extract

Preheat oven to 350 degrees F (175 degrees C). Line muffin tins with paper cups or lightly spray with non-stick cooking spray.

In a medium bowl, beat the cream cheese, egg, 1/3 cup sugar and 1/8 teaspoon salt until light and fluffy. Stir in the chocolate chips and set aside.

In a large bowl, mix together the flour, 2 cup sugar, cocoa, baking soda and 1 teaspoon salt. Make a well in the center and add the water, oil, vinegar and vanilla. Stir together until well blended. Fill muffin tins 1/2 full with the batter and top with a dollop of the cream cheese mixture.

Bake in preheated oven for 25 to 30 minutes.

Labels: , , , , ,

Tuesday, November 27, 2007

The Air Is Chili

Last week was miserably cold here, speaking as a southerner of course. When I say miserably cold, I mean that when you go outside your hands and feet get cold, and you really need to wear a coat at night. If I have to wear a coat that classifies as being miserably cold to me, and it's time to make something really warm and soothing for dinner.

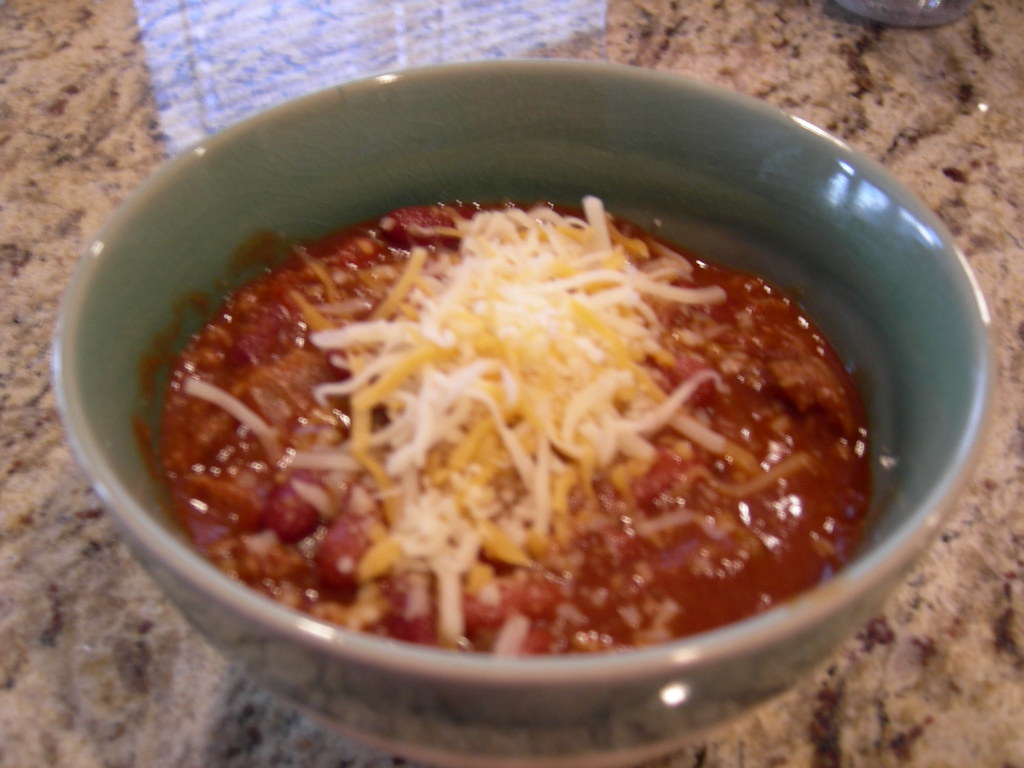
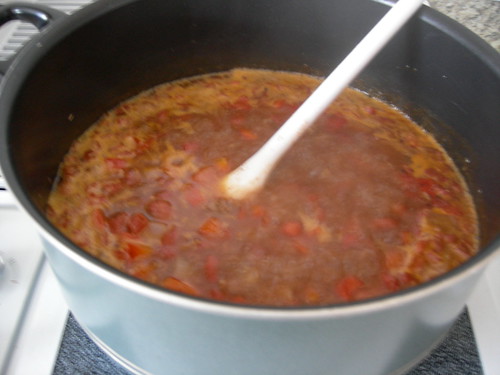
I'm still working on perfecting my chili, and I'm happy to say that I'm getting closer. My beef and beer chili had a good flavor, but not nearly the thickness I wanted so I studied and compared a few recipes and brought out the bits and pieces of each that I thought would bring me closer to my perfect chili. Taking a tip from my neighbor who recently entered and took something like fourth place in a local chili cookoff, I added tomato paste to thicken it up. And I've noticed a few recipes with cocoa powder on the ingredient lists, but cocoa powder in chili? What's that all about I wondered. I decided to find out, but I knew my Big, Bad Dad would have something to say about the addition. I figured if I could sneak it in he'd be none the wiser, and I was right. He didn't utter a word about tasting chocolate in his chili. I guess sometimes it pays to be sneaky because the addition of the cocoa powder seemed to add a nice depth of flavor.

thick & meaty chili


Thick and Meaty Chili

1 1/2 lb. lean ground beef
1 medium yellow onion, chopped
2 garlic cloves, crushed
2 Tbsp. chili powder
1/2 tsp. salt
2 tsp. ground cumin
1 tsp. dried oregano leaves
1 tsp. baking cocoa
1/2 tsp. red pepper sauce
1 can (28 oz.) diced tomatoes, undrained
1 small can tomato paste
2 cans (14 1/2 oz.) red kidney beans, undrained
Shredded Cheese (optional)


1. Cook ground beef in 3 quart saucepan over medium-high heat until beef is brown; Drain. Set aside and cook onions and garlic in same pot on medium-high heat, until onions are translucent. Return beef to pot.

2. Stir in remaining ingredients except tomato paste and beans. Heat to a boil; Reduce heat to low.

3. Add tomato paste, stir until completely combined. Add beans and stir in. Cover and simmer for 1 hour, stirring occasionally, until to desired thickness. Serve in a bowl with shredded cheese if desired.

Labels: , , , , , ,

Monday, November 26, 2007

A Daring Baker I Am!

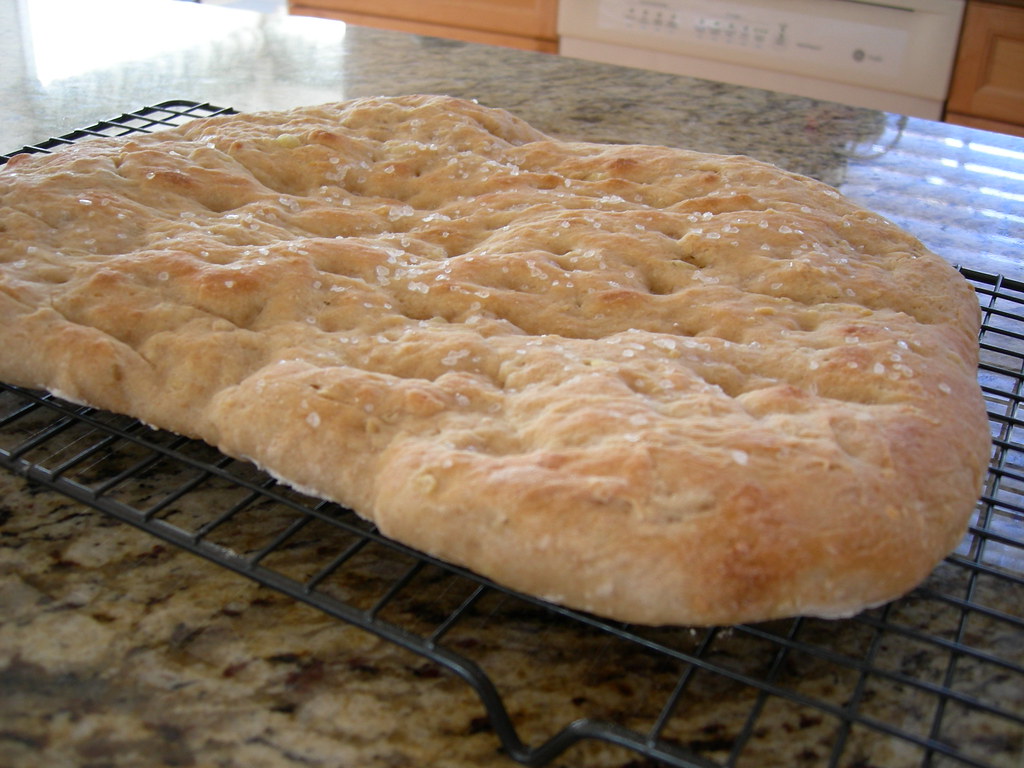
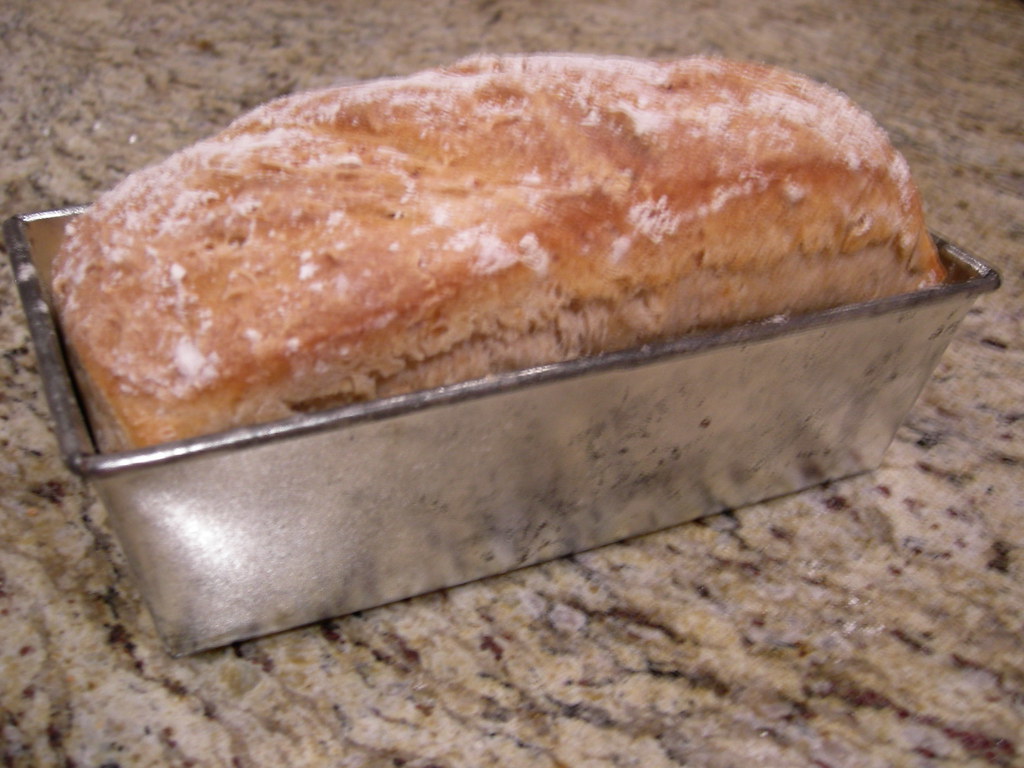
So I've seen this cute little logo on lots of blogs for months now and always wondered what it was. Turns out there's this really cool group called the Daring Bakers. And now I'm one too! I've completed my first DB challenge and really enjoyed it. The assigned recipe for November was potato bread. I've baked a few loaves of yeast bread here and there, but I've got minimal experience especially when it comes to the whole kneading by hand thing. I find the thought of kneading by hand to be the most intimidating part of bread baking. I always worry that I won't have enough flour, or I'll have too much and I won't knead enough, or I'll knead too much and the bread will be tough. Well I decided to suck it up and just give it a try.

focaccia potato bread


The bread was good, but I didn't love it. Maybe that was due to my lack of experience or maybe I would just prefer a different type of bread? Your guess is as good as mine. I chose to make a standard loaf of "sandwich bread" and a loaf of focaccia, and I was most pleased with the focaccia.

potato bread


I'm open to any tips or suggestions you experienced bread bakers have. Stay tuned for next month's Daring Baker challenge!

Labels: , , , ,

Wednesday, November 21, 2007

Gobble 'Til You Wobble

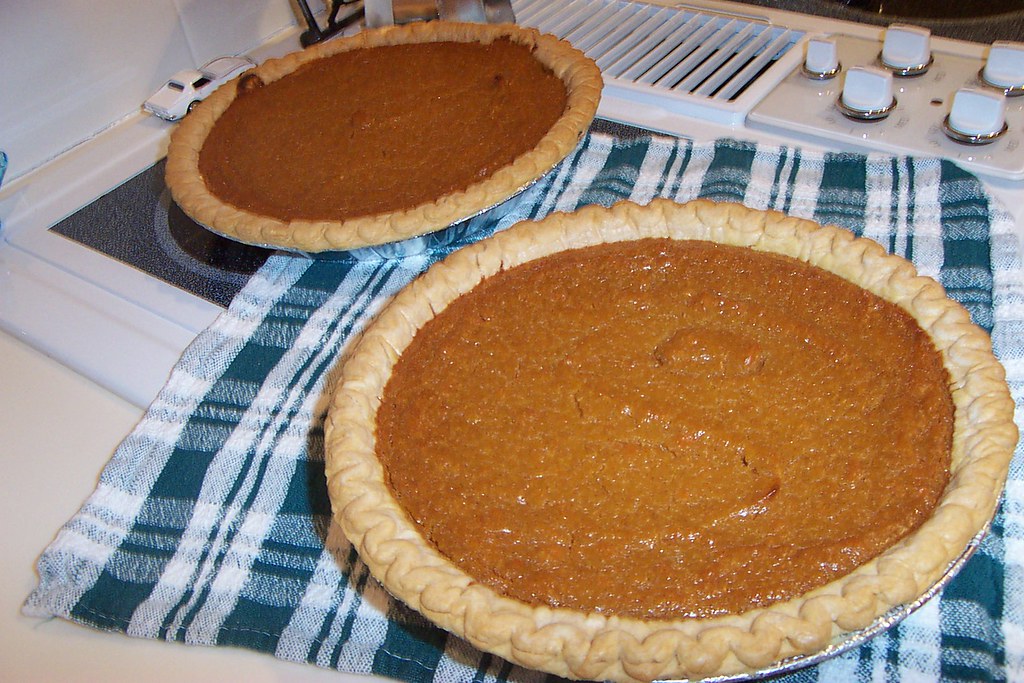
My, my my..sweet potato pie!!


Well, the turkey is in the fridge waiting to meet it's fate of being the delicious centerpiece to our Thanksgiving feast tomorrow, cornbread is in the oven - step one of making the dressing. And to top that off, the house if filled with the aroma of freshly baked sweet potato pies. I'm not sure what I look forward to more, the baking and cooking that lead up to Thanksgiving or actually getting to eat all the food, glorious food. It's a tough call. And whatever you do, please don't dare ask me what my favorite part of the meal is because I have no idea.

From my kitchen to yours, I want to wish everyone a safe and happy Thanksgiving. And please, whatever you do, gobble 'til you wobble folks. I know I will.

Labels: , , , , , , ,

Tuesday, November 20, 2007

Yummy Spicy Goodness

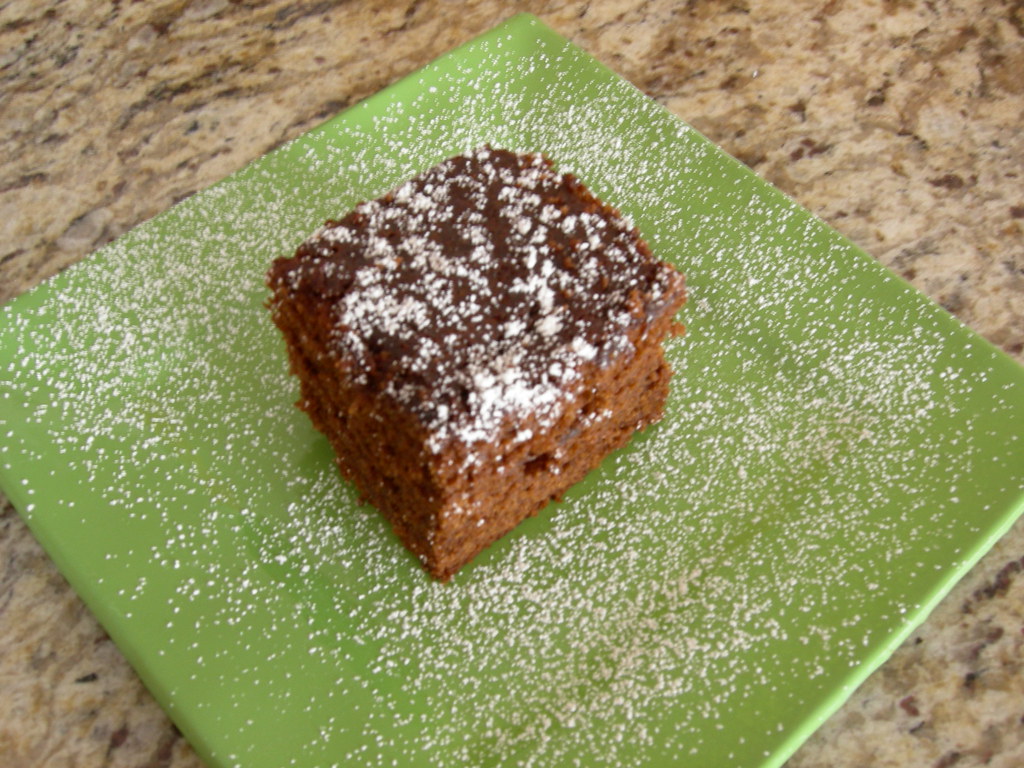
Once the Halloween decorations are taken down and we begin talk of turkey my food cravings change, as do my baking habits. I begin to crave warm, hearty stick to your ribs comfort foods. And I put the chocolate chip cookie recipe aside for a while. I put the brownie and cupcake making on the back burner momentarily, and I start making gingersnaps, soft and chewy they are sooo good! Come Thanksgiving and my house is filled with the wonderful smell of sweet potato pies. And lest we not forget my famous boiled oatmeal cookies, and there's always a batch of gingerbread or two in there somewhere. I got a jumpstart on the gingerbread baking this week. I don't have a tried and true recipe yet so I went to my standby, allrecipes. Overall I was pretty pleased with the recipe. It made a nice moist gingerbread with a good flavor, I think the spice amounts could benefit from being tweaked. I also prefer my gingerbread with lemon sauce, but I thoughtlessly forgot to buy lemons, and my craving wouldn't allow me to wait for the sauce so I decided to take my gingerbread straight up this time.

Old Fashioned Gingerbread


Old Fashioned Gingerbread

1/2 cup white sugar
1/2 cup butter
1 egg
1 cup molasses
2 1/2 cups all-purpose flour
1 1/2 teaspoons baking soda
1 teaspoon ground cinnamon
1 teaspoon ground ginger
1/2 teaspoon ground cloves
1/2 teaspoon salt
1 cup hot water

Preheat oven to 350 degrees F (175 degrees C). Grease and flour a 9 inch square pan.

In a large bowl, cream together the sugar and butter. Beat in the egg, and mix in the molasses.

In a bowl, sift together the flour, baking soda, salt, cinnamon, ginger, and cloves. Blend into the creamed mixture. Stir in the hot water. Pour into the prepared pan.

Bake 1 hour (I found mine was done after baking for approximately 35 minutes.) in the preheated oven, until a knife inserted in the center comes out clean. Allow to cool in pan before serving.

Labels: , , , ,

Saturday, November 17, 2007

Collecting My Coins

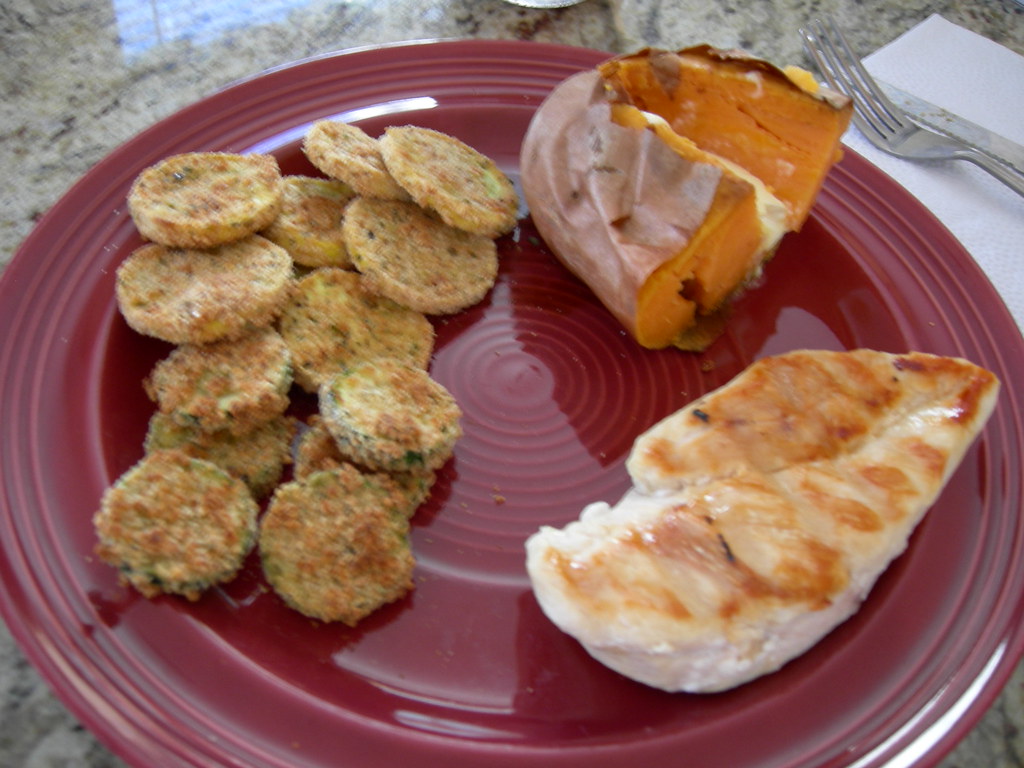
I do a lot of blog browsing, and with all the wonderful food blogs out there I'm constantly stumbling onto new ones. With all those food blogs comes the discovery of many new recipes and the reminder of quite a few others that I already know and love, but maybe sometimes let fall to the back of my mind. One of those new recipes I found recently was over at Janet Is Hungry. I can't recall how I found her blog, but Janet has a recipe for baked zucchini coins that immediately caught my eye.

sqaush & zucc coins


I love, capital L-O-V-E zucchini, and I thought this recipe would work perfectly with crookneck squash, another one of my favorites. For forever since I can remember fried squash has been one of my very favorite foods, but being that it's DEEP FRIED I try to refrain from eating it very often, so when I found this recipe it seemed like the perfect concept. I simplified the recipe a little, using storebought breadcrumbs and added a dash of Montreal seasoning. I've made the recipe twice and the first time around I loved it, but my Big, Bad Dad had a minor complaint and a few suggestions. He didn't care for the seasoning, saying the inclusion of sage in the spice blend made it taste like "Thanksgiving". "What's wrong with that???" I ask! Big, Bad Dad's suggestion? "Next time I think it would be better if you just breaded them in plain cornmeal." So that's what I did, but take my word for it, you should not, not, not use just cornmeal. Unless of course you want your zuccs and squash to taste like uncooked cornmeal. Yeah, not a good flavor, but at the last minute we stuck them under the broiler so they weren't a total loss. From here on out, it's breadcrumbs all the way in this recipe for me.

Baked Squash and Zucchini Coins

1/2 plain breadcrumbs
Montreal seasoning to taste
1 zucchini
1 yellow squash
1 egg
olive oil

1. Mix breadcrumbs and seasoning on a plate.

2. Beat egg in a small bowl.

3. Slice zucchini and squash into 1/4" thick coins.

4. Dip zucchini and squash into egg and then into breadcrumb mixture.

5. Coat a parchment lined cookie sheet with a couple of tablespoons of olive oil. Arrange zucchini and squash coins on cookie sheet and back at 425 for about 10 minutes per side, until golden brown.

Labels: , , , , ,

Friday, November 16, 2007

Happy Fall Y'all!

While the beautiful and vibrant foliage has given the appearance of fall, the chilly, blustery weather typical of the season has been an on-again off-again thing for us over the past several weeks. But it seems that we are finally settling into the season, with nighttime temperatures starting to fall into the 30's and the North Carolina mountains receiving a rather abrupt snowfall just a few days ago. Can I just say, thank goodness I don't live in the mountains right about now?

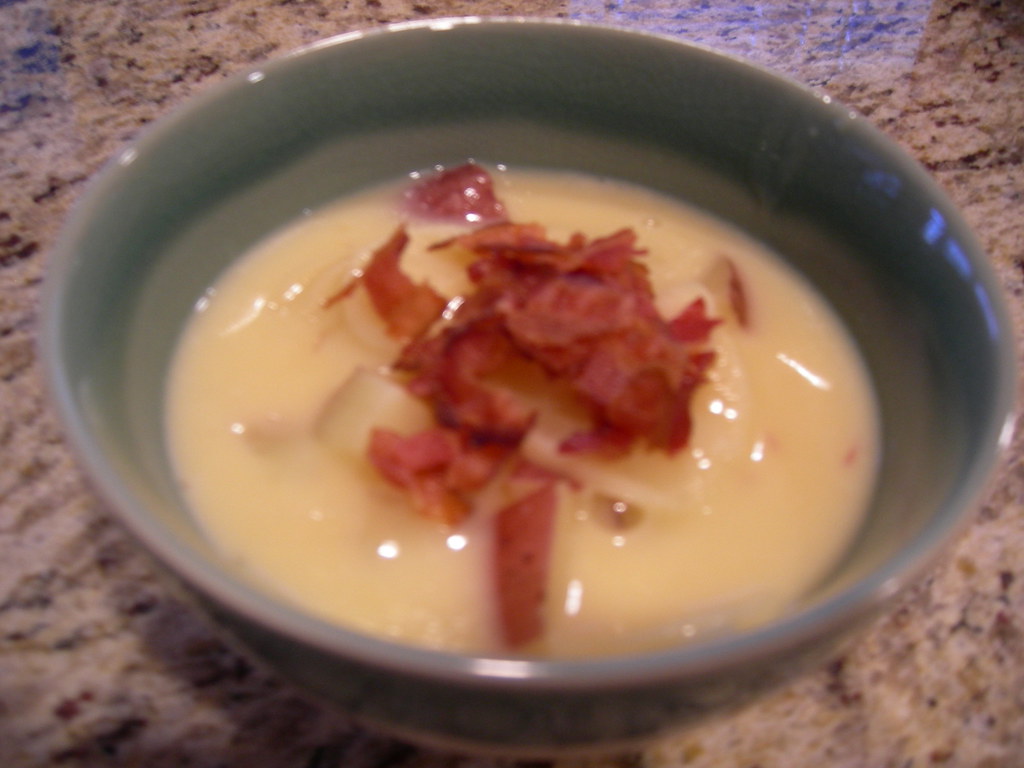
You may remember, a few weeks back I tested out Beef and Beer Chili in anticipation of the forthcoming chilly weather, no pun intended. Well, earlier this week as I started to accept the fact that I must begin waving a sad goodbye to my cute tank tops, shortsleeve blouses, adorable capris and oh-so loved shorts of summer and start dragging out my sweaters, scarves, gloves and other cold weather clothes I developed a craving for something hearty and warm you straight to the bone. I could think of nothing better than soup, so I whipped up a batch of my easy Au Gratin Potato Soup. My inspiration comes from a very similar recipe I found on Allrecipes. My changes were pretty simple and fairly minor but changed the flavor a bit and took away some of the fat and calories, but left the soup lacking nothing in my opinion. I don't think I'm too far off in saying that either, as I got no complaints or criticism from my Big, Bad Dad, he even went back for seconds.

au gratin potato soup


Au Gratin Potato Soup

4 medium red skinned potatoes, cubed
1 (5.5 ounce) package au gratin instant potato mix
1 (10.5 ounce) can condensed chicken broth
1 1/2 cups water
1 cup milk (2% is suitable)
crumbled cooked bacon (2 strips per bowl)

In a large saucepan or pot, combine potatoes, au gratin potato mix, chicken broth and water. Add more water to cover if necessary. Cook over medium heat, stirring occasionally, until potatoes are tender, about 40 minutes. Stir in cream and heat through. While soup is cooking, prepare bacon, drain grease and crumble. Serve with bacon crumbles on top.

Labels: , , , , ,

Sunday, November 11, 2007

Etc, Etc

I've got a few bits and pieces to cover, but sorry y'all, no new recipes today. There are a few coming though, so keep checking.

The past few weeks have not been marked by adventures in the kitchen, atleast not when it comes to baking. Recent weeks have been filled with sweets as usual, but I've been gravitating to some of my tried and true recipes: my best ever, big, fat, chewy chocolate chip cookies, and as a prelude to Christmas, boiled oatmeal cookies. For those of you who haven't read previous posts about the boiled oatmeal cookies, you MUST check them out. They are a long standing holiday tradition in my family, and as odd as the recipes name sounds they are utterly addictive and delicious.

In blogging news, I've joined the ever growing list of bloggers that makes up the Foodie Blog Roll. If you aren't already a part of it check it out!

Sammy says..


And last, but definitely not least, in family news I want to send out a HUGE and belated happy birthday to my Sammy baby. He turned 6 on November 2nd. It's hard to believe he's already that old. And in a matter of weeks Stumpy will be turning 4. My boys are growing up so fast!

Labels: , ,

Saturday, November 03, 2007

Halloween, The Recap

With all three of my children covered in fur and having four legs there was no trick-or-treating for us this year. There was also sadly no dressing up simply because I never found just the perfect costumes for my boys, and believe me, I searched. There is also an on-going debate in our house as to whether putting clothing on a dog for any reason other than warmth is appropriate. I say there are certain circumstances where it is suitable, such as they just look to freakin adorable not to dress them up. The Big Bad Dad? He has his feet firmly planted in the belief that dressing up a dog for more than warmth is completely stupid and degrading. Psssh, whateva.

halloween cookies


So, we were sans costumes and opted not to pass out candy to trick-or-treaters. And before you even think it. NO. I'm not the Grinch who stole Halloween. Having the doorbell ring and opening the door every five seconds would be pure and total chaos in my house. We would have had to lock the kids in their rooms in an effort to keep them from licking the trick-or-treaters to death. And Duncan. Well, let's just say Duncan would have lovingly stolen candy from each and every child who rang our doorbell.

jack-o-lantern cupcakes


I had to get in on the holiday somehow though, and ever being the baker I use every occassion possible to whip up something sweet. I made a batch of chocolate cupcakes with buttercream, and some sugar cookies decorated with royal icing. All of which were old standby recipes, no experiments, but as my Big, Bad Dad says, sometimes ya just gotta leave well enough alone. So that I did. My weeks have been busy, looking back, I can never seem to remember with what, but nonetheless all my projects seem to leave me short on time lately, the cookies and the cupcakes included so they didn't turn out to be my most adorable or my most creative. But they tasted great and still received high praises.

Labels: , , , , , , , ,

Tuesday, October 16, 2007

It's a boy!

After months of uber lovin and sometimes total chaos I think it's about time I share with you, my blogging buddies, the newest adventure in my life...

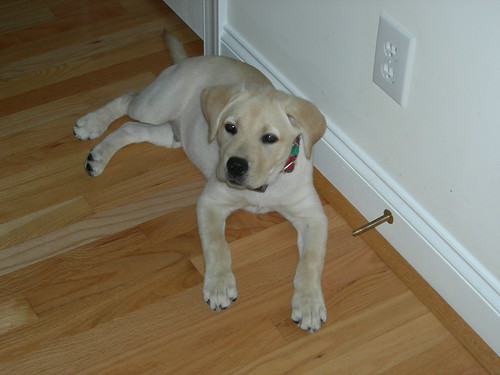
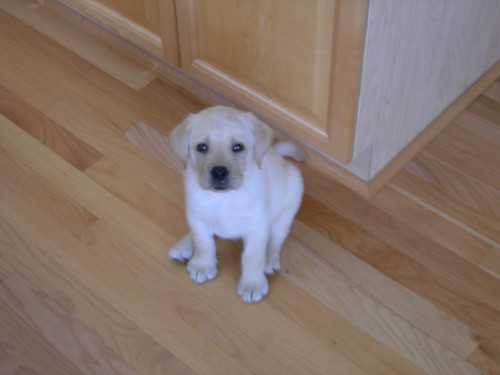
His name is Duncan, and although he's now more than three times the size he was in this photo, I look at his precious face everyday and remember him just as he was the day we brought him home, an innocent little ball of fur.

My entire life I've always, and I mean always had dogs. But I've never had a big dog, and I've always wanted a Labrador. I really fell in love with them this past winter during my two month long hospital stay. One of the things that helped me through those many long days were the therapy dogs, several of which were Retrievers, which occassionally came by my room for a visit, along with that, the thoughts of one day finally returning home to my two dogs. Upon returning home and slowly getting back on my feet, eventhough I was reunited with Sammy and Stumpy who I love more than I can even explain, my life still seemed to lack something, and as I tried to search and figure out what that was my thoughts always went back to those visits with the therapy dogs in the hospital. I knew I needed a Lab. And that's where Duncan came in.

After much searching we found him about a week after he was born. I held him before he was even able to open his eyes, but I knew I couldn't let him go, I was in love. Because he was so young, it was over a month before we could finally bring him home to join the family. Finally, he's here now, and I couldn't be happier. Duncan may have four legs and be covered in fur, but yanno what? He's my son and there is no doubt I'm his Momma. He's so smart, curious and full of energy. Sometimes he's almost more than I can handle, and I get so frustrated I want to either scream or cry, but that's how motherhood goes right? And can I just say, the boy's got good taste in shoes!!


Duncan - 8 weeks

Simple yet satisfying

Snuggled up with my Crocs

Dunky Monkey


Duncan - 8 weeks


I figured since this is a food blog, while I'm being a doting mother I would share with the dog owners out there an easy treat for your fur-covered little ones.
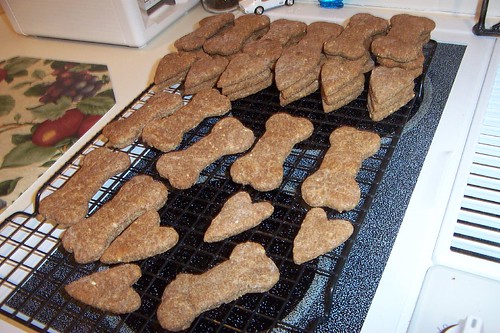
Good Doggy Dog Biscuits


Good Dog Cookies

2 1/2 cups whole wheat flour
3/4 cup nonfat dry milk powder
1 egg, beaten
1/2 cup vegetable oil
2 cubes beef bouillon
3/4 cup boiling water
2 tablespoons brown sugar

Preheat oven to 300 degrees. Lightly grease cookie sheet.

Dissolve bouillon cubes in boiling water and allow to cool.

Combine flour, dry milk, egg, oil, beef broth and brown sugar. Mix well and knead dough for 1 minute.

On a floured surface, roll out dough to about 1/4 inch thickness. Cut out bones and place on cookie sheet.

Bake for 30 minutes and allow to cool.

Labels: , , , , ,

Monday, October 15, 2007

Kick-Off To Fall

hearty beef & beer chili


I'm so not a fan of the cold weather months, so this recent fall cool down we've been experiencing is not a welcome feeling for me. Yes, it's nice not breaking into a sweat everytime you walk outside. But knowing that fall has arrived has always been bittersweet to me because I know winter and nearly freezing temperatures will be here before I know it. One of the few things I enjoy about fall and winter is that it's cool enough that I can actually enjoy eating chili and soups. For whatever reason I've always left the soup and chili cooking to my Big Bad Dad, but last week I decided to tackle chili making myself, with a recipe I found from Cooking Light.

I made a few changes to the original recipe, adding a bit more cornmeal for thickening as the specified amount did nothing to actually thicken the chili, and I used diced tomatoes prepared especially for making chili which had peppers added. Also, I started cooking so that it was ready about an hour early, then I just cut it off and left the pot on the burner so that the flavors had a little more time to develope. That part was key, although I'm sure if you didn't have the extra hour to spare the chili would have still been good. It wasn't the best I've ever had, I think the spices need a bit of tweaking, but I will definitely make this recipe again.

As an aside, since there are just two of us and the recipe makes a decent size pot, I decided to use some of the leftovers for making nachos. They came out delish and were super quick, I just heated the chili then layered corn chips in a baking dish, added some of the chili, then some salsa and cheese, then another layer of the chips and so forth. I popped them under the broiler for a few minutes to heat everything through and get the cheese all bubbly. Yum!

Beef and Beer Chili


Cornmeal helps thicken the chili to a satisfying consistency. Serve with a chilled lager. Time: 41 minutes.


1 1/2 cups chopped red onion (about 1 medium)
1 cup chopped red bell pepper (about 1 small)
8 ounces extralean ground beef
2 garlic cloves, minced
1 1/2 tablespoons chili powder
2 teaspoons ground cumin
1 teaspoon sugar
1/2 teaspoon salt
1/2 teaspoon dried oregano
1 (19-ounce) can red kidney beans, drained
1 (14.5-ounce) can diced tomatoes, undrained
1 (14-ounce) can beef broth
1 (12-ounce) can/bottle beer (I used Miller)
1 tablespoon yellow cornmeal (I used 1 1/2 Tbsp)
1 tablespoon fresh lime juice (omitted)

Combine first 4 ingredients in a large Dutch oven over medium-high heat. Cook 5 minutes or until beef is browned, stirring to crumble. Stir in chili powder, cumin, sugar, and salt; cook 1 minute. Add oregano and next 4 ingredients (through beer) to pan; bring to a boil. Reduce heat, and simmer 15 minutes. Stir in cornmeal; cook 5 minutes. Stir in juice.

Labels: , , , , ,

Sunday, October 07, 2007

Hot, Fudgy Goodness

Although fall has crept up on us, in my neck of the woods it certainly doesn't feel or look anything like it. So with the sun still blazing hot it is a perfectly suitable time to endulge in ice cream and treat yourself to a batch of decadent hot fudge sauce. But then again, if the craving hits, you I think any time is a suitable time for the aforementioned. Besides, think of all the wonderful things, other than ice cream, that would make the perfect accompaniment to hot fudge sauce. You could get creative and have waffles for dessert topped with hot fudge sauce and a dollop of whipped cream. Or you could slather the stuff on a slab of pound cake and, just for the sake of being healthy, top it off with some fruit. (I was, of course, joking about the healthy part.)

I made this recipe for the first time early last spring and featured it in an article I wrote for Sugar Savvy. Until then I was a bit leery when it came to making hot fudge sauce, I didn't want to suffer disappointment. I worried that I would have the misfortune of trying a recipe that would yield more of a chocolate syrup than a thick, rich hot fudge sauce. I wanted a real hot fudge sauce. You know, the kind you find in the neighborhood ice cream shop, one that goes on hot, melting your ice cream slightly and thickening as it covers the frozen goodness. Well folks, this is it! The sauce is a great consistency with a rich chocolatey flavor. Best part of all? It's the exact hot fudge sauce served in Ben & Jerry's Ice Cream shops! This hot fudge sauce recipe, along with other authentic and delicious Ben & Jerry's recipes can be found in their book, "Ben & Jerry's Ice Cream & Dessert Book". Now, run along and whip up a batch for yourself. If you don't love the stuff I'll be shocked.
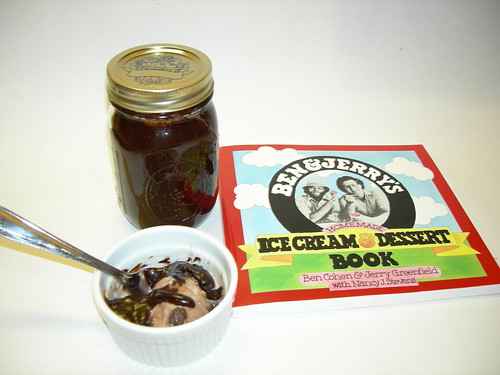
Ben & Jerry's Original Hot Fudge Sauce


Hot Fudge Sauce

4 oz unsweetened chocolate
1/2 cup (1 stick) of butter
3/4 cup unsweetened cocoa powder
2 cups sugar
1/2 cup milk
1/2 cup heavy cream or whipping cream

In double boiler, melt chocolate and butter, stirring frequently. Whisk in cocoa powder until dissolved.

Gradually stir in sugar; the mixture will resemble wet sand. Cook over simmering water for 20 minutes, stirring occasionally. Check water level of double boiler, adding more if necessary.

Gradually stir in milk and cream. Continue stirring until completely blended. Continue cooking for 1 hour, stirring and checking water level occasionally. The sauce is ready when completely smooth and all sugar is dissolved.

Yields 1 quart

Labels: , , , , , ,

Friday, September 14, 2007

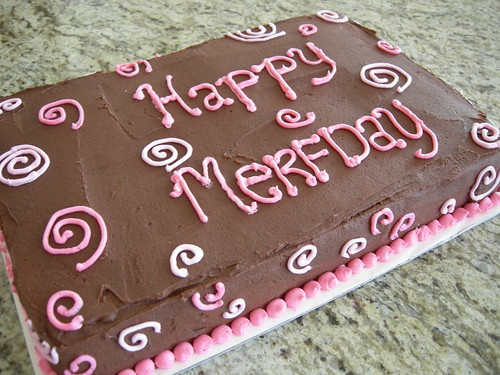
Who says you can't have your cake and eat it too?

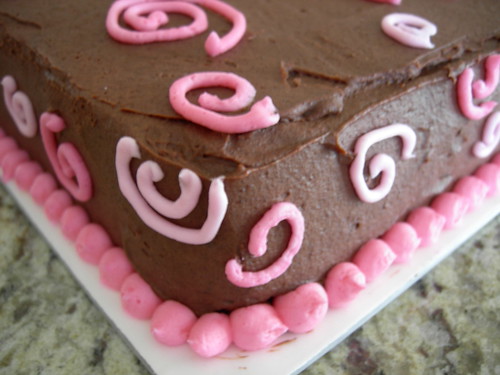
Double Chocolate Birthday Cake


"You can't have your cake and eat it too."


I understand the saying, and yeah I've experienced it plenty of times, like most people. But as a baker? Nope, doesn't happen. Well, except for the occassional failed recipe. But usually I can have my cake and eat it too. Just not too much or I'll have an expanding waistline, which I do NOT want.

If you are a chocolate lover like me and looking for a great chocolate cake you might want to give my go-to chocolate cake recipe a try. I searched high and low for what would become my "tried and true" chocolate cake recipe and wouldn't you know it was under my nose all along? On the back of the Hershey's Dutch Proccessed Cocoa container I found euphoria in the form of cake.

Want the ultimate sinfully delicious cake? Definitely top the cake off with my "tried and true" chocolate frosting - Fantastic Double Fudge Frosting.

Double Chocolate Birthday Cake


Hershey's "Especially Dark" Chocolate Cake

2 c. sugar
1 3/4 c. all-purpose flour
3/4 c. Hershey's Special Dark cocoa
1 1/2 tsp. baking powder
1 1/2 tsp. baking soda
1 tsp. salt
2 eggs
1 c. milk
1/2 c. vegetable oil
2 tsp. vanilla extract
1 c. boiling water

Heat oven to 350 degrees. Grease and flour two 9-inch round cake pans.

Stir together sugar, flour, cocoa, baking powder, baking soda and salt in large bowl. Add eggs, milk, oil and vanilla. Beat on medium speed for 2 minutes. Stir in boiling water (batter will be thin). Pour batter into prepared pans.

Bake 30 to 35 minutes or until wooden skewer inserted in center comes out clean. Cool 10 minutes; remove from pans to wire racks. Cool completely. Frost.

Makes 10 to 12 servings.

Fantastic Double Fudge Frosting

1 1/4 c. sugar
1 c. heavy cream
5 (1 oz each) squares unsweetened chocolate
1 stick unsalted butter
1 tsp. vanilla extract

Bring sugar and heavy cream to boil in a medium saucepan. Reduce heat and simmer for 5 minutes, stirring so that it doesn't boil over.

Remove pan from heat and add unsweetened chocolate, stir until completely dissolved. Add butter and stir until melted, then add vanilla, stir to combine. Refrigerate. When icing is cold, beat with an electric mixer or wooden spoon. Frost cake.

Frosts 1 2 layer cake or single layer medium size sheet cake.

*All credit goes to Ayun Halliday author of Dirty Sugar Cookies for original frosting recipe.

Oh, and if you're wondering if "Merfday" is some unusual little known holiday yet undiscovered by you, the answer is no. Well, sorta. I made the cake to celebrate my long-time friend Meredith's recent birthday. Together we're two very silly girls, always coming up with goofy nicknames for our friends and family, and for as long as I can remember we've all known her as Merf. Me? Well, I'll just leave y'all to wonder about my alias...

Labels: , , , , , , ,

Friday, September 07, 2007

A Chip Off The Ol' Block

Salsa is such a great summer food isn't it? I crave chips and salsa year round, but all those fresh veggies of summer just make me think about and crave it that much more during summer. It's not a constant craving though, and I think that is in large part due to my very specific guidelines for what makes for a GOOD salsa.

I love fresh salsa. Like I said, I'm pretty picky though. I've tried many, many varieties of store bought salsa, and the stuff from the jar just doesn't get it for me. Maybe there's a brand out there I haven't tasted yet that would suit me, if so I'd love to find it. I have found a few brands in the refrigerated section that that I liked. What makes a winning salsa to me? The fresh, natural flavor of simple ingredients: tomatoes, onion, peppers, cilantro and a little lime. Texture is a huge thing for me. I don't like chunky salsas, I want mine finely minced, almost pureed even. And nothing too spicy, I like a little bit of a kick, but nothing that makes me break into a sweat or leaves the outside of my mouth burning. That's just no fun!

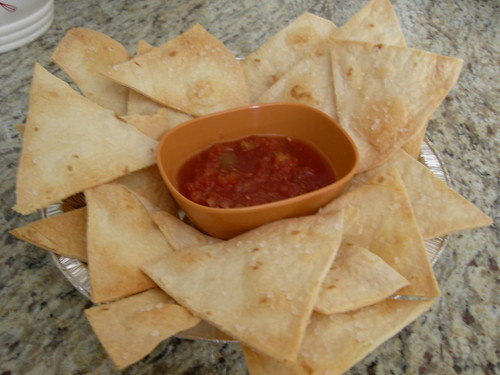
baked lime tortilla chips


One of my biggest culinary wishes is to master the art of making irresistable salsa and guacamole. I've tried making each one time and failed so badly with both that I've been intimadated by the idea of trying again. People swear it's so easy to make both, you just chop some ingredients up and throw them together. That's what I did, but somehow I found them both to leave so much to be desired it wasn't even funny.

Homemade tortilla chips? Those on the other hand I can whip up and willingly devour in a flash. I lucked up and found a totally tasty salsa on a recent shopping trip, so a batch of my homemade flour tortilla chips were in order. I love the restaurant tortilla chips that are loaded with salt and a hint of lime. If you haven't had them before and you've got a Qdoba Mexican Grill nearby, run, quickly and order up a batch. And eat some of their warm 3-cheese queso while you're at it. It's faaaantastic!

My homemade tortilla chips are hardly the same as those at Qboda - they're baked not fried, and the tortillas are much thicker, the ones at Qboda are paper thin. But mine are virtually guiltfree and still really good. Sometimes different is good right?


Baked Lime Tortilla Chips

4 10-inch flour tortillas
2-3 Tbsp vegetable oil
juice of 1 lime
kosher salt

Preheat oven to 350 degrees. Slice tortillas into 8 wedges and place on lined baking sheet. Brush top side of tortilla wedges lightly with oil. Drizzle evenly with lime juice and sprinkle with salt. Bake for 5 to 7 minutes. Rotate baking sheet and bake for an additional 5 minutes, or until tortillas start to crisp but do not turn brown.

Labels: , , , , ,

Directory of Food/drink Blogs Food & Drink Blogs - Blog Top Sites