
Sunday, May 18, 2008

Good Tastin' and Good Lookin'

I'm pulling one from the archives with this recipe. Ask me why I haven't shared these muffins with y'all yet and I couldn't tell you, let alone could I explain why I haven't baked them since that first time way back when. Perhaps it's my curiousity and endless search for something better that's kept them from being a repeat. I love a good blueberry muffin. The sweetness mixed with the slight tartness of the blueberries. Paired with a cup of coffee you've got the perfect breakfast, but accompanied by a glass of milk you've also got a great afternoon snack.

I haven't eaten these blueberry muffins in a long while, but I don't know off hand of anyway they could be improved upon, unless you add a sprinkling of struesel on top, but that would take away from the picture perfectness of these "Really Good Blueberry Muffins". Maybe it's the baker in me paired with the blogger in me, but I find eminent satisfaction in those times when I bake something that is not only delicious but also makes you say, "Wow, that looks good!" And, I think this is one of those recipes.

Unfortunately, I have no idea the original source. But, I'm thinking I may have possibly gotten the recipe from The Ultimate Muffin Book, I can't swear to it though. Regardless, if you like blueberry muffins, give these a try.
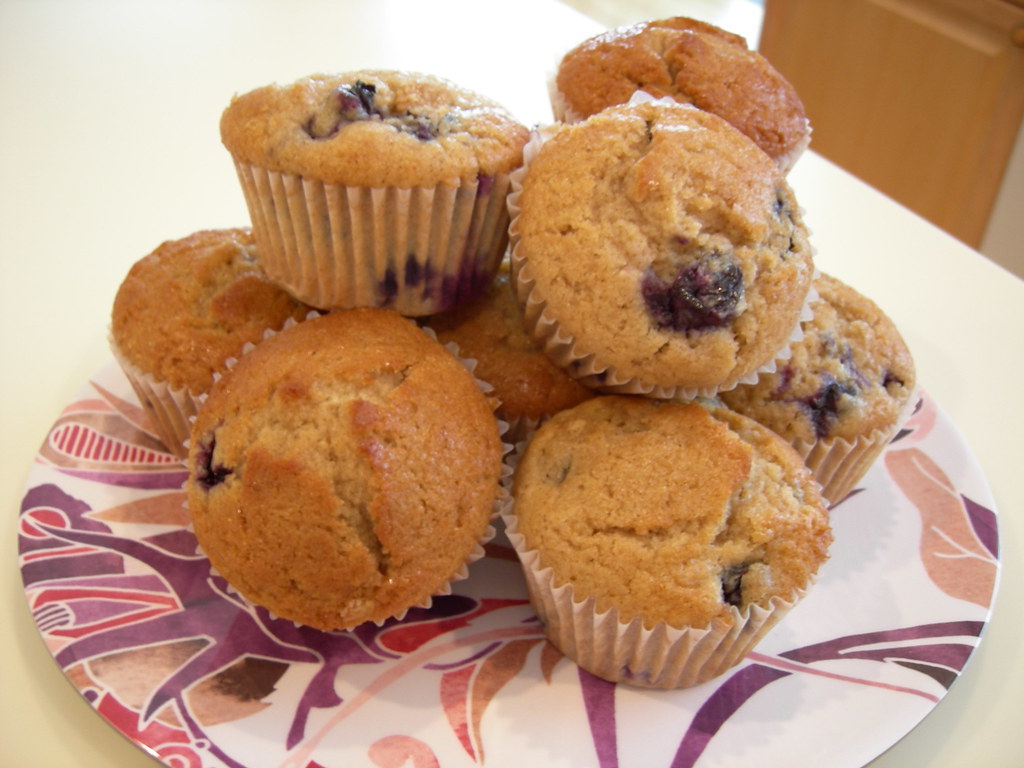
blueberry muffins


Really Good Blueberry Muffins

1/2 c. (1 stick) unsalted butter, softened
1/2 c. granulated sugar
1/2 c. packed brown sugar
3/4 c. milk
1 egg
1 3/4 c. flour
1 tsp cinnamon
2 1/2 tsp baking powder
1/2 tsp salt
1 c. blueberries
2 Tbsp flour

Sift together (1 3/4 cup) flour, cinnamon, baking powder and salt, set aside. Cream together butter and sugars. Beat in egg and milk until smooth. Add sifted dry ingredients and mix just until moist. Lightly toss blueberries with 2 Tbsp flour, and gently fold into batter. Fill well-greased or paper lined muffin tins nearly full.

Bake at 400 degrees for 20 minutes.

Labels: , , , , , ,

Tuesday, May 13, 2008

Nutty for Cookies

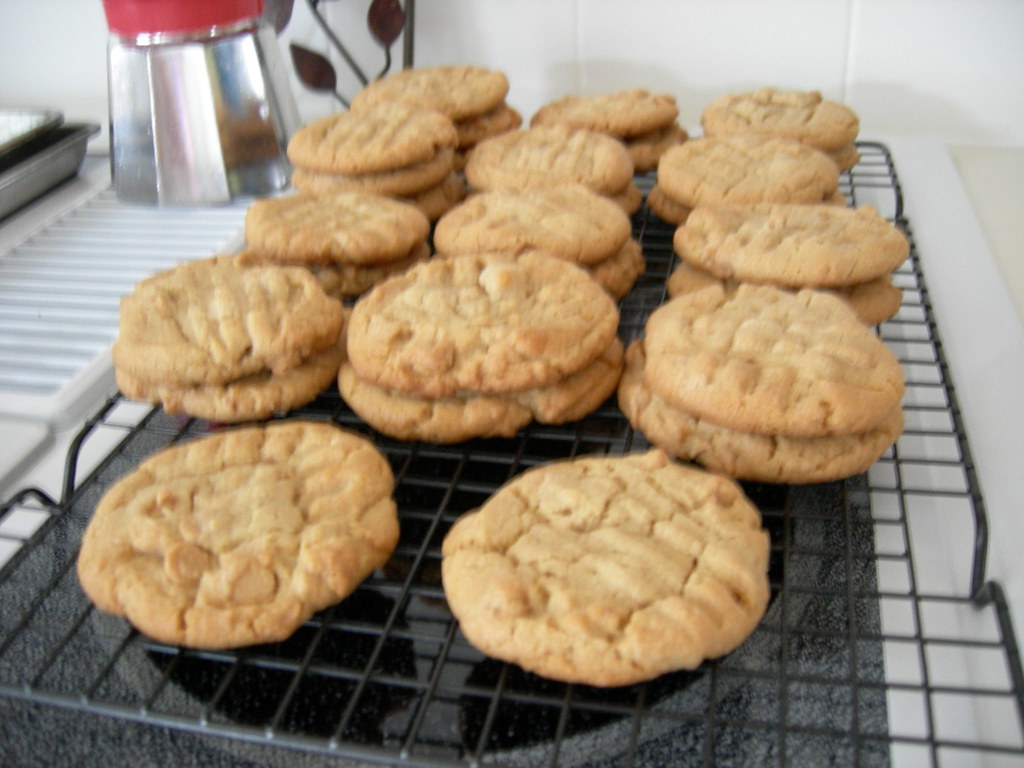
soft & chewy peanut butter cookies 003


With my ginormous sweet tooth I love, love, love cookies. The choco-holic in me tends toward chocolate chip cookies, especially MY chocolate chip cookies. My Big Bad Dad aka Mr. Picky Eater on the other hand is a sucker for peanut butter cookies. He doesn't have nearly the sweet tooth that I have, but when there's peanut butter cookies in the house he can't walk by the jar without eating one.

I dig the cute little criss-cross pattern that you see on almost all peanut butter cookies, but I don't like that crumbly texture that many peanut butter cookie recipes yield. So, long ago I decided that if they're going to be the much requested cookie around our house I need to find a recipe that suits me. After numerous tries, all of which were edible, some I considered promising even, but most of which weren't worth blogging or making a second time, I found the one.

From the tempting dessert cookbook Caprial's Desserts I tried and loved Caprial's mom's peanut butter cookie recipe. The cookies are sweet, soft and chewy. They're totally F-A-B-U-L-O-U-S I tell ya. The only change I made was to add a cup of peanut butter chips, which for us is a must in any peanut butter cookie.

I've been making these cookies for some time now, several years probably, and have been meaning to blog them, but slacked off and never did. My apologies for depriving you lovely readers of such delicious cookies. And my thanks to Marco for prodding me for this recipe, thus prompting me to get off my butt and share it with everything.

Doubley Peanut Buttery Peanut Butter Cookies

1 cup cold unsalted butter, diced
1 cup granulated sugar
1 cup firmly packed brown sugar
2 eggs
1 tsp vanilla extract
1 cup peanut butter (NOT natural and I prefer chunky)
3 cups all-purpose flour
2 tsp baking soda
1/2 tsp salt
1 cup peanut butter chips

Preheat oven to 350 degrees. Grease or line baking sheet with parchment paper and set aside.

Place the butter and both sugars in the bowl of a mixer and beat on high, scraping down the sides of the bowl often, until light and fluffy, about 3 minutes. With the mixer on low, add the eggs and vanilla, then add the peanut butter and mix well. Add the flour, baking soda, and salt and mix on low until all ingredients are incorporated. Increase the speed to medium and mix just until the dough is smooth. Stir in peanut butter chips.

Using a tablespoon or a small ice cream scoop, form the dough into 1/2 inch balls and place on the prepared pan. Flatten dough balls with a fork. Bake just until golden brown about 10 minutes. Let the cookies cool for about 5 minutes on the pan, then transfer to a rack and let cool completely.

Yield: approximately 48 cookies

Labels: , , , , , ,

Saturday, March 15, 2008

No Pudge Fudge Pie

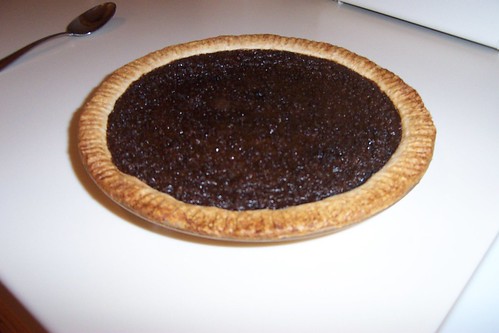
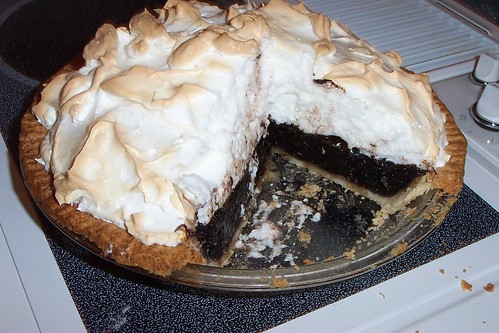
I'm reaching waaaay into the archives with this recipe. It's one I definitely haven't made in a long time, so you won't find many vivid adjectives to desccribe this pie, but trust me it was GOOD! If you're a regular around here you know I've got a killer sweet tooth, and I'm a serious chocaholic. I don't experiment with the lower fat, more guiltless versions of recipes as much as I should, but you'll catch a few guiltless recipes around here from time to time. This yummy chocolate pie is one of those recipes.

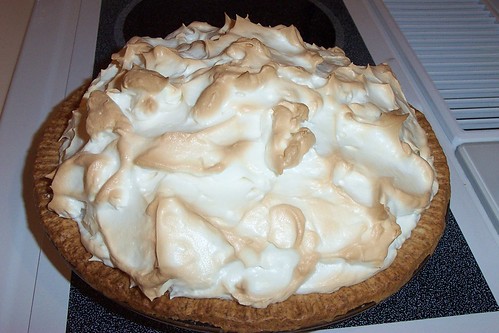
I found this recipe for Low-Fat Chocolate Fudge Pie on the Cooking Light website. I keep the recipe as written, with one minor change - instead of whipped cream, I wanted to top the pie off with some delicious, fluffy meringue. I love whipped cream, but the meringue was absolutely the perfect touch.

Chocolate Fudge Pie

Chocolate Fudge Pie Part 3

Chocolate Fudge Pie YUM

Low-Fat Chocolate Fudge Pie

1/2 (15-ounce) package refrigerated pie dough (such as Pillsbury)
1 cup packed brown sugar
1/2 cup unsweetened cocoa
1 tablespoon all-purpose flour
3/4 cup 2% reduced-fat milk
1/3 cup light-colored corn syrup
1 tablespoon butter, melted
1 teaspoon vanilla extract
2 large eggs
2 large egg whites
1 cup frozen fat-free whipped topping, thawed*
1/2 teaspoon unsweetened cocoa (optional)

*Substitute whipped topping for 1 recipe meringue (see recipe below)

Preheat oven to 350°.
Fit dough into a 9-inch pie plate. Fold edges under; flute. Place pie plate in freezer until ready to use.

Combine brown sugar, 1/2 cup cocoa, and flour in a large bowl. Combine milk and next 5 ingredients (milk through egg whites); stir with a whisk until well blended. Add milk mixture to brown sugar mixture; stir until combined.

Pour mixture into crust. Bake at 350° for 40 minutes or until just set. Cool on a wire rack to room temperature. Cover; chill at least 4 hours. Spread whipped topping evenly over filling; sprinkle with 1/2 teaspoon cocoa, if desired. (Or top with prepared meringue.)

Yield: 10 servings (serving size: 1 wedge)

FAT 8.6g per slice

Meringue

3 egg whites
1/4 teaspoon cream of tartar
3/4 cup white sugar

In large bowl, beat egg whites and cream of tartar with electric mixer until foamy. Gradually add sugar, beating until mixture forms stiff peaks.

To bake: Preheat oven to 350 degrees F (175 degrees C.) Bake pie in the preheated oven for 10 to 15 minutes, or until golden brown.

Labels: , , , , , ,

Friday, February 22, 2008

Biscotti Brings Me Back

Hello? Anybody out there? After all my time away, quite possibly not, but I'll cross my fingers that someone is still reading my little ol blog. There has obviously been no blogging for quite some time, but amid the fiascos that are my life, I have continued to bake, and bake some delicious things I have! Bear with me, and I promise to do my best to catch everyone up on my baking adventures, and mix in a few stories about my crazy life.

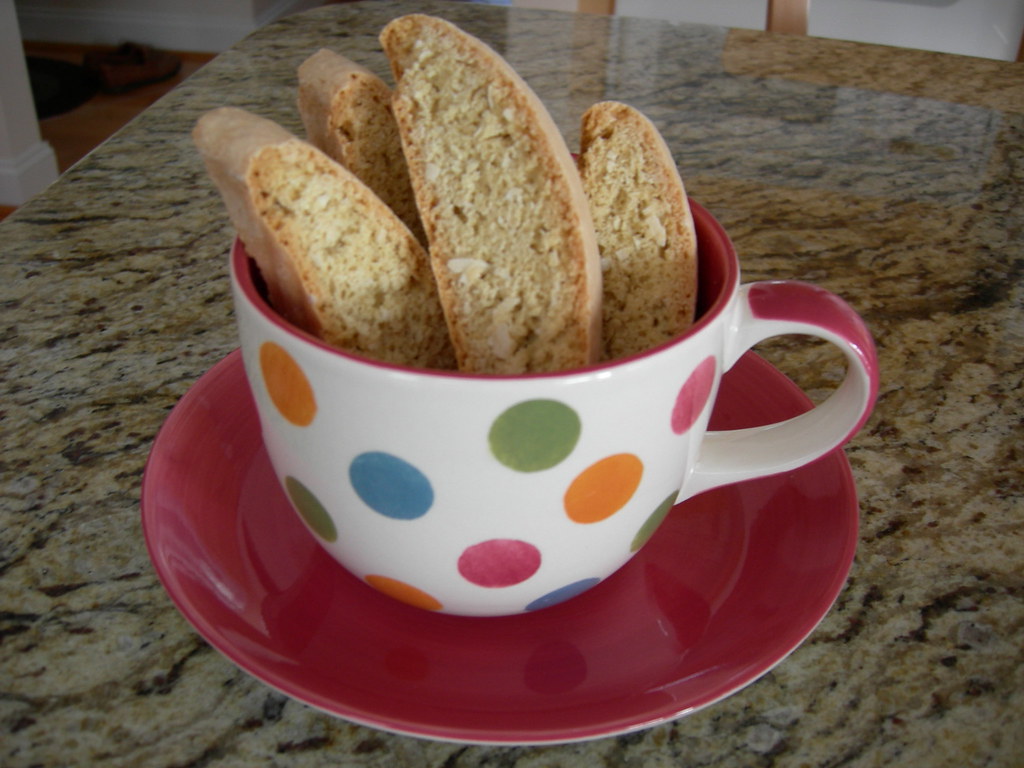
Christmas, which is when I went on my most recent blogging hiatus, was of course filled with many day long kitchen adventures. One of my favorite new recipes, which I included in my foodie gift bags, is this Coconut Biscotti recipe. I love, love, love biscotti, and I think this is my new favorite. The coconut flavor is not overpowering, it's just right. I found myself sneaking one of these every morning with my coffee until suddenly there were no more. Thankfully the biscotti are pretty low fat, so I wasn't too ridden with guilt.

coconut biscotti


Coconut Biscotti
From Cooking Light

2 cups all-purpose flour
3/4 teaspoon baking powder
1/4 teaspoon salt
1/4 teaspoon baking soda
1/8 teaspoon grated whole nutmeg
3/4 cup sugar
1 teaspoon vanilla extract
2 large eggs
1 cup flaked sweetened coconut


Preheat oven to 300°.
Lightly spoon flour into dry measuring cups; level with a knife. Combine flour and next 4 ingredients (through nutmeg). Place sugar, vanilla, and eggs in a large bowl; beat with a mixer at medium speed 2 minutes or until thick. Add flour mixture and coconut; stir to combine (dough will be very sticky). Turn dough out onto a heavily floured surface; knead lightly 7 or 8 times. Shape dough into a 15 x 3-inch roll. Place roll on a baking sheet lined with parchment paper, and pat to 1-inch thickness. Bake at 300° for 40 minutes or until roll is golden brown. Cool for 5 minutes on a wire rack.

Cut roll diagonally into 20 (1/2-inch-thick) slices; stand slices upright on baking sheet. Bake 20 minutes (cookies will be slightly soft in center but will harden as they cool). Remove from baking sheet; cool completely on wire rack.

Yield
20 cookies (serving size: 1 biscotto)

2.5 grams of fat

*The original recipe called for 1 1/2 cups flour, but the dough was entirely too sticky.

Labels: , , , , , ,

Saturday, December 08, 2007

Black Bottom Goodness

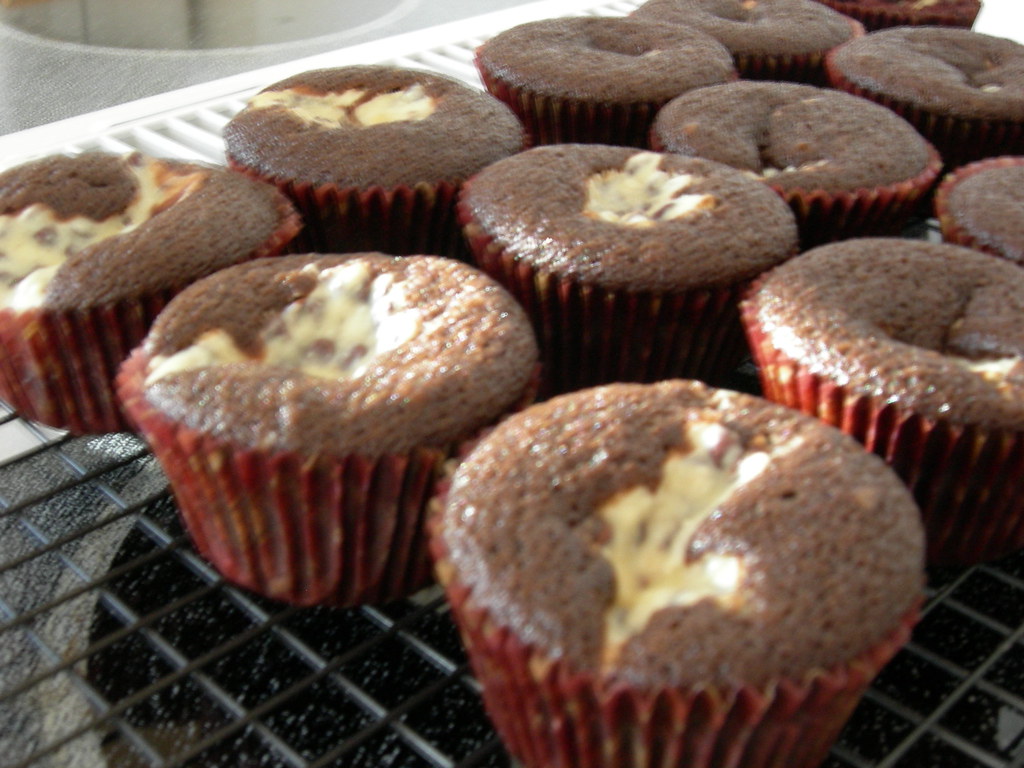
I tasted my first ever black bottom cupcake when I baked up a batch several months ago. The earlier version was covered in chocolate glaze and known by another name, cream cheese-stuffed chocolate cupcakes. From that first cupcake I knew I was a fan. Chocolate, cake in the form of a cupcake, and cream cheese, what isn't to love?

This recipe got rave reviews on allrecipes, and truly couldn't have been easier. The recipe as it appears on allrecipes yields twice as much cream cheese filling as it does cake batter, so through trial I ended up making two batches of cake batter. Next time? I'll just make one double batch. Even with a double batch of cupcake batter, which ends up with about 30 cupcakes you still have a generous amount of filling in each cupcake. They were delish the first day, but after refrigerating them over night I thought they were even better. I don't know what it is, but something about cold chocolate cake, all moist and dense, it's hard to resist. Yum!

Black Bottom Cupcakes


Black Bottom Cupcakes

Filling

1 (8 ounce) package cream cheese, softened
1 egg
1/3 cup white sugar
1/8 teaspoon salt
1 cup miniature semisweet chocolate chips

Cake Batter

3 cups all-purpose flour
2 cup white sugar
1/2 cup unsweetened cocoa powder
2 teaspoon baking soda
1 teaspoon salt
2 cup water
2/3 cup vegetable oil
2 tablespoon cider vinegar
2 teaspoon vanilla extract

Preheat oven to 350 degrees F (175 degrees C). Line muffin tins with paper cups or lightly spray with non-stick cooking spray.

In a medium bowl, beat the cream cheese, egg, 1/3 cup sugar and 1/8 teaspoon salt until light and fluffy. Stir in the chocolate chips and set aside.

In a large bowl, mix together the flour, 2 cup sugar, cocoa, baking soda and 1 teaspoon salt. Make a well in the center and add the water, oil, vinegar and vanilla. Stir together until well blended. Fill muffin tins 1/2 full with the batter and top with a dollop of the cream cheese mixture.

Bake in preheated oven for 25 to 30 minutes.

Labels: , , , , ,

Sunday, October 07, 2007

Hot, Fudgy Goodness

Although fall has crept up on us, in my neck of the woods it certainly doesn't feel or look anything like it. So with the sun still blazing hot it is a perfectly suitable time to endulge in ice cream and treat yourself to a batch of decadent hot fudge sauce. But then again, if the craving hits, you I think any time is a suitable time for the aforementioned. Besides, think of all the wonderful things, other than ice cream, that would make the perfect accompaniment to hot fudge sauce. You could get creative and have waffles for dessert topped with hot fudge sauce and a dollop of whipped cream. Or you could slather the stuff on a slab of pound cake and, just for the sake of being healthy, top it off with some fruit. (I was, of course, joking about the healthy part.)

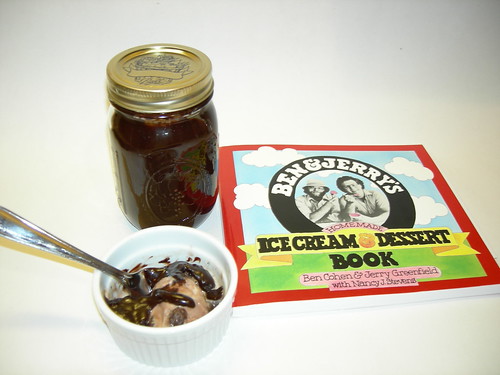
I made this recipe for the first time early last spring and featured it in an article I wrote for Sugar Savvy. Until then I was a bit leery when it came to making hot fudge sauce, I didn't want to suffer disappointment. I worried that I would have the misfortune of trying a recipe that would yield more of a chocolate syrup than a thick, rich hot fudge sauce. I wanted a real hot fudge sauce. You know, the kind you find in the neighborhood ice cream shop, one that goes on hot, melting your ice cream slightly and thickening as it covers the frozen goodness. Well folks, this is it! The sauce is a great consistency with a rich chocolatey flavor. Best part of all? It's the exact hot fudge sauce served in Ben & Jerry's Ice Cream shops! This hot fudge sauce recipe, along with other authentic and delicious Ben & Jerry's recipes can be found in their book, "Ben & Jerry's Ice Cream & Dessert Book". Now, run along and whip up a batch for yourself. If you don't love the stuff I'll be shocked.

Ben & Jerry's Original Hot Fudge Sauce


Hot Fudge Sauce

4 oz unsweetened chocolate
1/2 cup (1 stick) of butter
3/4 cup unsweetened cocoa powder
2 cups sugar
1/2 cup milk
1/2 cup heavy cream or whipping cream

In double boiler, melt chocolate and butter, stirring frequently. Whisk in cocoa powder until dissolved.

Gradually stir in sugar; the mixture will resemble wet sand. Cook over simmering water for 20 minutes, stirring occasionally. Check water level of double boiler, adding more if necessary.

Gradually stir in milk and cream. Continue stirring until completely blended. Continue cooking for 1 hour, stirring and checking water level occasionally. The sauce is ready when completely smooth and all sugar is dissolved.

Yields 1 quart

Labels: , , , , , ,

Monday, August 13, 2007

Puttin some 'nanas to good use

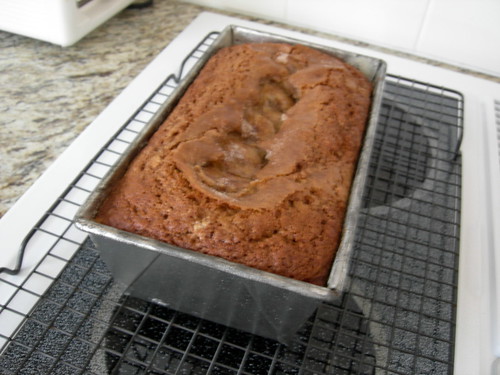
Who wants some banana bread? I decided I did! I make banana bread from time to time usually trying out some random recipe in hopes of finding the one that will end my search. This is supposedly a Paula Deen recipe, but I'm not absolutely sure. I looked on the FoodNetwork website and didn't find it there. I made a few changes - the addition of cinnamon in the batter, a few slices of bananas on top for appearance and some cinnamon sugar sprinkled on top. Yum, doesn't cinnamon make almost everything better?

This would be perfect with some nuts added in to make banana nut muffins...one of my favorite breakfast treats!

Banana Bread


Bodacious Banana Bread

1/2 cup (1 stick) butter, at room temperature
1 cup sugar
1/2 teaspoon salt
2 eggs
1 teaspoon vanilla extract
1-1/2 cups all-purpose flour
1 teaspoon baking soda
1 teaspoon baking powder
1 teaspoon cinnamon
3 ripe bananas, mashed (reserve 4 or 5 slices to add on top once the batter is in the pan)
1-2 Tbsp. cinnamon sugar


Preheat the oven to 350. Grease a 9x5 loaf pan. In a mixing bowl, combine the butter and sugar; mix well. Add the salt, eggs, vanilla, flour, baking soda, baking powder, cinnamon and bananas. Mix well. Pour the batter into the prepared pan, top with reserved banana slices and sprinkle with cinnamon sugar mixture. Bake for 50 minutes, or until wooden skewer inserted in center of loaf comes out clean. Cool 5 minutes and remove from pan to cooling rack.

Variation: For muffins fill regular size muffin cups 2/3 full, top each with a slice of banana and sprinkle with cinnamon sugar mixture. Bake for 25-30 minutes, until wooden skewer inserted in center comes out clean. Cool 5 minutes and remove from pan to cooling rack until completely cooled.

Labels: , , , , ,

Sunday, July 02, 2006

How the cookie really crumbles

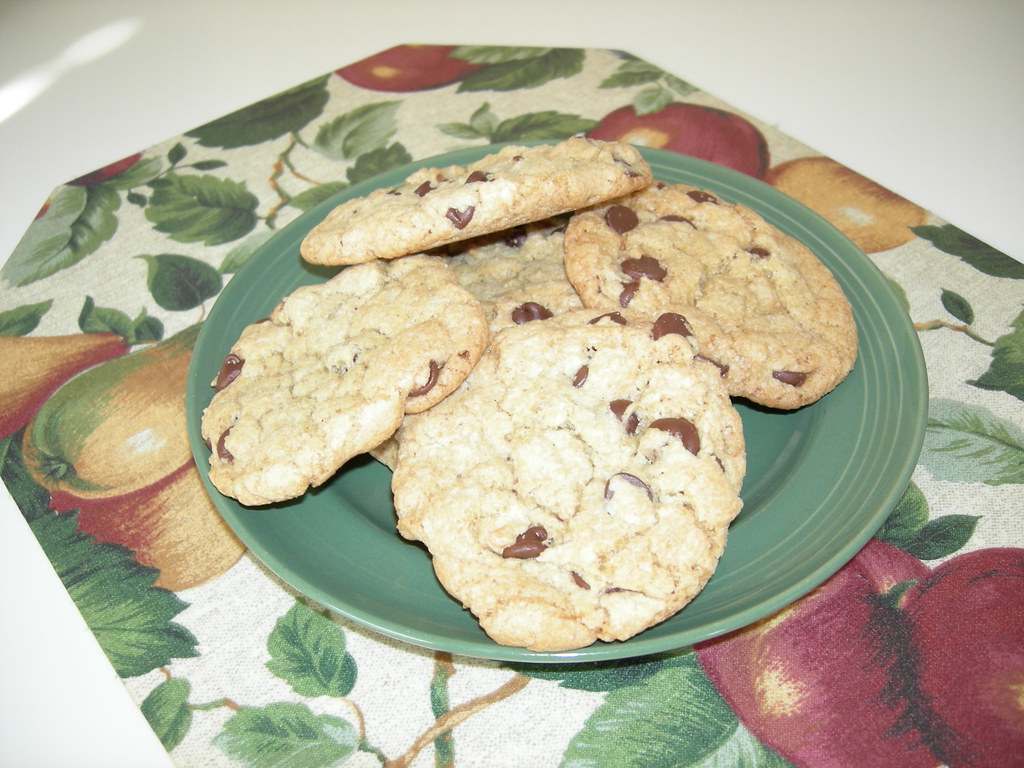
best choc chip cookies


Perhaps you might call me a connoisseur of cookies, or maybe I'm just picky? Either way I know what I like and I often have very specific expectations when it comes to cookies, especially chocolate chip and peanut butter cookies!

Over the last few months I've experimented with several chocolate chip cookie recipes. And thought I'd found the one with when I tested out the Alton Brown recipe known as "The Chewy". Well, as fate would have it - yes I believe in fate, even when it comes to food! I stumbled upon a recipe on allrecipes.com, the ratings were pretty darn high with stellar reviews, so I just had to see if this cookie lived up to all the hype, and believe me, it did!

Best Big, Fat, Chewy Chocolate Chip Cookie

2 cups all-purpose flour
1/2 teaspoon baking soda
1/2 teaspoon salt
3/4 cup unsalted butter, melted
1 cup packed brown sugar
1/2 cup white sugar
1 tablespoon vanilla extract
1 egg
1 egg yolk
2 cups semisweet chocolate chips

Preheat the oven to 325 degrees F (165 degrees C). Grease cookie sheets or line with parchment paper.

Sift together the flour, baking soda and salt; set aside.

In a medium bowl, cream together the melted butter, brown sugar and white sugar until well blended. Beat in the vanilla, egg, and egg yolk until light and creamy. Mix in the sifted ingredients until just blended. Stir in the chocolate chips by hand using a wooden spoon. Drop cookie dough 1/4 cup at a time onto the prepared cookie sheets. Cookies should be about 3 inches apart.

Bake for 15 to 17 minutes in the preheated oven, or until the edges are lightly toasted. Cool on baking sheets for a few minutes before transferring to wire racks to cool completely

best choc chip cookieThese cookies tout themselves as being "the pinniacle of perfection!," and as the type of cookie that you will find in bakeries and specialty shops. I agree 100%! I've made multiple batches and been so happy with each batch that I now keep a container of the unbaked dough in my freezer.

Labels: , , ,

Saturday, September 03, 2005

Wilton Course 2 Finale


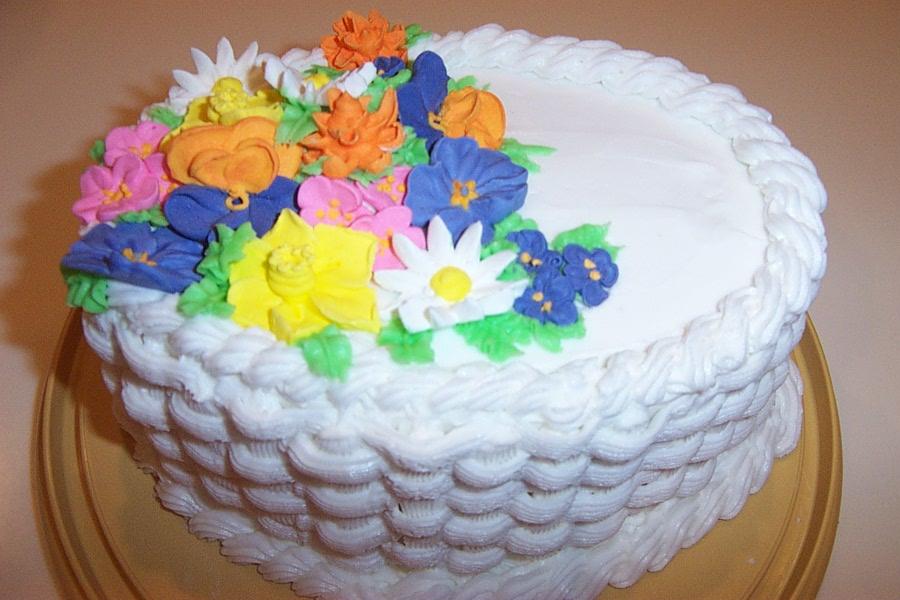
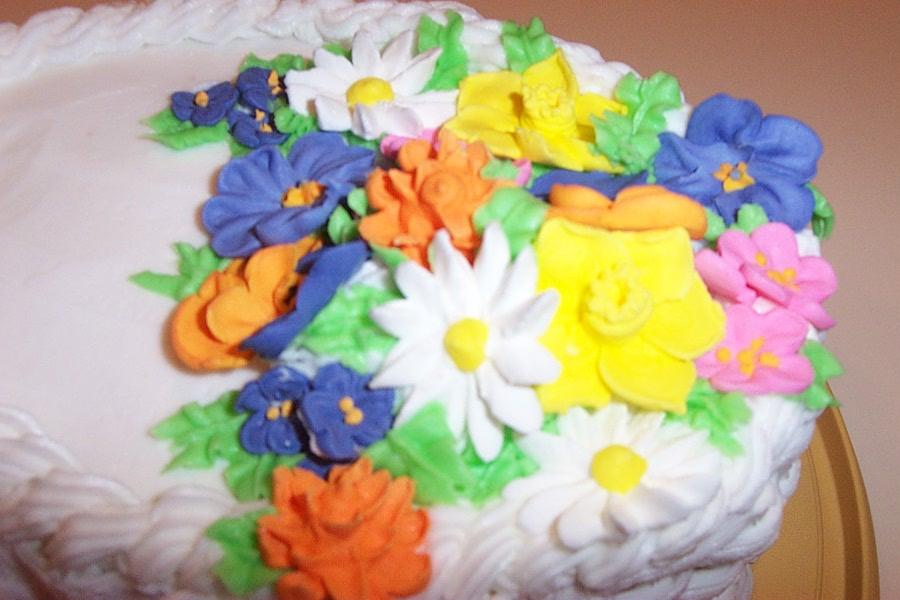
I did it!! I have mastered the art of basketweave and royal icing flowers. Well, atleast according to the Wilton Course II outline..lol There are many many other flowers I have yet to learn. I missed class 3 of 4 for the course, so I was a bit nervous about how my flowers & cake would turn out, but I must say I'm very pleased. I had to teach myself how to do some of the flowers, but I'm pretty happy with how they came out. And the basketweave..well, that was an experience..I was able to get into a rhythm & it wasn't too long before I made my way around the entire cake..my hand was telling me it wasn't a moment too soon you can believe that..lol

Labels: , , , , , , , ,

Thursday, August 25, 2005

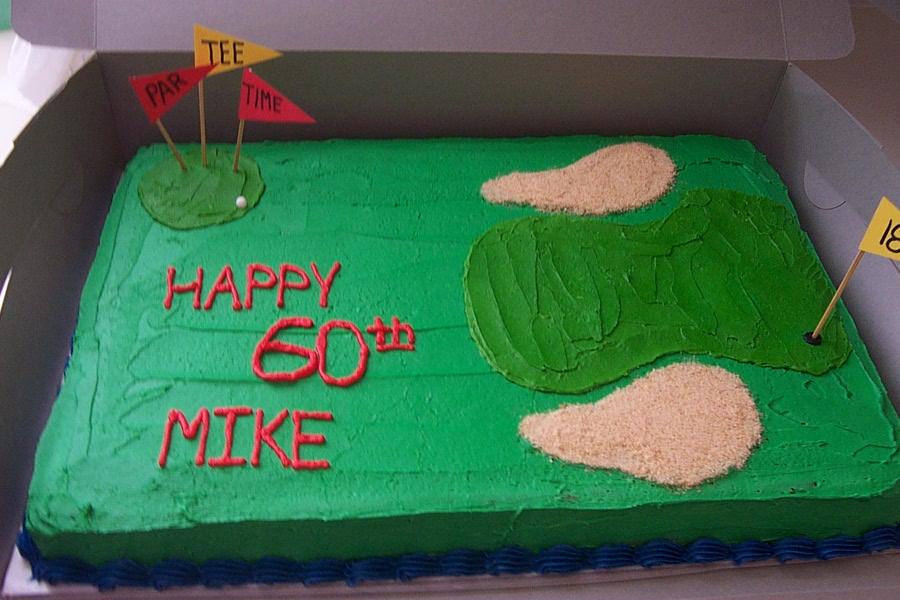
Par-Tee Time


I present to you my latest creation!! I worked long & hard to come up with what I felt was just the PERFECT idea for this cake. First let me set the scenario for you...

My neighbor knows about my interest & efforts to start my own homebased bakery as she is often my guinea pig when I make breakfast muffins. Well, she was hosting a golf tournament over the weekend & asked if I would do a cake because one of the players was celebrating his 60th birthday - as you can see. So of course I jumped at the chance, as it's a great opportunity to get my name out to other people & a chance to pad my portofolio just a little bit more..lol Of course it doesn't hurt that it gave me a pretty good bit of decorating practice right?

After much work & standing over the cake for probably a good hour just staring, trying to decide if it was actually done or not..I was beaming from ear to ear with pride. As I always am when trying out a new recipe, which carelessly this was I was a bit nervous that maybe it didn't turn out right or that it just wouldn't suit the taste of my customer. Unfortunately this time I had reason to be nervous - come to find out the cake was very DRY!! I was crushed..absolutely crushed. I definitely should have tried the recipe before hand..but I made a cupcake out of the batter & sampled it. The flavor was pretty good, but yes it was a bit dry..but I figured once I iced the cake it would be fine. I finished the cake up about 24 hours before the party, so I figured it would be fine..shouldn't dry out too much before then right?? Well I guess with this cake that wasn't the case..Either that or maybe the cake dried out more than the cupcake.

Regardless I'm terribly disappointed & will NEVER use the Barefoot Contessa recipe she featured on her show for the "birthday cake with pink frosting". The recipe was called exactly that..well something close. The cake was really cute when she made it on the show & normally I really like her recipes so I felt pretty confident the cake would be atleast satisfactory, but in this case I was wrong. Maybe she just doesn't do good birthday cakes? lol Anyway I'm pretty bummed about that. I don't expect all my recipes to be great..you just have to test & toss sometimes..lol But the fact that I made something for someone else..especially because they were using it for a party & they were going to pay me for it..that makes it bother me even more. Bleh..maybe I'll be able to write a much more redeeming blog SOON!! lol

Labels: , , , , , , , , ,

Sunday, August 14, 2005

No substitute for the real thing??

I pose this question as it relates to granulated sugar versus Splenda. I was approoached to do a birthday cake for someone using splenda. I'm always up for trying new things, especially when it may potentially result in a delicious new discovery. I'm even more excited when it may broaden my customer base. With so many people counting carbs, watching their weight or more importantly adhering to a special diet because of a medical condition, a baker/chef stands a good chance of having atleast the occassional customer inquire about goods made with reduced sugar or sugar substitutes right?

Well anyway, on with my story. I've heard so many times, "Oh Splenda tastes just like sugar - in fact it is sugar!!" Me being the eternal skeptic found that sooo hard to believe, so I tried it..and to those people I say "get outta here!!" It's much much better than those artifical sweeteners, and much healthier I would imagine. But I tried some in my coffee some months back, and according to the package 1 tablespoon Splenda = 1 tablespoon sugar, so then my normal 2 teaspoons of sugar, should equate to 2 teaspoons of splenda for my coffee correct? Well it didn't!! And I noticed some peculiar little fizzy bubbles rising to the top when I spooned that stuff into my mug of coffee. Umm is that normal?? Well, I didn't die after drinking it so I guess I'm safe. Yeah, yeah I'm rambling right?? Sorry..geez

So anyway, I agreed to do the cake of course, but made a point to reiterate that this was a total experiment for me!! I made sure to let them know that if I could not find a recipe on the Splenda website I was going to have to adapt one of my own and "hope it turns out". I immediately got online & diligently scoured the Splenda site, found a recipe for yellow cake & made sure to read all the helpful hints & tips.

I baked the cake Friday afternoon, after 2 trips to the grocery store - 1 to buy buttermilk & Splenda for the cake. The second trip to exchange the Splenda for Splenda Baking Sugar Blend. Yes boys & girls, there are multiple types of Splenda. That little yellow box requires various alterations to your recipes and can not be used in baking something that needs to rise, such as a cake. So I exchanged the itty bitty $4 box of Splenda for the 2lb $7 bag of Splenda Baking Blend. Both quite pricey if u ask me. Anyway, the cake was a sucess from what I've heard thus far. The batter was quite a bit thicker than my "regular" cake batters normally are, and cakes don't rise quite as much with the sugar substitute, so I knew to expect that & didn't freak out at the flatness of my cake thank goodness..lol And I finished the cake off nicely but a buttercreme frosting. Unfortunately, on such short notice I wasn't able to come up with a GOOD recipe for frosting using any type of Splenda..that will be on my to do list..lol

I can't seem to the get photos posted at the moment..I dunno what the problem is. Any suggestions?? I didn't think my html knowledge or my copy & paste skills were that bad..lol

Labels: , ,

Thursday, August 11, 2005

Cranberries in summer...

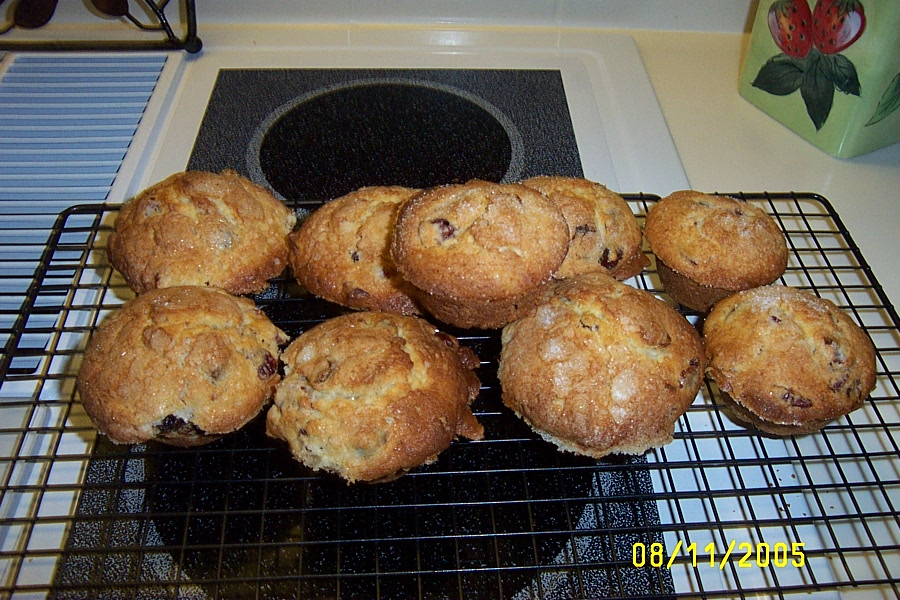
I would try a new recipe everyday if I could. Unfortunately that would be very time-consuming, most of all just terribly wasteful. And to be honest, I'm afraid I would become horribly overweight. We keep enough baked goodies in the house now, that if there were new things each day I would just become one chunkie little ball of - well, fat. And we can't have that now can we? So until my home-based bakery is off the ground & I'm testing out new recipes daily for a profit, I must pick and choose my test recipes carefully. That leads me to the whole "Cranberries in summer.." title.

The brownie recipe I tried out on Tuesday was decent, but a tad disappointing, so I think sub-consciously I felt the need to redeem myself. Well redeem myself I did!! Yesterday was a deliciously fabulous day. I am absolutely in love with orange cranberry muffins. Ever since working at Starbucks some years back as a Barista, where I would nosh on the orange cranberry muffins as I sipped my morning coffee and delighted in the caffeine addicts who I saw religiously I have been in love. Our romance was never quite an out in the open type thing, until now. Yes now that I have baked a batch myself & feel that I have found the recipe that was intended just for me, I will scream it from the highest mountain. Okay, maybe it's not quite that serious, afterall they contain no chocolate. But they are pretty delicious..and I feel good about eating them, they aren't laden with stick upon stick of butter and tons of oil. They have just enough of everything to make them a delicious treat, but not enough to make them a shameful endulgence.

Perhaps I am being a bit dramatic?? What do you expect - need I remind you that I am admittedly Culinarily Obsessed??

cranmuffins


Thanks to the Food Network for such delicious inspiration..what would I do without their recipes?

Cranberry Orange Muffins

1 cup dried cranberries
1/4 cup fresh orange juice
2 cups unbleached all-purpose flour
2 teaspoons baking powder
1/4 teaspoon fine salt
1/2 cup unsalted butter, softened, plus more for preparing the muffin tin
1 teaspoon grated orange zest
2/3 cup granulated sugar, plus up to 1 tablespoon for topping the muffins, if desired
2 large eggs, at room temperature
1/2 cup milk

Preheat the oven to 375 degrees F.
Put the cranberries and orange juice in a small saucepan, and bring just to a simmer over medium heat. Remove berries from the heat, and set aside to cool and plump. Drain off any excess liquid and set aside.

Lightly brush a 12-muffin tin with butter. Sift the flour, baking powder, and salt into a medium bowl and set aside.

In a standing mixer fitted with the paddle attachment, or with an electric hand-held mixer in a large bowl, cream the butter, orange zest, and 2/3 cup sugar until light and fluffy, about 2 minutes. Scrape down the sides of the bowl with a rubber spatula. Add the eggs, one at a time, beating well after each addition. Remove the bowl from the mixer.

Fold the flour in 3 parts into the butter mixture, alternating with the milk in 2 parts, until just combined. Fold in the cranberries. Do not over mix. Divide the batter evenly into the muffin tin and sprinkle the tops with sugar. Bake until golden brown, about 25 minutes. Cool muffins in the pan on a rack. Serve warm.

Labels: , , , , , ,

Directory of Food/drink Blogs Food & Drink Blogs - Blog Top Sites