
Tuesday, May 13, 2008

Nutty for Cookies

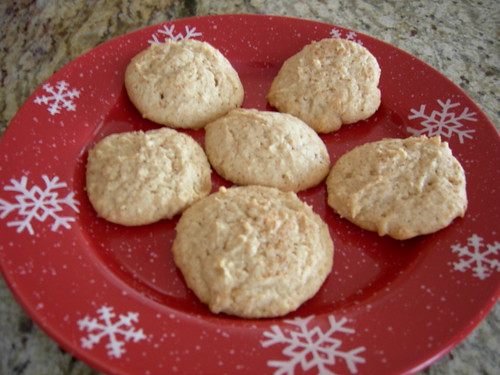
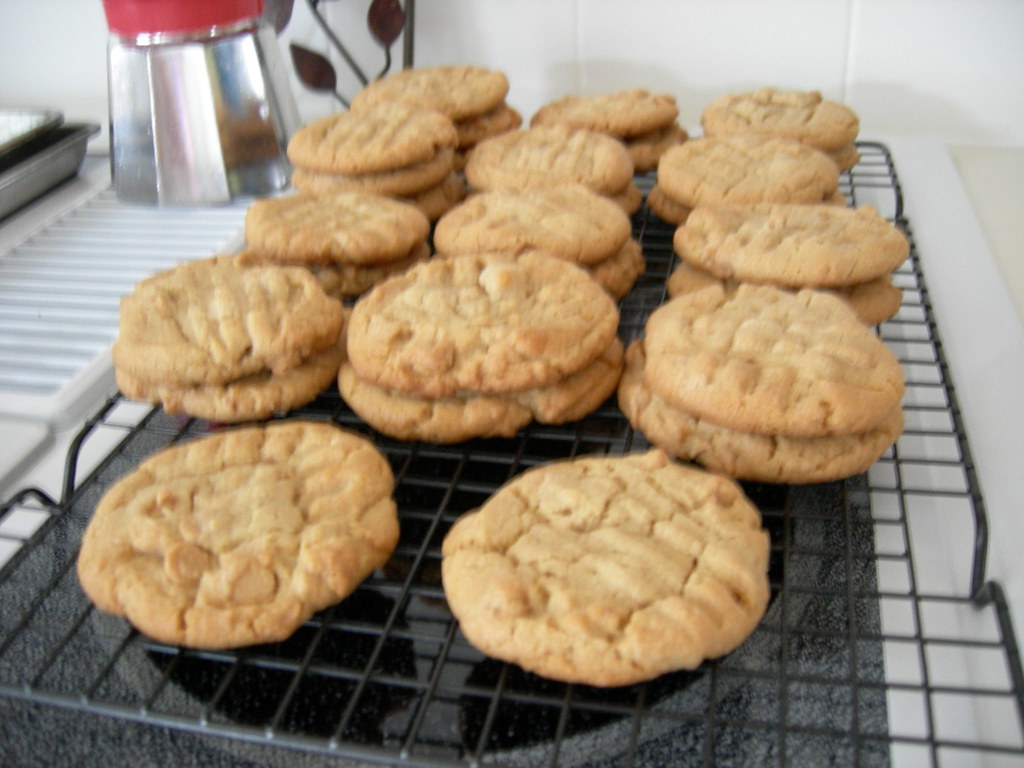
soft & chewy peanut butter cookies 003


With my ginormous sweet tooth I love, love, love cookies. The choco-holic in me tends toward chocolate chip cookies, especially MY chocolate chip cookies. My Big Bad Dad aka Mr. Picky Eater on the other hand is a sucker for peanut butter cookies. He doesn't have nearly the sweet tooth that I have, but when there's peanut butter cookies in the house he can't walk by the jar without eating one.

I dig the cute little criss-cross pattern that you see on almost all peanut butter cookies, but I don't like that crumbly texture that many peanut butter cookie recipes yield. So, long ago I decided that if they're going to be the much requested cookie around our house I need to find a recipe that suits me. After numerous tries, all of which were edible, some I considered promising even, but most of which weren't worth blogging or making a second time, I found the one.

From the tempting dessert cookbook Caprial's Desserts I tried and loved Caprial's mom's peanut butter cookie recipe. The cookies are sweet, soft and chewy. They're totally F-A-B-U-L-O-U-S I tell ya. The only change I made was to add a cup of peanut butter chips, which for us is a must in any peanut butter cookie.

I've been making these cookies for some time now, several years probably, and have been meaning to blog them, but slacked off and never did. My apologies for depriving you lovely readers of such delicious cookies. And my thanks to Marco for prodding me for this recipe, thus prompting me to get off my butt and share it with everything.

Doubley Peanut Buttery Peanut Butter Cookies

1 cup cold unsalted butter, diced
1 cup granulated sugar
1 cup firmly packed brown sugar
2 eggs
1 tsp vanilla extract
1 cup peanut butter (NOT natural and I prefer chunky)
3 cups all-purpose flour
2 tsp baking soda
1/2 tsp salt
1 cup peanut butter chips

Preheat oven to 350 degrees. Grease or line baking sheet with parchment paper and set aside.

Place the butter and both sugars in the bowl of a mixer and beat on high, scraping down the sides of the bowl often, until light and fluffy, about 3 minutes. With the mixer on low, add the eggs and vanilla, then add the peanut butter and mix well. Add the flour, baking soda, and salt and mix on low until all ingredients are incorporated. Increase the speed to medium and mix just until the dough is smooth. Stir in peanut butter chips.

Using a tablespoon or a small ice cream scoop, form the dough into 1/2 inch balls and place on the prepared pan. Flatten dough balls with a fork. Bake just until golden brown about 10 minutes. Let the cookies cool for about 5 minutes on the pan, then transfer to a rack and let cool completely.

Yield: approximately 48 cookies

Labels: , , , , , ,

Sunday, March 02, 2008

Snickety Snickerdoodles

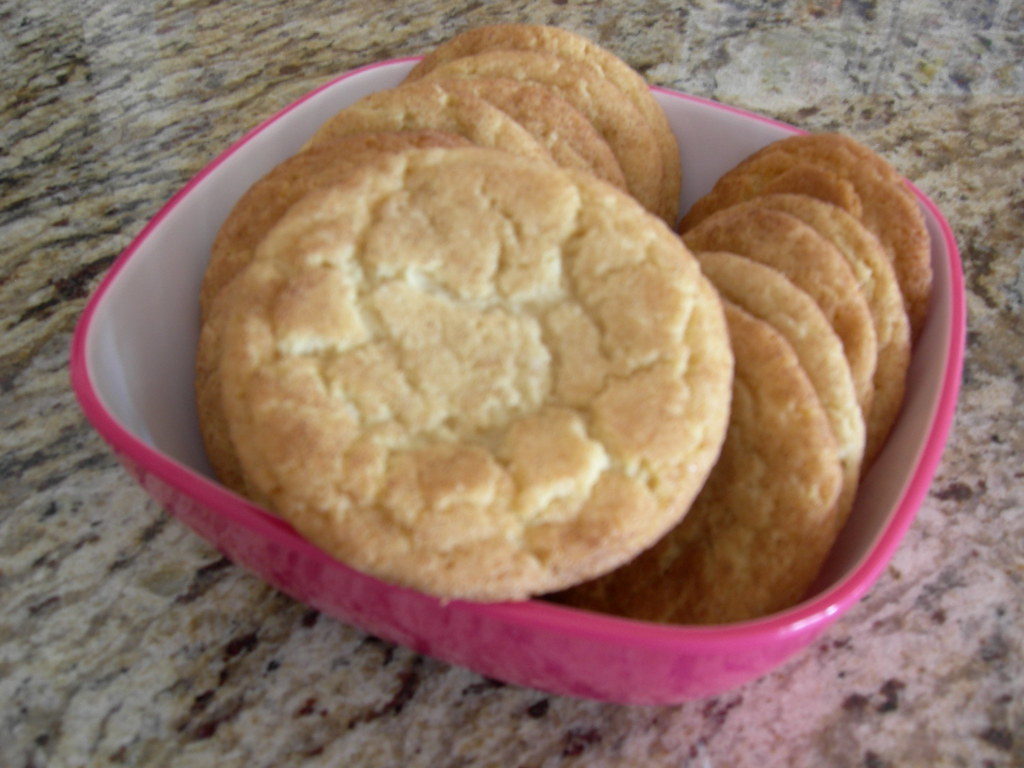
I'm a sucker for a good cookie, and I'm always craving the adventure of a new recipe. I remember eating snickerdoodles as a kid, but my experience with them was minimal. Snickerdoodles just weren't a cookie we had around my house. I remember them as buttery, soft and chewy with a wonderful crispness on the outside from the cinnamon sugar that coats them. I've seen the recipe for "Mrs. Sigg's Snickerdoodles" over and over on allrecipes. When I see a recipe with a high rating from a huge number of people I figure it's probably pretty good and worth giving a try.

Overall I was pretty happy, they had a nice flavor, but weren't as buttery as I would like. I made an adjustment to the cinnamon sugar mixture. When mixing it looked like there wasn't nearly enough sugar so I doubled the amount and found that was perfect for me. I also refrigerated the dough for about 30 minutes before prepping it for the oven, since I was going to be rolling it in my hands I thought that would be a good idea.
Mrs. Sigg's Snickerdoodles


Snickety Snickerdoodles

1/2 cup butter, softened
1/2 cup shortening
1 1/2 cups white sugar
2 eggs
2 teaspoons vanilla extract
2 3/4 cups all-purpose flour
2 teaspoons cream of tartar
1 teaspoon baking soda
1/4 teaspoon salt
4 tablespoons white sugar
2 teaspoons ground cinnamon

Preheat oven to 400 degrees F (200 degrees C).

Cream together butter, shortening, 1 1/2 cups sugar, the eggs and the vanilla. Blend in the flour, cream of tartar, soda and salt. Shape dough by rounded spoonfuls into balls.

Mix the 3 tablespoons sugar and the cinnamon. Roll balls of dough in mixture. Place
2 inches apart on ungreased or parchment lined baking sheets.

Bake 8 to 10 minutes, or until set but not too hard. Remove immediately from baking sheets to cooling rack.

Makes approximately 48 cookies

Labels: , , , , ,

Sunday, February 24, 2008

Reliving Christmas

It's weird, I don't drink eggnog, don't like it one bit. But last Christmas a friend's wife sent over a big plate of various cookies, most were edible but nothing to die for. Except one cookie really stuck out with me, and that was the Eggnog Cookie. I had never had these before or even heard of them, and when it came time to plan my baking schedule this past Christmas I knew I had to make some Eggnog Cookies. I wasn't able to get the recipe from said friend, so I searched the web and when I came up empty handed I enlisted the help of my friends over on the Bakespace forum, and was given the perfect recipe. The original cookie had icing, but the recipe from Bakespace did not so I figured I could wing it and come up with my own icing, but after baking the cookies and doing a tastetest I nixed the icing idea because the cookies were so good as is.

These Eggnog Cookies, are not your average cookie. They're soft and a little cakey, not chewy or crispy at all. Not typically what I go for, but these are great, and I love the hint of spice with that extra boost from the nutmeg sprinkled on top. And if you manage to keep these cookies around for more than a few days you'll be fooled into thinking you just baked them because they keep their freshness well.

Don't forget to add these to your "must bake" list for next Christmas!

eggnog cookies


EGGNOG COOKIES

2 ½ c. flour
1 t. baking powder
½ t. cinnamon
½ t. nutmeg
3/4 c. butter
1 1/4 c. sugar
½ c. eggnog
1 t. vanilla
2 egg yolks
1 T. nutmeg, for sprinkling

Preheat oven to 300°. In a large mixing bowl, combine flour, baking powder, cinnamon and nutmeg. In another bowl, cream butter and sugar; add eggnog, vanilla and egg yolks. Beat with an electric mixer on medium speed until just combined. Stir flour mixture into eggnog mixture until uniform. Drop by teaspoonfuls onto ungreased cookie sheet; sprinkle cookies lightly with nutmeg. Bake for 23-25 minutes or until bottoms are light brown.

Labels: , , , , , ,

Friday, February 22, 2008

Biscotti Brings Me Back

Hello? Anybody out there? After all my time away, quite possibly not, but I'll cross my fingers that someone is still reading my little ol blog. There has obviously been no blogging for quite some time, but amid the fiascos that are my life, I have continued to bake, and bake some delicious things I have! Bear with me, and I promise to do my best to catch everyone up on my baking adventures, and mix in a few stories about my crazy life.

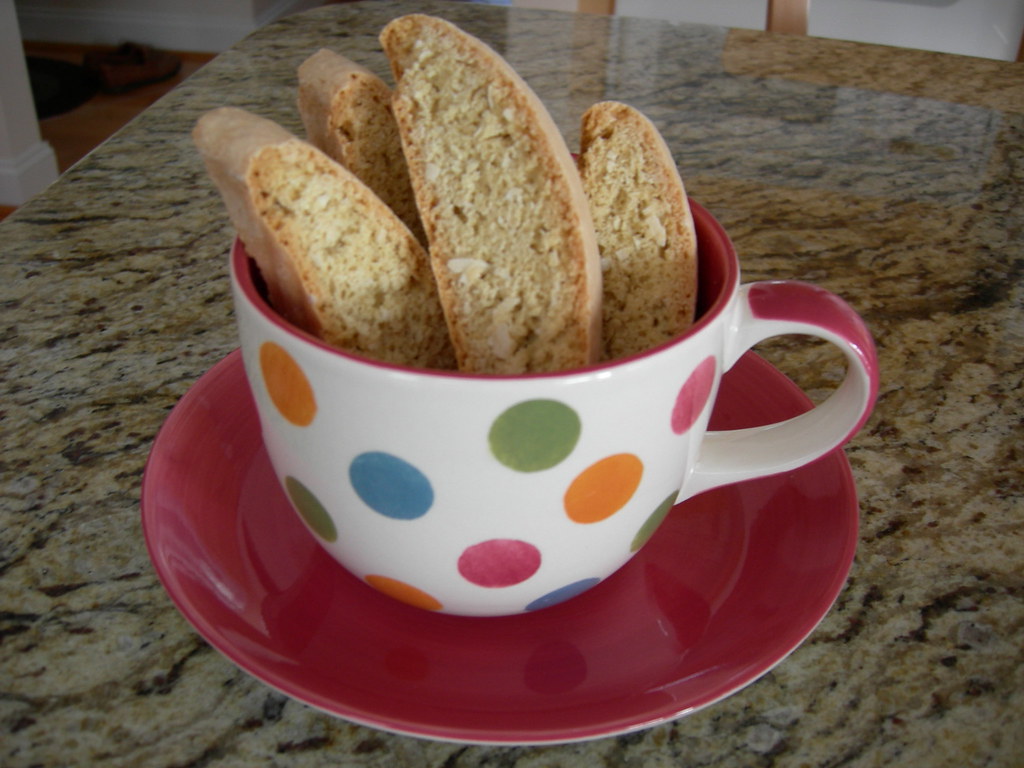
Christmas, which is when I went on my most recent blogging hiatus, was of course filled with many day long kitchen adventures. One of my favorite new recipes, which I included in my foodie gift bags, is this Coconut Biscotti recipe. I love, love, love biscotti, and I think this is my new favorite. The coconut flavor is not overpowering, it's just right. I found myself sneaking one of these every morning with my coffee until suddenly there were no more. Thankfully the biscotti are pretty low fat, so I wasn't too ridden with guilt.

coconut biscotti


Coconut Biscotti
From Cooking Light

2 cups all-purpose flour
3/4 teaspoon baking powder
1/4 teaspoon salt
1/4 teaspoon baking soda
1/8 teaspoon grated whole nutmeg
3/4 cup sugar
1 teaspoon vanilla extract
2 large eggs
1 cup flaked sweetened coconut


Preheat oven to 300°.
Lightly spoon flour into dry measuring cups; level with a knife. Combine flour and next 4 ingredients (through nutmeg). Place sugar, vanilla, and eggs in a large bowl; beat with a mixer at medium speed 2 minutes or until thick. Add flour mixture and coconut; stir to combine (dough will be very sticky). Turn dough out onto a heavily floured surface; knead lightly 7 or 8 times. Shape dough into a 15 x 3-inch roll. Place roll on a baking sheet lined with parchment paper, and pat to 1-inch thickness. Bake at 300° for 40 minutes or until roll is golden brown. Cool for 5 minutes on a wire rack.

Cut roll diagonally into 20 (1/2-inch-thick) slices; stand slices upright on baking sheet. Bake 20 minutes (cookies will be slightly soft in center but will harden as they cool). Remove from baking sheet; cool completely on wire rack.

Yield
20 cookies (serving size: 1 biscotto)

2.5 grams of fat

*The original recipe called for 1 1/2 cups flour, but the dough was entirely too sticky.

Labels: , , , , , ,

Tuesday, November 27, 2007

The Air Is Chili

Last week was miserably cold here, speaking as a southerner of course. When I say miserably cold, I mean that when you go outside your hands and feet get cold, and you really need to wear a coat at night. If I have to wear a coat that classifies as being miserably cold to me, and it's time to make something really warm and soothing for dinner.

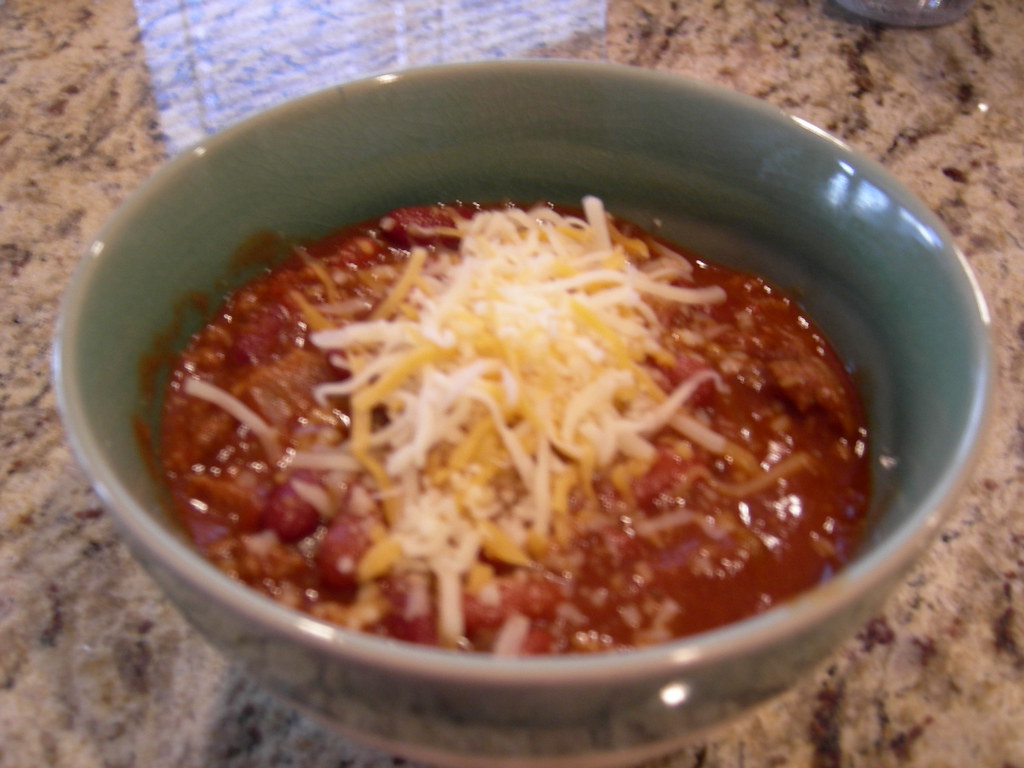
I'm still working on perfecting my chili, and I'm happy to say that I'm getting closer. My beef and beer chili had a good flavor, but not nearly the thickness I wanted so I studied and compared a few recipes and brought out the bits and pieces of each that I thought would bring me closer to my perfect chili. Taking a tip from my neighbor who recently entered and took something like fourth place in a local chili cookoff, I added tomato paste to thicken it up. And I've noticed a few recipes with cocoa powder on the ingredient lists, but cocoa powder in chili? What's that all about I wondered. I decided to find out, but I knew my Big, Bad Dad would have something to say about the addition. I figured if I could sneak it in he'd be none the wiser, and I was right. He didn't utter a word about tasting chocolate in his chili. I guess sometimes it pays to be sneaky because the addition of the cocoa powder seemed to add a nice depth of flavor.

thick & meaty chili


Thick and Meaty Chili

1 1/2 lb. lean ground beef
1 medium yellow onion, chopped
2 garlic cloves, crushed
2 Tbsp. chili powder
1/2 tsp. salt
2 tsp. ground cumin
1 tsp. dried oregano leaves
1 tsp. baking cocoa
1/2 tsp. red pepper sauce
1 can (28 oz.) diced tomatoes, undrained
1 small can tomato paste
2 cans (14 1/2 oz.) red kidney beans, undrained
Shredded Cheese (optional)


1. Cook ground beef in 3 quart saucepan over medium-high heat until beef is brown; Drain. Set aside and cook onions and garlic in same pot on medium-high heat, until onions are translucent. Return beef to pot.

2. Stir in remaining ingredients except tomato paste and beans. Heat to a boil; Reduce heat to low.

3. Add tomato paste, stir until completely combined. Add beans and stir in. Cover and simmer for 1 hour, stirring occasionally, until to desired thickness. Serve in a bowl with shredded cheese if desired.

Labels: , , , , , ,

Monday, November 26, 2007

A Daring Baker I Am!

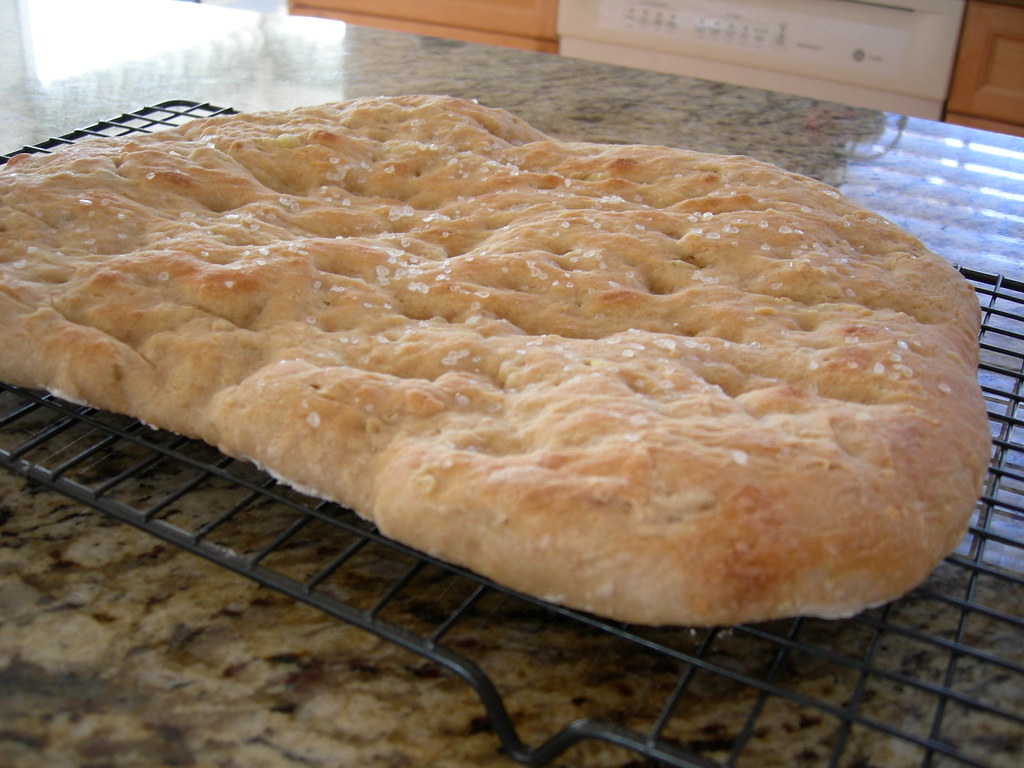
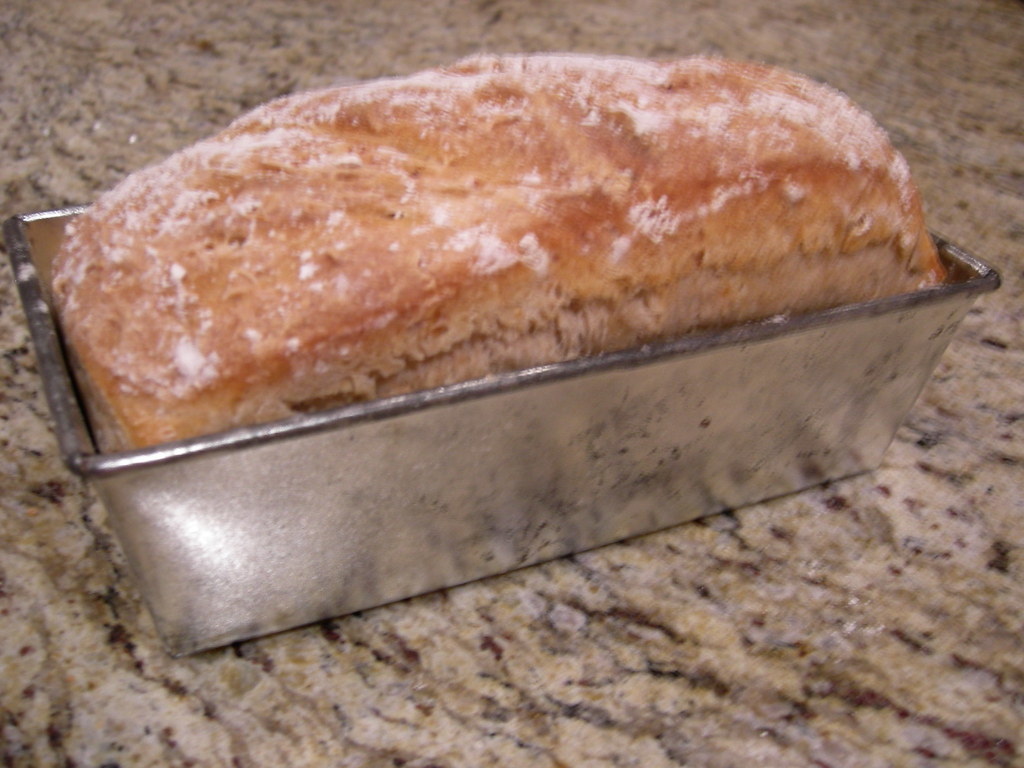
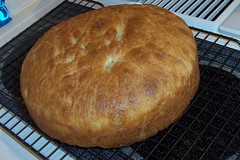
So I've seen this cute little logo on lots of blogs for months now and always wondered what it was. Turns out there's this really cool group called the Daring Bakers. And now I'm one too! I've completed my first DB challenge and really enjoyed it. The assigned recipe for November was potato bread. I've baked a few loaves of yeast bread here and there, but I've got minimal experience especially when it comes to the whole kneading by hand thing. I find the thought of kneading by hand to be the most intimidating part of bread baking. I always worry that I won't have enough flour, or I'll have too much and I won't knead enough, or I'll knead too much and the bread will be tough. Well I decided to suck it up and just give it a try.

focaccia potato bread


The bread was good, but I didn't love it. Maybe that was due to my lack of experience or maybe I would just prefer a different type of bread? Your guess is as good as mine. I chose to make a standard loaf of "sandwich bread" and a loaf of focaccia, and I was most pleased with the focaccia.

potato bread


I'm open to any tips or suggestions you experienced bread bakers have. Stay tuned for next month's Daring Baker challenge!

Labels: , , , ,

Tuesday, November 20, 2007

Yummy Spicy Goodness

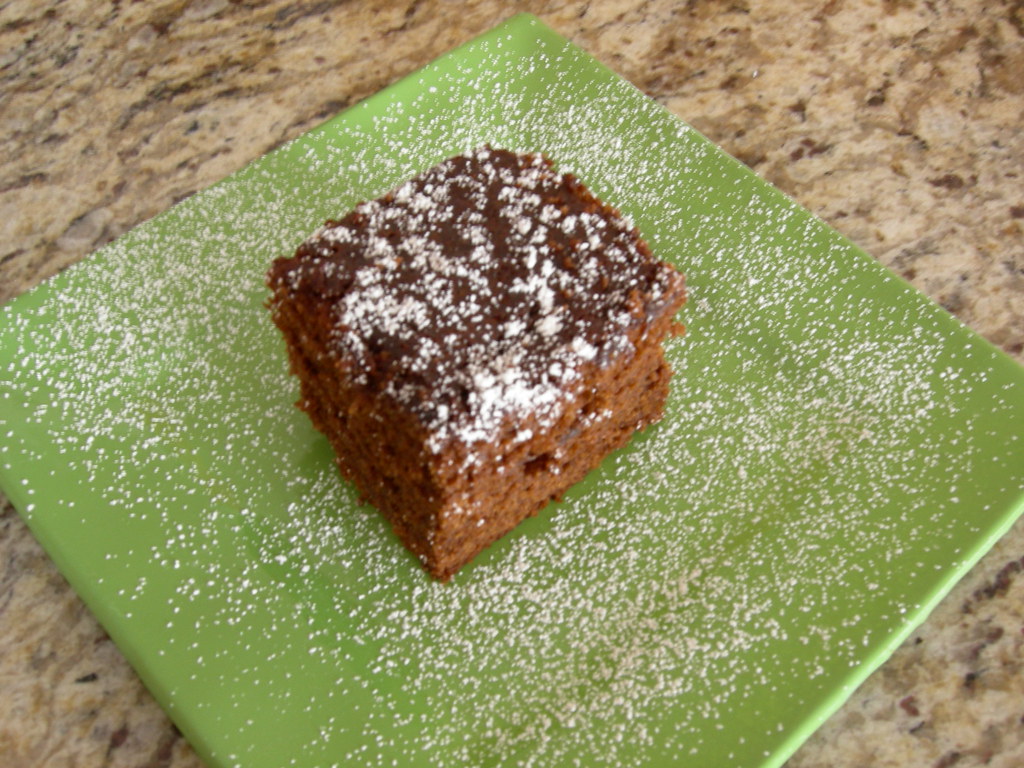
Once the Halloween decorations are taken down and we begin talk of turkey my food cravings change, as do my baking habits. I begin to crave warm, hearty stick to your ribs comfort foods. And I put the chocolate chip cookie recipe aside for a while. I put the brownie and cupcake making on the back burner momentarily, and I start making gingersnaps, soft and chewy they are sooo good! Come Thanksgiving and my house is filled with the wonderful smell of sweet potato pies. And lest we not forget my famous boiled oatmeal cookies, and there's always a batch of gingerbread or two in there somewhere. I got a jumpstart on the gingerbread baking this week. I don't have a tried and true recipe yet so I went to my standby, allrecipes. Overall I was pretty pleased with the recipe. It made a nice moist gingerbread with a good flavor, I think the spice amounts could benefit from being tweaked. I also prefer my gingerbread with lemon sauce, but I thoughtlessly forgot to buy lemons, and my craving wouldn't allow me to wait for the sauce so I decided to take my gingerbread straight up this time.

Old Fashioned Gingerbread


Old Fashioned Gingerbread

1/2 cup white sugar
1/2 cup butter
1 egg
1 cup molasses
2 1/2 cups all-purpose flour
1 1/2 teaspoons baking soda
1 teaspoon ground cinnamon
1 teaspoon ground ginger
1/2 teaspoon ground cloves
1/2 teaspoon salt
1 cup hot water

Preheat oven to 350 degrees F (175 degrees C). Grease and flour a 9 inch square pan.

In a large bowl, cream together the sugar and butter. Beat in the egg, and mix in the molasses.

In a bowl, sift together the flour, baking soda, salt, cinnamon, ginger, and cloves. Blend into the creamed mixture. Stir in the hot water. Pour into the prepared pan.

Bake 1 hour (I found mine was done after baking for approximately 35 minutes.) in the preheated oven, until a knife inserted in the center comes out clean. Allow to cool in pan before serving.

Labels: , , , ,

Friday, September 07, 2007

A Chip Off The Ol' Block

Salsa is such a great summer food isn't it? I crave chips and salsa year round, but all those fresh veggies of summer just make me think about and crave it that much more during summer. It's not a constant craving though, and I think that is in large part due to my very specific guidelines for what makes for a GOOD salsa.

I love fresh salsa. Like I said, I'm pretty picky though. I've tried many, many varieties of store bought salsa, and the stuff from the jar just doesn't get it for me. Maybe there's a brand out there I haven't tasted yet that would suit me, if so I'd love to find it. I have found a few brands in the refrigerated section that that I liked. What makes a winning salsa to me? The fresh, natural flavor of simple ingredients: tomatoes, onion, peppers, cilantro and a little lime. Texture is a huge thing for me. I don't like chunky salsas, I want mine finely minced, almost pureed even. And nothing too spicy, I like a little bit of a kick, but nothing that makes me break into a sweat or leaves the outside of my mouth burning. That's just no fun!

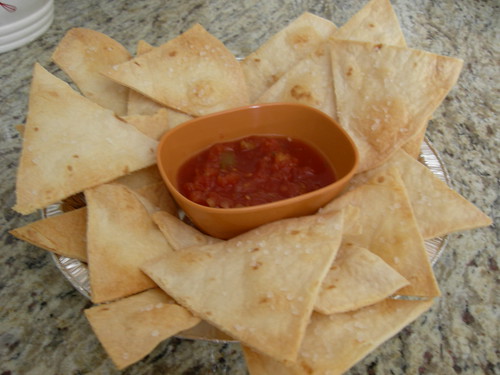
baked lime tortilla chips


One of my biggest culinary wishes is to master the art of making irresistable salsa and guacamole. I've tried making each one time and failed so badly with both that I've been intimadated by the idea of trying again. People swear it's so easy to make both, you just chop some ingredients up and throw them together. That's what I did, but somehow I found them both to leave so much to be desired it wasn't even funny.

Homemade tortilla chips? Those on the other hand I can whip up and willingly devour in a flash. I lucked up and found a totally tasty salsa on a recent shopping trip, so a batch of my homemade flour tortilla chips were in order. I love the restaurant tortilla chips that are loaded with salt and a hint of lime. If you haven't had them before and you've got a Qdoba Mexican Grill nearby, run, quickly and order up a batch. And eat some of their warm 3-cheese queso while you're at it. It's faaaantastic!

My homemade tortilla chips are hardly the same as those at Qboda - they're baked not fried, and the tortillas are much thicker, the ones at Qboda are paper thin. But mine are virtually guiltfree and still really good. Sometimes different is good right?


Baked Lime Tortilla Chips

4 10-inch flour tortillas
2-3 Tbsp vegetable oil
juice of 1 lime
kosher salt

Preheat oven to 350 degrees. Slice tortillas into 8 wedges and place on lined baking sheet. Brush top side of tortilla wedges lightly with oil. Drizzle evenly with lime juice and sprinkle with salt. Bake for 5 to 7 minutes. Rotate baking sheet and bake for an additional 5 minutes, or until tortillas start to crisp but do not turn brown.

Labels: , , , , ,

Tuesday, September 04, 2007

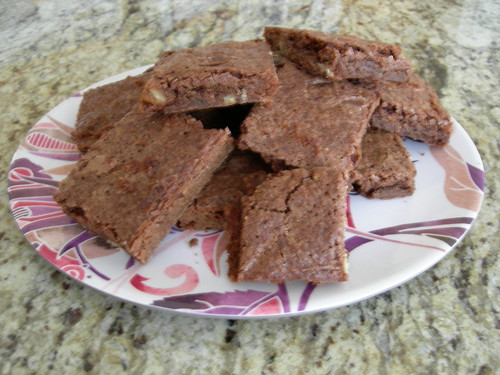
Best Brownies? Or is there one better?

Continuing my search for my ideal brownie I tried out another recipe, this time for Allrecipes' Best Brownies. I often turn to the site when looking for a new recipe because I find the reader reviews and ratings to be helpful. But are they always accurate? I'm not so sure they are. Ever the chocolate lover, how did these brownies turn out? Well, for over 1,000 allrecipes members they are pretty fantastic, racking up a whopping 4 1/2 stars. The important question, how did these brownies rate with me? The recipe was easy enough and by all accounts a success. Still they are not my ideal brownie. The batter was nice and thick like a brownie batter should be, but the brownies themself were very thin. I also thought they were pretty sweet, which I'm not so much complaining about, but they weren't chocolatey enough for me. When I think of brownies I think of deep rich chocolate flavor, with a fudgy texture. This recipe falls somewhere nicely in the middle of cakey and fudgy, which was fine by me, but I definitely need a richer chocolate flavor. I generally don't add icing to my brownies, and since these were so thin I skipped icing. I'll likely give this recipe a shot again since the batter was mixed up and in the oven in less than 15 minutes, but next time I'll double the amount of batter used for the pan size and I'll use dutch process cocoa powder in place of regular cocoa powder.

"The Best" Brownies


Reviews: 1,611 Rating: 4 1/2 stars

Best Brownies

1/2 cup butter
1 cup white sugar
2 eggs
1 teaspoon vanilla extract
1/3 cup unsweetened cocoa powder
1/2 cup all-purpose flour
1/4 teaspoon salt
1/4 teaspoon baking powder

3 tablespoons butter, softened
3 tablespoons unsweetened cocoa powder
1 tablespoon honey
1 teaspoon vanilla extract
1 cup confectioners' sugar

Preheat oven to 350 degrees F (175 degrees C). Grease and flour an 8 inch square pan.

In a large saucepan, melt 1/2 cup butter. Remove from heat, and stir in sugar, eggs, and 1 teaspoon vanilla. Beat in 1/3 cup cocoa, 1/2 cup flour, salt, and baking powder. Spread batter into prepared pan.

Bake in preheated oven for 25 to 30 minutes. Do not overcook.

To Make Frosting: Combine 3 tablespoons butter, 3 tablespoons cocoa, 1 tablespoon honey, 1 teaspoon vanilla, and 1 cup confectioners' sugar. Frost brownies while they are still warm.

Labels: , , , ,

Sunday, August 26, 2007

Rachael Ray's Gigi's Apple Cake

Ok, I'm reaching into my archives with this one. I made this so long ago I can't even remember when, but for some reason I kept it a secret, never taking time enough to share it with y'all. Most people who know me know I'm not a Rachael Ray fan. I'm not a Rach-hater, I'm just not a Rach-lover. I do however really like her talkshow, and I love, love, triple lover her magazine, Everyday with Rachael Ray. I don't make too many of the recipes from the magazine, and I have yet to make a recipe from any of her shows, but I really dig the style of the magazine and Rach's talkshow.

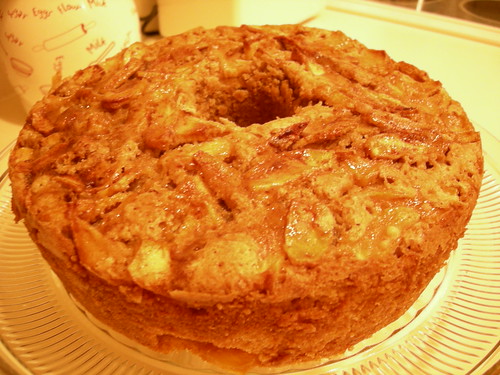
The recipes in the Sweet Spot section of the magazine always catch my eye and if I'm going to make one of the recipes from Everyday with Rachael Ray, that's 9 times out of 10 going to be the recipe. I found the recipe for Gigi's Apple Cake in the August/September issue. I have no idea who Gigi is, but the cake was gorgeous and sounded absolutely delicious. I love apples and the cake turned out great, nice and moist from the apples. My cake didn't turn out to look like the one in the magazine, but I'm sure it tasted just as good.

Apple Cake


Gigi's Apple Cake

1 cup canola oil, plus more for greasing
2½ cups all-purpose flour, plus more for dusting
2 teaspoons baking powder
3 teaspoons ground cinnamon
6 Granny Smith apples (about 1¼ pounds)-peeled, cored and thinly sliced
2¼ cups granulated sugar
4 large eggs
1/3 cup orange juice
2 teaspoons pure vanilla extract

Preheat the oven to 350°. Grease and flour a 12-cup Bundt or tube pan. In a medium bowl, combine the 2½ cups of flour with the baking powder and 2 teaspoons of the cinnamon. In a large bowl, toss the apples with ¼ cup of the sugar and the remaining 1 teaspoon of cinnamon and set aside.

In a standing mixed fitted with a paddle attachment, beat the 1 cup of oil with the eggs, orange juice, vanilla and the remaining 2 cups of sugar on medium speed for 1 minute. Add the flour in 3 batches, mixing until just combined. Add the apples and stir to combine. Transfer to the pan, leaving about an inch at the top, and bake until golden and a toothpick inserted into the cake comes out clean, about 1½ hours. Let the cake cool in the pan for about 30 minutes before unmolding it onto a rack to cool completely.

Labels: , , , , , ,

Thursday, August 16, 2007

Two Years Strong and Going

I'm a few days late celebrating the two year anniversary of the launch of my beloved blog. Okay, six days to be exact, but much better late than never right? I'm kind of sad that life is often so busy and rushed that milestone dates often slip my mind until after the fact. But I suppose a blog anniversary isn't quite the milestone that a wedding anniversary or a loved one's birthday is, so this isn't quite a tragedy.

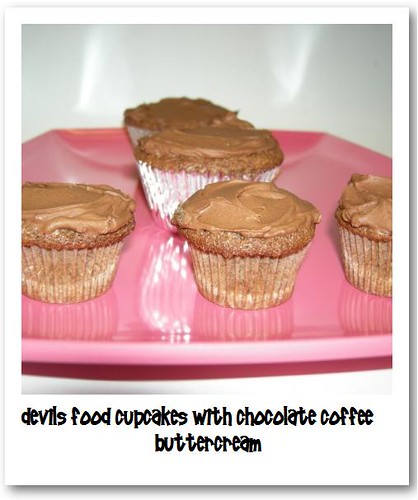
But, I digress. What better way to celebrate a birthday, anniversary or other special event than with cupcakes? Devils food cupcakes with chocolate coffee buttercream..I made these cupcakes for the first time last year as part of an article for A Nice Cuppa. The recipe comes from the book 500 Cupcakes. The book lives up to the name, but to my disappointment, most of those 500 cupcake recipes are slight, sometimes very slight, variations on a basic recipes.

After hitting the two year mark with my blog it makes me wonder what lies ahead. I hope that my blog will be here for many years to come, that my skills in the kitchen will continue to grow and grow. That I will be able to build party planning and catering business into everything I dream of. Only time will tell, but you my dear readers, I thank for the last two years with me, even during the slow times when it seemed that I may have disappeared.

Devils Food Cupcakes with Chocolate Coffee Buttercream


Devils Food Cupcakes

2 c self rising flour
1 tsp baking powder
1 cup brown sugar
2 sticks butter, softened
2 eggs seperated
3 1/2 oz semisweet choc, melted
1 tsp vanilla
1/2 cup milk

Preheat oven to 350 degrees. Line 18 medium size muffin cups with paper liners. Sift flour & baking powder together in medium bowl, set aside. In bowl of mixer, cream together sugar and butter. Add egg yolks, beat well. Add melted chocolate & vanilla, mixing well. Add flour & milk alternately, beating well with each addition. Beat egg whites in medium bowl until soft peaks form and gently fold into batter.

Spoon batter into cups filling 2/3 full. Bake for 20 minutes. Remove pans from oven & cool 5 minutes. Remove cupcakes from pan & cool on rack.

Chocolate Coffee Buttercream

1 stick butter, softened
1 tbsp milk
3 1/2 oz semisweet choc, melted
1 tsp vanilla
2 c confectioners sugar, sifted
1 tsp hot coffee + 2 tbsp instant coffee granules

Beat in milk until smooth. Stir in melted chocolate & vanilla. Beat in confectioners sugar until thick and creamy. Stir in cooled coffee mixture. Spread over cupcakes. Store unfrosted in airtight container for up to 2 days or freeze up to 3 months.

The original frosting recipe called for 3/4 c confectioners sugar, but the consistancy seemed a bit thin, and honestly I like a generous amount of frosting on my cupcakes. The cupcakes themselves were pretty good, but not as moist and dense and I like. And considering that I had to seperate the eggs, beat the egg whites then fold them in, I think next time I would opt to use another cupcake recipe.

Labels: , , , , , , ,

Monday, August 13, 2007

Puttin some 'nanas to good use

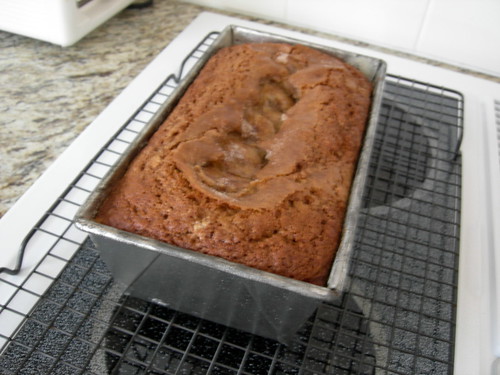
Who wants some banana bread? I decided I did! I make banana bread from time to time usually trying out some random recipe in hopes of finding the one that will end my search. This is supposedly a Paula Deen recipe, but I'm not absolutely sure. I looked on the FoodNetwork website and didn't find it there. I made a few changes - the addition of cinnamon in the batter, a few slices of bananas on top for appearance and some cinnamon sugar sprinkled on top. Yum, doesn't cinnamon make almost everything better?

This would be perfect with some nuts added in to make banana nut muffins...one of my favorite breakfast treats!

Banana Bread


Bodacious Banana Bread

1/2 cup (1 stick) butter, at room temperature
1 cup sugar
1/2 teaspoon salt
2 eggs
1 teaspoon vanilla extract
1-1/2 cups all-purpose flour
1 teaspoon baking soda
1 teaspoon baking powder
1 teaspoon cinnamon
3 ripe bananas, mashed (reserve 4 or 5 slices to add on top once the batter is in the pan)
1-2 Tbsp. cinnamon sugar


Preheat the oven to 350. Grease a 9x5 loaf pan. In a mixing bowl, combine the butter and sugar; mix well. Add the salt, eggs, vanilla, flour, baking soda, baking powder, cinnamon and bananas. Mix well. Pour the batter into the prepared pan, top with reserved banana slices and sprinkle with cinnamon sugar mixture. Bake for 50 minutes, or until wooden skewer inserted in center of loaf comes out clean. Cool 5 minutes and remove from pan to cooling rack.

Variation: For muffins fill regular size muffin cups 2/3 full, top each with a slice of banana and sprinkle with cinnamon sugar mixture. Bake for 25-30 minutes, until wooden skewer inserted in center comes out clean. Cool 5 minutes and remove from pan to cooling rack until completely cooled.

Labels: , , , , ,

Sunday, August 12, 2007

Summertime and the living is easy

Summer is a time for easy living and carefree fun. It's also hot as heck, here anyway. I love summer not only for the beautiful, yet sweltering weather but for the amazingly fresh and delicious fruits and vegetables. In my family we're no longer blessed with the bounty of fresh homegrown vegetables: yellow crookneck squash, cucumbers, juicy red tomatoes, new potatoes, butterbeans and string beans as our greenthumb gardner, my beloved Pop, passed away several winters ago. Summers are still beautiful and my favorite season, but they just aren't the same anymore.

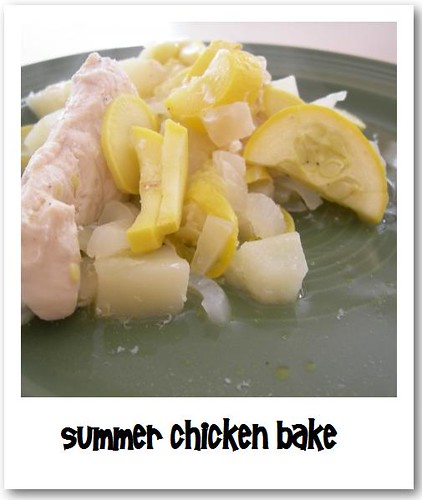
There is no more going to visit Nana and Pop, finding Pop hidden deep in his garden picking pans full of fresh veggies while Nana is inside canning tomatoes and beans or whipping up something fresh and delicious for dinner. I will always have the vivid memories of those summers to cherish for the rest of my life, along with a delicious recipe passed down by Nana for her Summer Chicken Bake. I remember it like it was yesterday, I think it was probably my eighth birthday dinner. We strayed from the norm of grilling burgers and she created this amazing dish for the first time. I've loved it ever since, and each summer look forward to making it myself. Preparing this recipe along with the others I've learned from Nana helps me feel like she's still here with us, and reminds me that a part of her will always live on, not just in my memories, but in the wonderful and beautiful parts of her that I see in myself.

Preparing the Summer Chicken Bake is super easy, with the hardest part being the wait for it to cook. Patience is a virtue that I do not have, I admit it. My measurements are a rough guess, and can be easily changed to suit your taste and the number of mouths you are feeding.

summer chicken bake


Summer Chicken Bake

1 lb skinless chicken breast
1 large yellow onion
1 lb yellow squash
2-3 medium size baking potatoes (or equivalent amount in weight of new/red potatoes)
salt and pepper to taste
1/4 - 1/2 stick butter

Preheat oven to 350 degrees. Slice vegetables into equal thickness slices. Starting with potatoes, layer vegetables and chicken in casserole dish. Season with salt and pepper. Cube butter into small pieces and scatter over top of chicken and vegetables. Cover with tinfoil and bake for 45 to 50 minutes. Uncover and bake for another 10 to 15 minutes, until vegetables are cooked and tender. Remove from oven and cool for 5 minutes.

*Can also be cooked on the grill by layering vegetables and one piece of chicken on large piece of tinfoil. Then season with salt and pepper and top with small pat of butter. Wrap foil to form a pouch. Place in middle of grill, and cover. Unfortunately I am not the grill master of the family and have not prepared this recipe on the grill myself, so I have no idea what the cooking time on the grill is. Sorry!

Labels: , , , , ,

Thursday, August 09, 2007

Chewy Chocolate, Chocolate Chip Espresso Cookies

So I don't know what it's like where you my dear readers are, but here it's HOT, HOT, HOT. We broke record temps yesterday and it's looking like there's a good chance we will do so again today. It's even mid-afternoon yet and we've already reached 101 degrees. Guess what? With our southern humidity it feels like it's 104, but hey what's another 3 degrees when it's already over 100 right? It's more than I want to deal with!

With all this heat and the air conditioners working overtime the last thing I want to do is heat up the oven or turn the stove on, so I thought now would be the perfect time to reach into the archives and share some recipes from the past. Before my illness when I was still doing some freelance writing I tried out a recipe for chewy chocolate, chocolate chip espresso cookies from Short and Sweet: Quick Desserts with Eight Ingredients or Less by Gale Gand.. The cookies great. They were a delicious cross between a cookie and a fudgy brownie. And I loved the fact that the recipe brought together the flavors of chocolate and espresso - two of my faves!

I made a few minor changes to the recipe using instant espresso instead of regular finely ground espresso as called for. Gand offers the option of scooping the batter out onto the cookie sheets and freezing before baking, which I did. When opting not to freeze the cookies pre-bake the baking time is decreased to 5 minutes per the original recipe. Unless I wanted to eat my cookies with a spoon the bake time definitely had to be increased. My oven is pretty right on so if you skip the freezing step keep an eye on these yummy little cookies as they are baking.

If I closed my eyes while I was eating these, I'd swear I was eating the world's perfect fudgy brownie. Shaped like a cookie of course. If you like chocolate these are a must try. Be warned though, they are not for the faint of heart, so if you can't handle a good serious dose of chocolate use caution.

Chewy Chocolate, Chocolate Chip Espresso Cookies


Chewy Chocolate, Chocolate Chip Espresso Cookies

1 3/4 cups plus 3/4 cup semi-sweet chocolate chips
4 Tbsp unsalted butter
1/4 cup all-purpose flour
1/4 tsp baking powder
1/4 tsp salt
2 large eggs
3/4 cup sugar
1 tsp instant espresso powder (original recipe calls for 1 tsp finely ground espresso)

1. Mix together the flour, baking powder and salt, set aside. Melt the 1 3/4 cups chocolate chips and butter together in the microwave for 1 minute, stir and continue microwaving in 1 minute intervals until melted and smooth.

2. In a mixer fitted with a whisk attachment, mix the eggs and sugar until light and fluffy. Add the instant espresso powder and mix, then mix in the chocolate mixture. Mix in the dry ingredients and the remaining 3/4 cup chocolate chips. Let the dough firm up in the refrigerator for 15-30 minutes.

3. Scoop the dough by heaping tablespoon onto a sheet pan and freeze. If you don’t have room in your freezer for a sheet pan, simply scoop the cookies into a smaller pan, then freeze, making sure the cookies do not clump together.

4. When ready to serve, heat the oven to 375 degrees. Without thawing the cookies, arrange them 2 inches apart on a sheet pan that has been generously buttered or is lined with parchment paper. Bake for 7 minutes. Serve warm.

*Note: You can also bake the cookies without freezing them, to do this reduce the baking time to 5 minutes.(I found the cookies needed a longer bake time than 5 minutes.)

Labels: , , , , ,

Thursday, May 10, 2007

Tasty Tiramisu

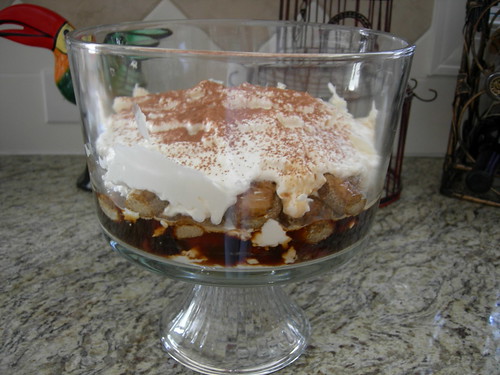
Love tiramisu? I do! I can hardly resist the stuff, but until the other day I've never made any myself. I found an easy and tempting recipe in Everyday Food's gorgeous new cookbook Great Food Fast. It only took me about 20 minutes to make the tiramisu, add to that an hour to chill and it couldn't have been much easier. Not to mention this version required very few ingredients so if you're looking for an easy, inexpensive dessert to wow guests with at your next dinner party this might just be it.

Easy Tiramisu


Easy Tiramisu

3 Tbsp. instant espresso powder
3 Tbsp. boiling water
1 package (8 oz) reduced-fat cream cheese
3/4 c. heavy cream
1/3 c. sugar
2 packages (3oz each) soft ladyfingers
Unsweetened cocoa powder, for dusting

1. In a medium heat-proof bowl, mix the espresso powder with the boiling water until dissolved. Add 1 1/2 c. cold water;set aside.

2. With an electric mixer, beat the cream cheese with the heavy cream and sugar until light and fluffy.

3. Spread a few Tbsp. of the cream-cheese mixture in the bottom of a 2-quart serving dish. Seperate the ladyfingers. One by one, dip a third of the ladyfingers in the espresso, then arrange in the bottom of the serving dish. Spread with a third of the cream-cheese mixture. Repeat twice with the remaining ladyfingers, espresso and cream-cheese mixture. The tiramisu can be refrigerated, covered for up to 1 day.

4. Dust with cocoa just before serving.

Try it out and let me know what you think!

Labels: , , ,

Friday, May 04, 2007

Back In Action

Hey y'all! As I sit here writing this it really sinks in to me how long it has actually been since I blogged - since I've been able to blog. I haven't abandoned my blog out of sheer laziness or even lack of desire to share recipes. I've been ill - I'm not talking a bad case of the flu ill. I spent months in the hospital, sometimes not knowing if I would make it home, and as I finally turned the corner on the road to recovery, I spent weeks aching to be home, wondering when the day would finally come. I don't want to go into further details, but believe me when I say I thank the Lord for each new day - now more than I ever have. And I'm so glad to be back on my feet able and wanting to be in the kitchen.

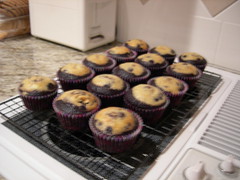
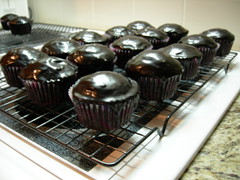
Last Friday night was the most fun I've had in the kitchen in a very long time. A friend came over so I could help her bake cupcakes for her boyfriend's birthday party. I can proudly say I'm often the person my baking-challenged loved ones turn to for help when they want to show lovin' with something from the oven. The verdict from the party-goers was that our Cream Cheese-Stuffed Chocolate Cupcakes from "Chocolate & Vanilla" by Gale Gand, were a hit. We certainly enjoyed them during our tastetest! The cupcakes were incredibly moist and rich with chocolatey goodness. My only complaint was the tiny amount of cream cheese filling in each cupcake. I would definitely repeat this recipe, but next time I would double the cream cheese filling recipe. The frosting recipe made a HUGE and I do mean huge batch. We had a ton leftover.

Cream-Cheese Stuffed Chocolate Cupcakes - batterCream-Cheese Stuffed Chocolate Cupcakes - fresh from the oven


Try these out and let me know what you think!

Cream-Cheese Stuffed Chocolate Cupcakes - iced and ready to eat!


Cream Cheese-Stuffed Chocolate Cupcakes

for the filling
4 oz. cream cheese, softened
1 large egg yolk
1 tsp. vanilla extract
1/3 c. sugar
2/3 c. semi-sweet chocolate chips

for the cupcakes
3 c. all-purpose flour
2 c. sugar
1/2 c. cocoa powder, preferably Dutch-processed
2 tsp. baking soda
1 tsp. salt
2 c. hot water
3/4 c. vegetable oil
2 tsp. white vinegar
1 Tbsp. instant cofee crystals (optional)
1 Tbsp. vanilla extract

for the chocolate frosting
8 Tbsp. unsalted butter
1 1/2 c. superfine sugar
1 1/2 c. cocoa powder, preferabley Dutch-processed
Pinch of salt
1 c. heavy cream
1 tsp. instant coffee crystals (optional)
1/2 c. sour cream
1 1/2 tsp vanilla extract

To make the filling, in a mixer fitted with a paddle attachment, beat the cream cheese until fluffy, about 5 minutes, scraping the bowl often, and then blend in the egg yolk and vanilla. Add the sugar and chips and mix for a few seconds on low to fold them in.

Preheat the oven to 350. Line 2 (12 cup) muffin tins with cupcake paper liners.

To make the cupcakes, in a large bowl, whisk together the flour, sugar, cocoa, baking soda, and salt. In a large measuring cup, combine the water, oil, vinegar, instant coffee, and vanilla. Pour the mixture into the dry ingredients and whisk until just combined (don't worry if there are a few lumps).

Fill each cupcake liner two-thirds full of batter. Drop a heaping tsp. of the cream cheese filling into the center of each.

Bake for 30 to 35 minutes, or until the cupcakes have puffed on top and are firm to the touch. Remove from the oven and let cool completely in the tins.

To make the frosting, melt the butter in a large saucepan. Stir in the sugar, cocoa, and salt. The mixture might look grainy or sandy and this is fine. Whisk the cream and instant coffee into the cocoa mixture and cook over low heat, while stirring to dissolve the sugar grains. The mixture should get hot to the touch but never simmer or boil. Remove from the heat and stir in the sour cream and vanilla. Let cool until the frosting thickens an becomes spreadable, about 1 hour. If it seems too thin, stir in some powdered sugar.

Remove the cupcakes from the tins. Spread the frosting on the tops of the cupcakes.

Labels: , , , ,

Saturday, January 14, 2006

They call her the Queen of Hearts

Waaaay Early V-day cookies


Love is in the air..

Nope, it has nothing, and I mean nothin' to do with a man. It's all about the cookies. "Cookies?" you ask. Yes, colorful, sugary, heart-shaped ones to be exact.

With a name like "No Fail Sugar Cookies" I had my doubts. But they are everything the name claims them to be and more. I've got a drawer FULL of under-used cookie cutters and I just ordered some new ones, so expect more great things outta this recipe, which can be found at KitchenGifts.com. When you try this recipe, I HIGHLY recommend that you follow her hints about dividing the dough into about 3-4 parts and rolling each part between wax paper before chilling. It's so not nearly as messy and it's so much easier.

No-Fail Sugar Cookies

6 cups flour
3 tsp. baking powder
2 cups butter
2 cups sugar
2 eggs
2 tsp. vanilla extract or desired flavoring (I like almond myself)
1 tsp. salt

Cream butter and sugar until light and fluffy. Add eggs and vanilla. Mix well. Mix dry ingredients and add a little at a time to butter mixture. Mix until flour is completely incorporated and the dough comes together.

Chill for 1 to 2 hours (or see Hint below)

Roll to desired thickness and cut into desired shapes. Bake on ungreased baking sheet at 350 degrees for 8 to 10 minutes or until just beginning to turn brown around the edges. This recipe can make up to 5-dozen 3” cookies.

HINT: Rolling Out Dough Without the Mess -- Rather than wait for your cookie dough to chill, take the freshly made dough and place a glob between two sheets of parchment paper. Roll it out to the desired thickness then place the dough and paper on a cookie sheet and pop it into the refrigerator. Continue rolling out your dough between sheets of paper until you have used it all. By the time you are finished, the first batch will be completely chilled and ready to cut. Reroll leftover dough and repeat the process! An added bonus is that you are not adding any additional flour to your cookies.


The cookies are decorated with Royal Icing.

Royal Icing

3 3/4 cups sifted confectioners' sugar
3 T meringue powder
6 T warm water

Beat 4 to 5 minutes.
By hand, stir in optional flavorings and desired tints.

Labels: , , , , , ,

Saturday, January 07, 2006

Breakin' Bread

I absolutely LOVE bread..I'm a carb addict, honestly. I swear to you I could never do the Atkin's Diet, I wouldn't last a day without carbs. Breakfast/lunch usually consists of bagels, waffles, homemade muffins or something along those lines.

And, with that said..I made bread! From scratch, with yeast and everything. My goal is to learn the art of bread making. And I will be honest, that seems like no small feat to me. Bread baking has always been a bit intimidating to me. All that kneading, and rising..scary.

peasant boule


I used a recipe from The Weekend Baker, which by the way is a fantastic book. It seems to have lots of great recipes. The book is broken down into 3 sections, based on the amount of time you are able to devote to the recipes. The only thing I don't like about the book is there aren't a lot of photos. I'm super visual so great color photos are a HUGE must for me when it comes to cookbooks!

Peasant Boule
Makes 1 round loaf

3 1/3 cups all purpose flour
2 1/4 teaspoons (1 packet) instant yeast
2 tablespoons granulated sugar
1 1/2 teaspoons table salt
1 1/2 teaspoons baking powder
1 1/3 cups very warm water (between 115 & 125 degrees)
2 tablespoons unsalted butter melted
Optional: 2/3 cup finely chopped mixed fresh herbs

(recipe can be prepared by hand, however instructions are for using a stand mixer, as that's the method I used)

1. To mix in a stand mixer
In a large bowl of a stand mixer, combine flour, yeast, sugar, salt and baking powder. Whisk until well blended.

2. Check water temp; should register about 120 degrees on an instant-read thermometer. In order for the yeast to grow, the liquid needs to be between 115-125 degrees.

3. Fit mixer with dough hook. With the mixer on medium-low speed, slowly pour the warm water into the flour mixture and mix until the flour is completely incorporated. Add the chopped herbs (if using). Increase the speed to medium-high and beat until the dough is smooth and pulls away from the bottom and sides of the bowl, about 6 minutes. If the dough clumbs up the hook, stop the mixer and scrape the dough back into the bowl. Don't venture too far away while the dough is mixing, as the mixer might dance around on the counter because of the large amoutn of dough.

4. Let the dough rise
Scoop up the dough & shape into a ball. Lightly grease the bowl & pop the dough back into it. Cover the top securely with plastic wrap. Let the covered dough rise in a warm spot until doubled in size, about 45 minutes.

5. Generously butter an 8-inch round cake pan. Turn the dough out onto clean work surface (no need to flour; the dough is soft, but not sticky) and press down gently to deflate it. Shape dough into a rough 7 inches wide & place it, smooth side up, in the prepared pan. Generously brush with some of the melted butter. You may not need all the butter.

6. Let dough rise (no need to cover it) in a warm spot until doubled in size, about 25 minutes. It will fill the pan and will be light and airy to the touch.

7. Position an oven rack on the middle rung. Heat oven to 375 degrees. Brush dough with remaining butter.

8. Bake until the boule is well browned and sounds hollow when tapped, abuot 40 minutes. Transfer pan to a rack, tip the baked bread onto the rack, and remove the pan. Set the loaf right side up and let cool completely.


I was pretty pleased with the outcome. This is just a good basic crusty white bread. Definitely a good beginner recipe for others like myself who want to start baking bread. I was afraid of over kneading the dough and actually I think I should have kneaded it more because it was a bit sticky. So I'll try the recipe again and be sure to knead the dough more. The only other thing I'm not sure about is why the bread softened up after it had been sitting overnight. It's by no means soggy, but initially it was fairly hard and when tapped the loaf sounded hollow. I put the loaf in a large ziploc bag on the counter overnight and the next morning I noticed it seemed to have softened up. My muffins often do this too. I guess something to do with moisture, does anyone have any clues or suggestions? If so I would love to hear from you, please let me know.

Labels: , , , , ,

Friday, November 18, 2005

Hay, hay! It's Donna Hay

Time for another fun food blogging event!! This event is hosted by winosandfoodies and is centered around Donna Hay, the wonderful Australian domestic goddess, and her self frosting cupcakes. I absolutely LOVE her, so of course I was excited & jumped at the chance to participate in this event. She has a fabulous style. All her books & recipes are so elegantly simple, I just love that!


Image Hosted by ImageShack.us


So the idea of this event was that everyone participating follow the same basic recipe, either exactly how Donna Hay created it or add their own little twist to it. The recipe is featured in her book Modern Classics 2. The original calls for peanut butter as the "frosting", but as many bloggers before me have done I chose to use Nutella as my "frosting" and believe me I didn't go wrong with that decision. The cupcakes were delicious! I tried them out on my usual test group - the family, with the focus as usual on my niece & nephew. Not a crumb was intentionally left, but they are 3 & 6 years old, so a few crumbs ended up on the floor I'm sure..lol I sent the remainder of the cupcakes to school with my nephew the next day for his snack time and have been told they were a big hit, even with the teacher. I will definitely make these again, experimenting with different "frostings", I'm thinking I'll try apple butter next time. Maybe substitute brown sugar for some of the granulated sugar, maybe add some cinnamon. YUM-O! That would make a nice winter snack no?? I think yes!!


Image Hosted by ImageShack.us


My only complaint, I think I got a little generous with the Nutella in a few of the cupcakes because I notices a few of them split & looked a tad bit hollow in the very center. I think the Nutella is to blame for that.


Image Hosted by ImageShack.us


Recipe taken directly from Modern Classics 2.
Self-Frosting Cupcakes aka Nutella Cupcakes
(Originally known as Peanut Butter Cupcakes)

6 oz butter, softened
3/4 c. superfine sugar
3 eggs
1 3/4 c. all-purpose flour, sifted
2 tsp. baking powder
Nutella (can substitute jam or peanut butter)

Preheat the oven to 324 F/160 C.

Place very soft butter, superfine sugar, eggs, sifted all purpose flour and baking powder in a bowl and mix, using electric beaters, until smooth.

Line 12 muffin tins with paper cases.

Spoon in the mixture and swirl 1 1/2 tsp Nutella (can also use jam or peanut butter) through each cake. Bake for 20 minutes.

Makes 12 standard size cupcakes.

Labels: , , , , , ,

Thursday, August 25, 2005

Par-Tee Time


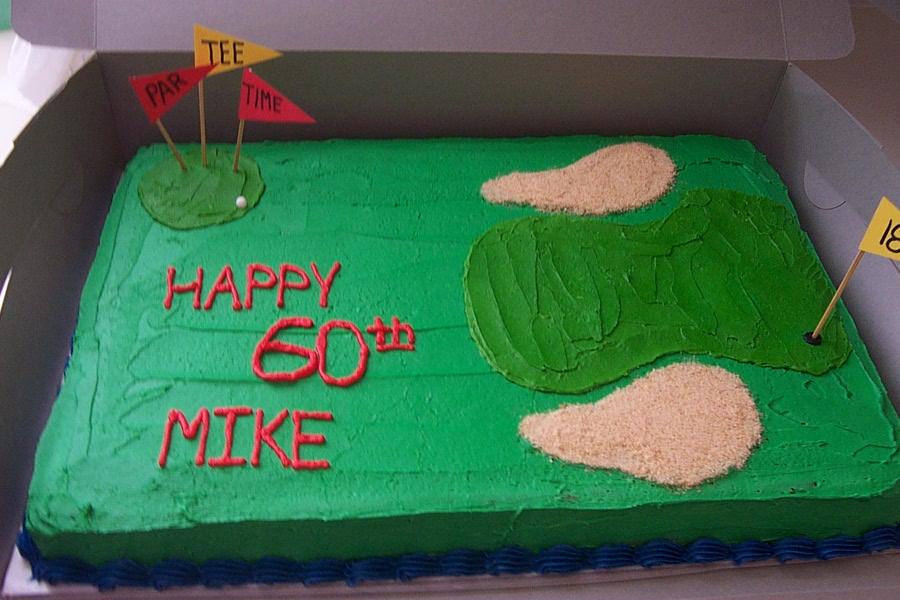
I present to you my latest creation!! I worked long & hard to come up with what I felt was just the PERFECT idea for this cake. First let me set the scenario for you...

My neighbor knows about my interest & efforts to start my own homebased bakery as she is often my guinea pig when I make breakfast muffins. Well, she was hosting a golf tournament over the weekend & asked if I would do a cake because one of the players was celebrating his 60th birthday - as you can see. So of course I jumped at the chance, as it's a great opportunity to get my name out to other people & a chance to pad my portofolio just a little bit more..lol Of course it doesn't hurt that it gave me a pretty good bit of decorating practice right?

After much work & standing over the cake for probably a good hour just staring, trying to decide if it was actually done or not..I was beaming from ear to ear with pride. As I always am when trying out a new recipe, which carelessly this was I was a bit nervous that maybe it didn't turn out right or that it just wouldn't suit the taste of my customer. Unfortunately this time I had reason to be nervous - come to find out the cake was very DRY!! I was crushed..absolutely crushed. I definitely should have tried the recipe before hand..but I made a cupcake out of the batter & sampled it. The flavor was pretty good, but yes it was a bit dry..but I figured once I iced the cake it would be fine. I finished the cake up about 24 hours before the party, so I figured it would be fine..shouldn't dry out too much before then right?? Well I guess with this cake that wasn't the case..Either that or maybe the cake dried out more than the cupcake.

Regardless I'm terribly disappointed & will NEVER use the Barefoot Contessa recipe she featured on her show for the "birthday cake with pink frosting". The recipe was called exactly that..well something close. The cake was really cute when she made it on the show & normally I really like her recipes so I felt pretty confident the cake would be atleast satisfactory, but in this case I was wrong. Maybe she just doesn't do good birthday cakes? lol Anyway I'm pretty bummed about that. I don't expect all my recipes to be great..you just have to test & toss sometimes..lol But the fact that I made something for someone else..especially because they were using it for a party & they were going to pay me for it..that makes it bother me even more. Bleh..maybe I'll be able to write a much more redeeming blog SOON!! lol

Labels: , , , , , , , , ,

Directory of Food/drink Blogs Food & Drink Blogs - Blog Top Sites