
Thursday, May 29, 2008

Easy Peasy Chicken Pot Pie

Mention comfort food and chicken pot pie immediately comes to my mind. When it comes to homemade chicken pot pie I grew up on biscuit topped chicken pot pie, which happens to not be my favorite, so it was quite a few years before I decided to make my own. I love a flaky buttery pie crust outside to surround the vegetables, tender chicken and creamy filling. I can never decide which part I like better though, the crust or the filling. It's okay to like them equally though isn't it?

I am a firm believer that I should make most everything from scratch atleast once. Notice, I said most everything. I came up with Easy Peasy Chicken Pot Pie totally off the cuff one day a couple years back and it was so good and so easy peasy, pun intended that I just haven't seen the need to mess with a good thing. If my Big, Bad Dad aka Mr. Picky Eater, who happens to be a huge chicken pot pie fan likes my easy peasy version enough to request it I must be doing something right.
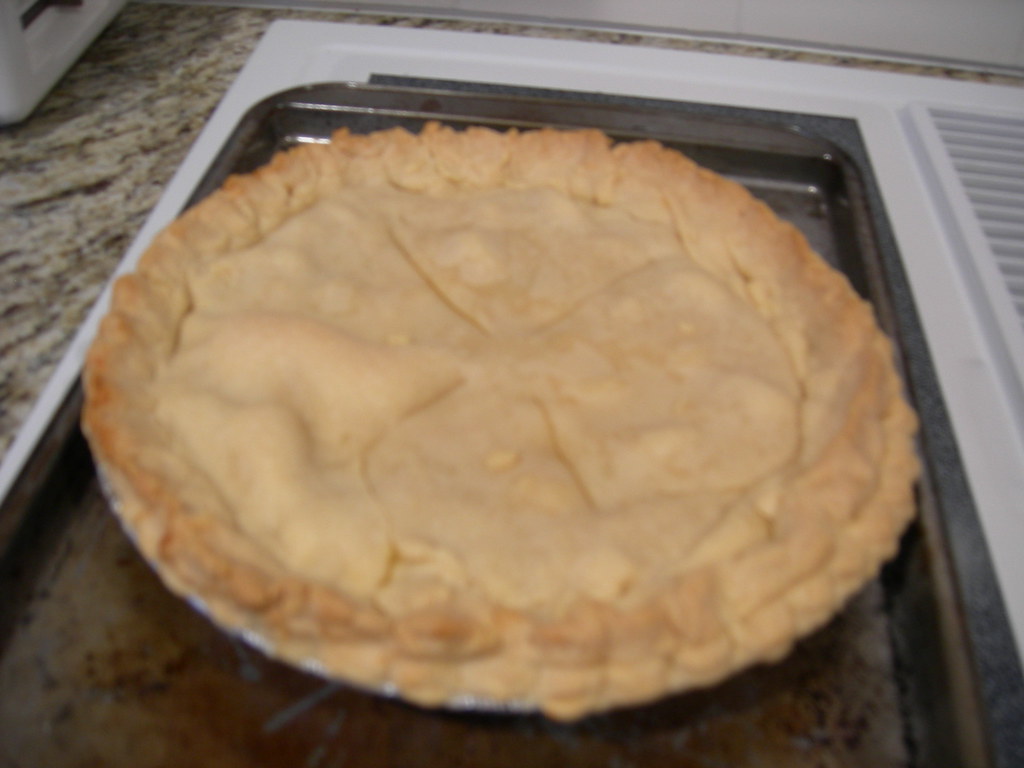
Chicken Pot Pie


Easy Peasy Chicken Pot Pie

1 package deep-dish pie crust (2 crusts)
1 can condensed cream of chicken soup
1 can mixed vegetables
1/2 cup milk
2 chicken breasts, cooked and cubed

Preheat oven as instructed on pie crust package. In a medium bowl, mix together soup, mixed vegetables, milk, and chicken. Stir until combined. Pour into pie crust. Place second crust on top. Pinch edges together. Cut several slits in center of crust.

Bake as directed for double crust pie, or until crust is golden brown.

*You may find that you need more or even a little less milk - some brands of mixed vegetables seem to have more liquid than others. Just make sure your filling is pouring consistency but not runny. I highly recommend placing the pie on a baking sheet before baking to avoid having the ingredients bubble over into the oven. Talk about a mess!

Labels: , , , , , , ,

Sunday, May 18, 2008

Good Tastin' and Good Lookin'

I'm pulling one from the archives with this recipe. Ask me why I haven't shared these muffins with y'all yet and I couldn't tell you, let alone could I explain why I haven't baked them since that first time way back when. Perhaps it's my curiousity and endless search for something better that's kept them from being a repeat. I love a good blueberry muffin. The sweetness mixed with the slight tartness of the blueberries. Paired with a cup of coffee you've got the perfect breakfast, but accompanied by a glass of milk you've also got a great afternoon snack.

I haven't eaten these blueberry muffins in a long while, but I don't know off hand of anyway they could be improved upon, unless you add a sprinkling of struesel on top, but that would take away from the picture perfectness of these "Really Good Blueberry Muffins". Maybe it's the baker in me paired with the blogger in me, but I find eminent satisfaction in those times when I bake something that is not only delicious but also makes you say, "Wow, that looks good!" And, I think this is one of those recipes.

Unfortunately, I have no idea the original source. But, I'm thinking I may have possibly gotten the recipe from The Ultimate Muffin Book, I can't swear to it though. Regardless, if you like blueberry muffins, give these a try.
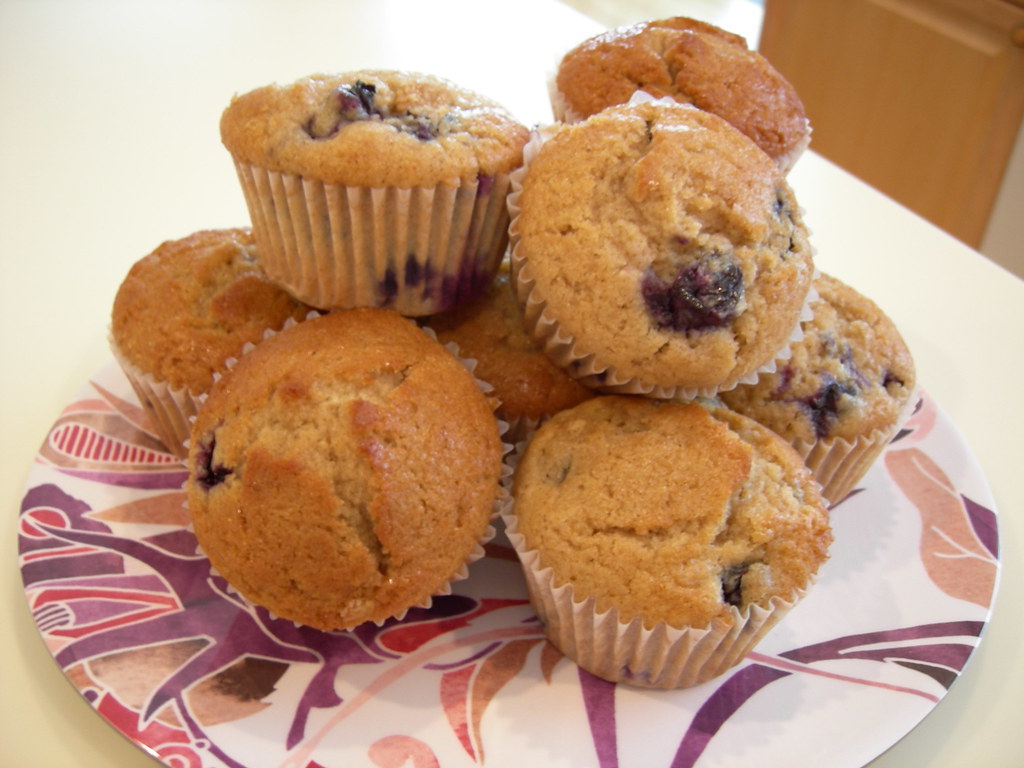
blueberry muffins


Really Good Blueberry Muffins

1/2 c. (1 stick) unsalted butter, softened
1/2 c. granulated sugar
1/2 c. packed brown sugar
3/4 c. milk
1 egg
1 3/4 c. flour
1 tsp cinnamon
2 1/2 tsp baking powder
1/2 tsp salt
1 c. blueberries
2 Tbsp flour

Sift together (1 3/4 cup) flour, cinnamon, baking powder and salt, set aside. Cream together butter and sugars. Beat in egg and milk until smooth. Add sifted dry ingredients and mix just until moist. Lightly toss blueberries with 2 Tbsp flour, and gently fold into batter. Fill well-greased or paper lined muffin tins nearly full.

Bake at 400 degrees for 20 minutes.

Labels: , , , , , ,

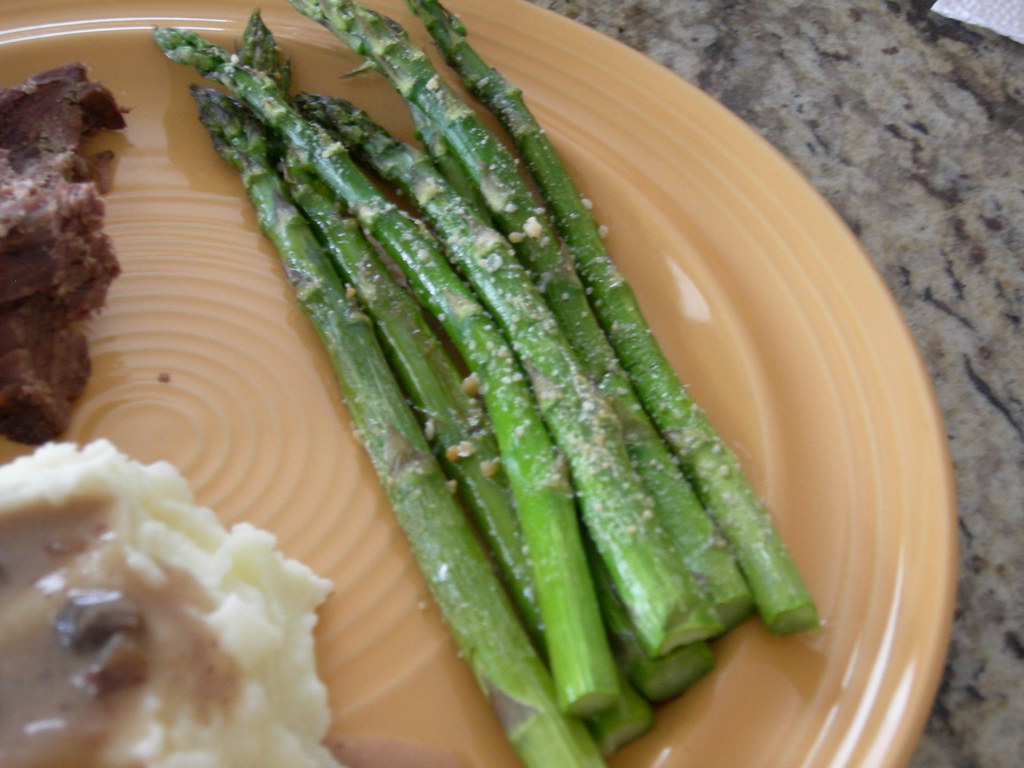
Oven Roasted Parmesan Asparagus

During my foray into the world of asparagus I was quickly smitten. I love vegetables, even as a kid I was never one that had to be forced to eat my veggies. I am admittedly a bit picky about which ones, and especially the preparation of said vegetables. For example, green beans. I love them, and eat them usually atleast once a week. Growing up, my grandfather always planted an adundance of them in his garden, so my grandmother regularly snapped and cooked fresh beans. Toward the end of their growing season she would even can them so we had plenty to last through the winter. The whole family loved them. Me? I ate them, only what was put on my plate the first go round, but when my Big Bad Dad cooked, I'd gladly go back for seconds on the green beans. Why? Because his green beans came from a can! Oh what shame my family must have felt. To this day I still pick canned green beans over fresh.

Let's get back on track though shall we? On to the asparagus, oh those green stalks of deliciousness. I'm taking full advantage of the fact that we're in the height of asparagus season right now, buying it everytime I see it on sale, which is pretty regularly as of late. Asparagus has such a pure and crisp flavor that you really should keep the preparation simple. It doesn't need to be weighed down with lots of spices and seasoning. I think it's at it's best lightly coated in a little olive oil, seasoned with salt and pepper, and roasted or grilled to perfection.

I grabbed a pound not too long ago while shopping and headed to allrecipes for a recipe I could use strictly as a guide for cooking temperature and length. Twenty minutes later, we were eating some seriously delicious oven roasted parmesan asparagus.

Parmesan Roasted Asparagus


Oven Roasted Parmesan Asparagus

1 pound thin asparagus spears
1 tablespoon extra virgin olive oil
1 ounce shaved Parmesan cheese
freshly ground black pepper to taste
1/4 cup balsamic vinegar, or to taste (I omitted this and it was totally NOT missed)

Preheat oven to 450 degrees F (230 degrees C).

Place asparagus on a baking sheet. Drizzle with olive oil, and toss to coat. Arrange asparagus spears in a single layer. Spread Parmesan cheese over asparagus, and season with freshly ground black pepper.

Bake 12 to 15 minutes in the preheated oven, until cheese is melted and asparagus is tender but crisp. Serve immediately on warm plates, sprinkling with balsamic vinegar to taste, if desired.

Labels: , , , , , ,

Saturday, May 17, 2008

Culinarily Obsessed Pizza Kitchen Open For Business

Everybody loves pizza right? Seriously, I don't think I know a single person who doesn't admit they love pizza. Even the picky eaters I know enjoy cheese pizza at the very least. Me? I can't say I enjoy cheese pizza, but I love it pretty much any other way. Top it with every meat you can think of, I'm in. Just pepperoni? I'm not shy to grab the first slice. You're offering up a supreme? Yum-o!

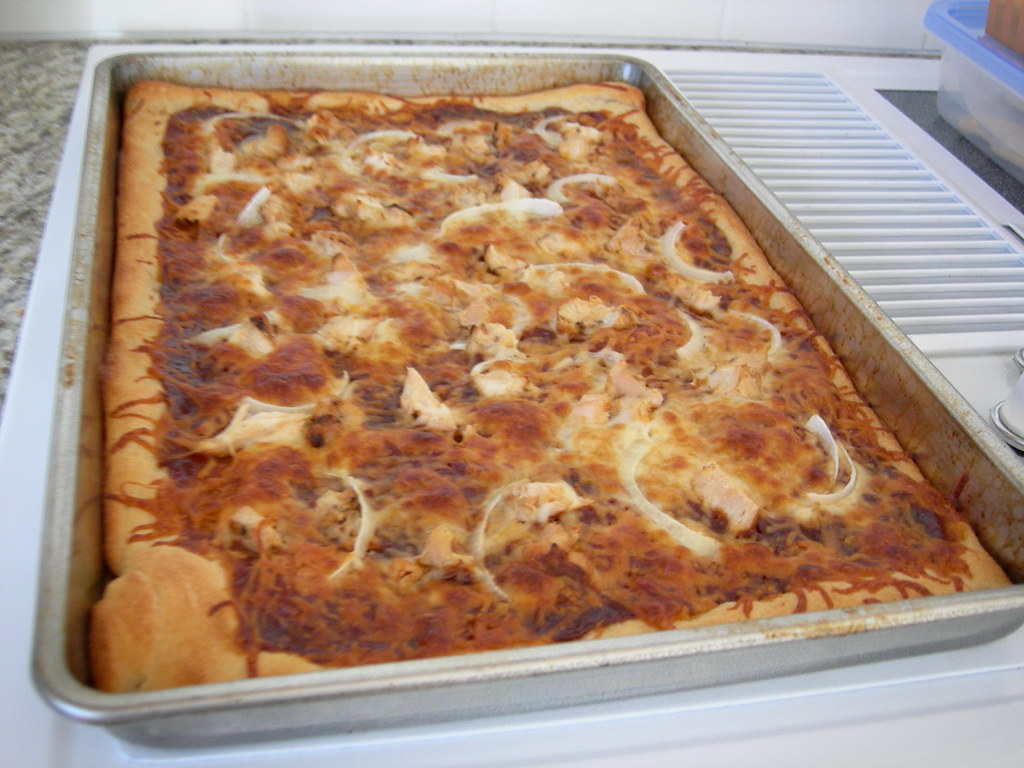
I'm a Carolina girl through and through so I know nothing of that whole NY vs Chicago thing, but give me a slice of each and I'll gladly do a taste test. My most favoritest kind though is hands down barbeque chicken pizza. I can't be sure but I think the famed California Pizza Kitchen may be to credit for the delicious creation. That's definitely where I tried and fell in love with the stuff. But since I live not so close to a CPK and the only one remotely local is in the mall, which everyone knows is a dangerous place for a woman, I figured it best to star making my own. I haven't tried my version next to the CPK version of barbeque chicken pizza, but from my mouth-watering memories my version tastes pretty darn close. The best part? Besides that I'm saving money and potentially serious credit card debt, my Barbeque Chicken Pizza is easy peasy.

Somehow even with my serious cookbook addiction I didn't know that California Pizza Kitchen had their own cookbook, but turns out they do. You can preview excerpts of the book on Amazon, so if you love pizza go check out what mouthwatering recipes you can make at home from The CPK Cookbook. And it turns out they've got a new cookbook geared toward family cooking due out in August called California Pizza Kitchen Family Cookbook

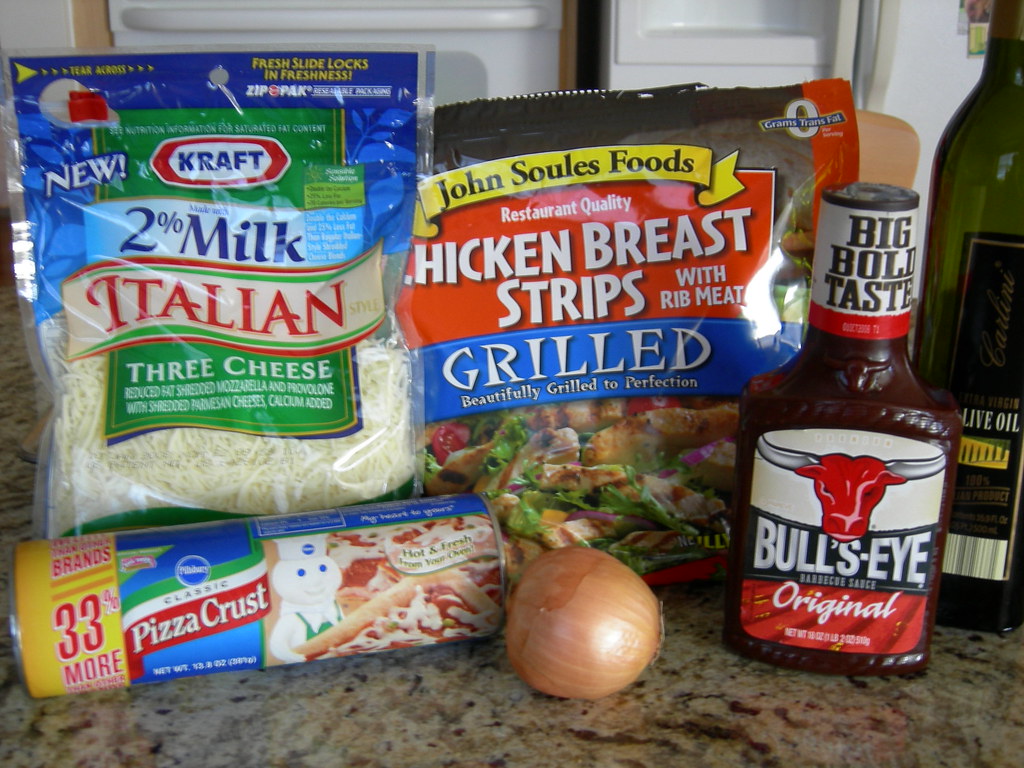
bbq chicken pizza ingredients
The ingredients


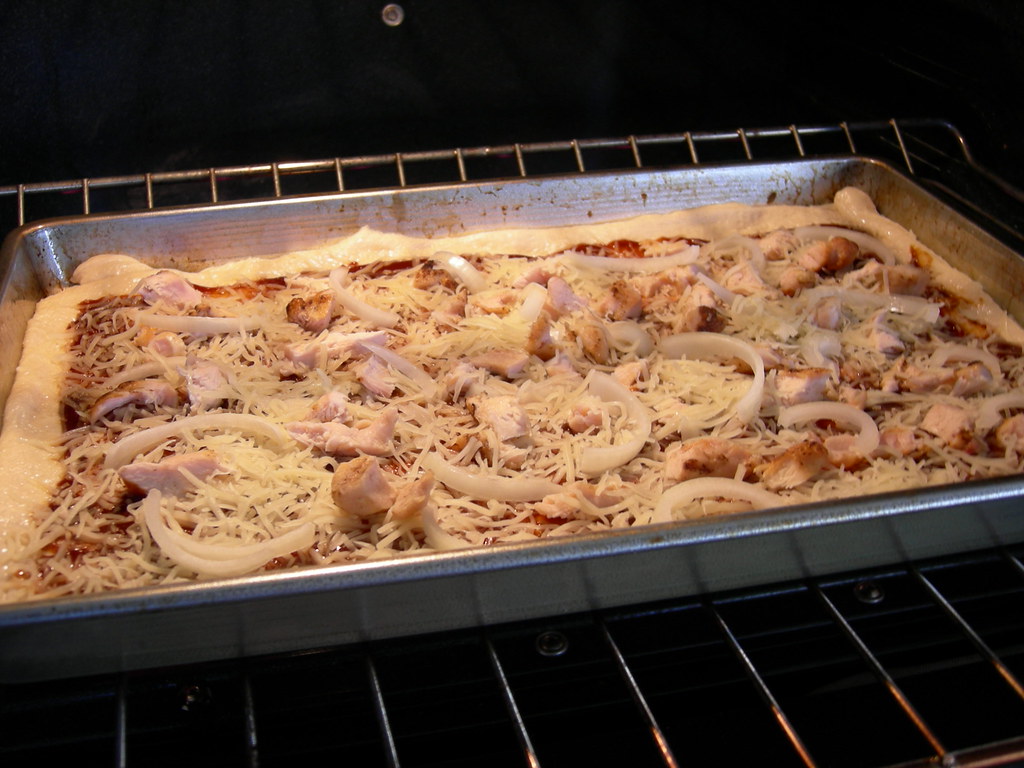
bbq chicken pizza
Going in the oven!


bbq chicken pizza
Can we dig in already?


BBQ Chicken Pizza

1 pre-made pizza dough (I suggest Pillsbury in with the refrigerated canned biscuits)
1/4 c bottled barbeque sauce (more or less to suit your taste)
1/2 of small thinly sliced onion
pre-cooked chicken, cut into bite size chunks
1-1 1/2 c shredded italian blend or pizza cheese

Preheat oven according to dough directions. Grease or spray pan with non-stick spray. Flatten dough into pan, pinching up slight edges. Spread barbeque sauce evenly onto dough using just enough for a thin layer, be careful not to go all the way to edge of dough. Spread chicken pieces evenly over sauced dough, top with cheese. Scatter onion over cheese. Bake according to dough package instructions. Allow to cool slightly before serving.

Ok, did I just use two Rachael Rayisms in one post? And I'm not even a fan! That should tell you how much I love this pizza.

Labels: , , , , , , , ,

Saturday, May 10, 2008

Whaddya Know Joe

Sloppy Joes


Growing up I loved Sloppy Joes. But what kid doesn't? The sweet, tangy, and sometimes extremely messy sandwiches were a rare treat around our house so when I did get to eat them, they were all the better. Since I'm the sometimes meal planner these days I try to sneak in much loved treats like Sloppy Joes. And, since I'm a big fan of searching out simple and highly rated recipes on Allrecipes I decided to skip the store-bought stuff and seek out a from-scratch recipe there when I got a recent craving.

As with most recipes on the site, there were several variations so I chose the one that sounded like it would suit me and the Big Bad Dad aka my Picky Eater best, which was Sloppy Joes II. I made slight changes to the recipe. After I got everything into the pan it just didn't seem to have enough juice for my liking, so I ended up using a total of 1 cup of ketchup and adding a half cup of water. We didn't really notice the flavor of the bell pepper, which was fine it didn't seem to be lacking because of it, but next time I'll either omit the pepper or make sure I just cut it into bigger chunks. These homemade Sloppy Joes were a little sweeter than the store-bought stuff, so if you think you might not be too keen on that I would suggest cutting back on the brown sugar a bit or adding a little extra mustard.

I always remember eating potato chips with Sloppy Joes growing up, and for some reason Ruffles stick out in my mind - don't ask because I really couldn't tell you why. Maybe I just prefer Ruffles to regular chips? Or not even Ruffles, Wavy Lays, yes, it's the Wavy Lays I prefer. But that's so beyond my point. I decided to take a healthier route but still wanted to serve some form of potato, so I seasoned and roasted some Russets.

MmmMmmm dinner was so good that night!

Sloppy Joes

1 pound lean ground beef
1/4 cup chopped onion
1/4 cup chopped green bell pepper
1/2 teaspoon garlic powder
1 teaspoon prepared yellow mustard
1 cup ketchup
3 teaspoons brown sugar
1/2 cup water
salt & pepper to taste

In a medium skillet over medium heat, brown the ground beef, onion, and green pepper; drain off liquids.

Stir in the garlic powder, mustard, ketchup, brown sugar, and water; mix thoroughly. Reduce heat, and simmer for 30 minutes. Season with salt and pepper.

Oven Roasted Potatoes

1 lb Russet potatoes, but into 1 inch cubes
Olive oil
seasoned salt to taste
sea salt to taste

Preheat oven to 425. Drizzle cubed potatoes with just enough oil to coat. Toast to coat evenly and place on non-stick baking sheet, sprinkle with salts and pepper.

Roast for 30-40 minutes or until tender and golden brown.

Labels: , , , , , , , , ,

Monday, April 14, 2008

A Pearl Of A Snack

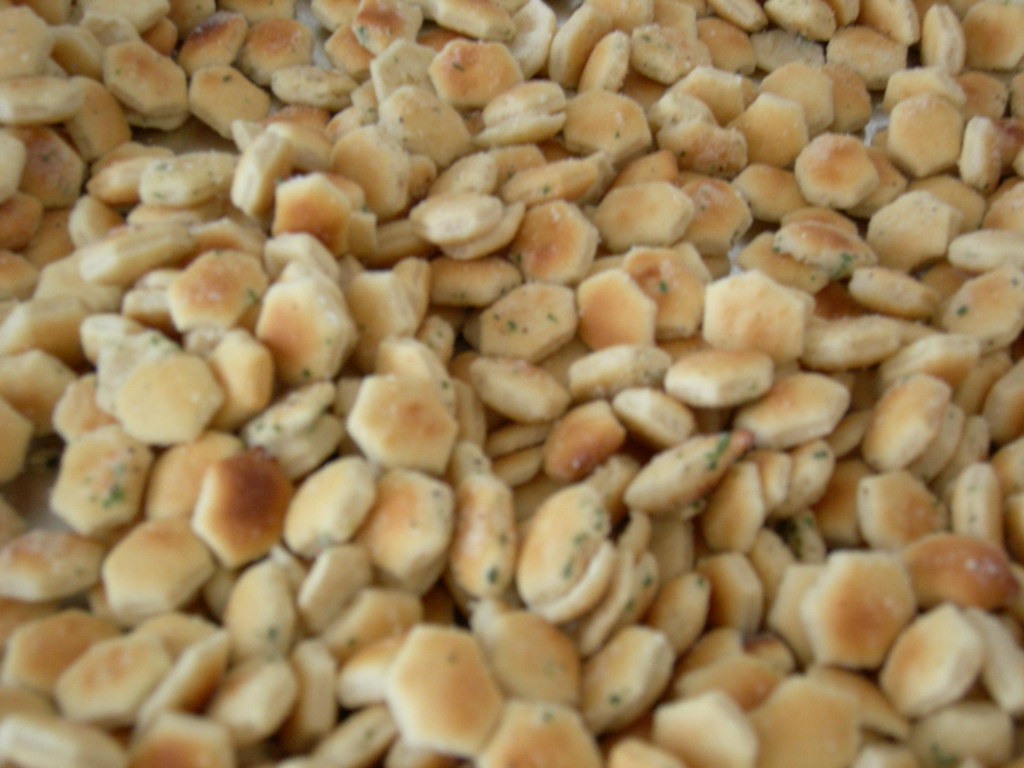
Ranch Oyster Crackers


Looking for a super simple and highly addictive snack? Oh baby have I found one! Ranch Oyster Crackers are on the list as a must-make munchie for my next soiree. Aside from the 20 minute bake time, these tasty little nibbles took about 5 minutes to make, and I spent less than $5 on the ingredients. What's not to love about a snack like that? And to boot, the crackers are relatively low fat.

I omitted the dill weed and the lemon pepper, and cut back on the oil a smidge, and this little snack came out great.

Ranch Oyster Crackers

1 (1 ounce) package ranch dressing mix
1/2 teaspoon dried dill weed
1/4 cup vegetable oil
1/4 teaspoon lemon pepper (optional)
1/4 teaspoon garlic powder (optional)
5 cups oyster crackers

Preheat oven to 250 degrees F (120 degrees C).

In a large mixing bowl, combine ranch dressing mix, dill weed, vegetable oil, lemon pepper, and garlic powder. Mix well. Add oyster crackers to the mixture and mix to coat the crackers. Pour the crackers onto a cookie sheet.

Bake for 15 to 20 minutes, stirring gently halfway through the baking time.

Labels: , , , , , ,

Sunday, April 13, 2008

Slow Cookin' Goodness

So let's play a little catch up shall we? The economy sucks, so the job hunt has been on like crazy in my Culinarily Obsessed house. But the cooking continues, more than usual actually. Funny thing about having to watch your budget, keeps you from eating out as much, thus you're in the kitchen more. But hey, I'm not complaining, I get to try out new recipes, save money and eat healthier than I would have by going out.

One of those new recipes I tried a while back was a yummy pot roast recipe. For a long while, the use of the slow cooker was left to my Big Bad Dad aka Mr. Picky Eater. It's a simple appliance, but I never touched the thing, I was always worried I'd undercook or worse overcook something. I've started using the thing and I'm starting to like it. Another thing I like, no scratch that I LOVE is AllRecipes. It is definitely my go-to site when I'm searching for a recipe. A while back I spotted a slow cooker pot roast recipe that had about a bazillion rave reviews, so I figured I had to give it a shot, I mean how can a bazillion people be wrong about a recipe yanno?

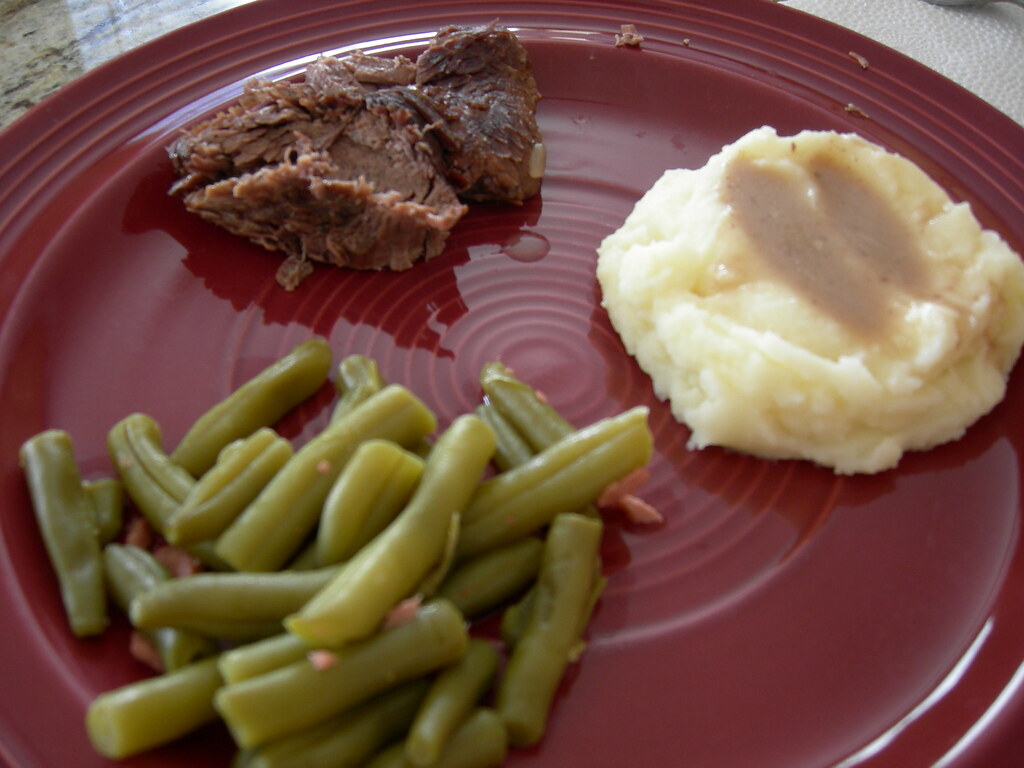
awesome slow cooker pot roast dinner


Awesome Slow Cooker Pot Roast

2 (10.75 ounce) cans condensed cream of mushroom soup
1 (1 ounce) package dry onion soup mix
3/4 cup water
5 1/2 pounds bottom round roast

In a slow cooker, mix cream of mushroom soup, dry onion soup mix and water. Place pot roast in slow cooker and coat with soup mixture.

Cook on High setting for 3 to 4 hours, or on Low setting for 8 to 9 hours.

A lot of the review critiqued the "gravy" in the recipe which didn't turn out to be much of a gravy in my opinion. I served the pot roast alongside mashed potatoes, and the so-called gravy, which was flavorful was great mixed into the potatoes. It was hardly thick enough to be considered a gravy though, but hey I'm not complaining. Will this be a repeat for us? Oh yeah.

Labels: , , , , ,

Saturday, March 15, 2008

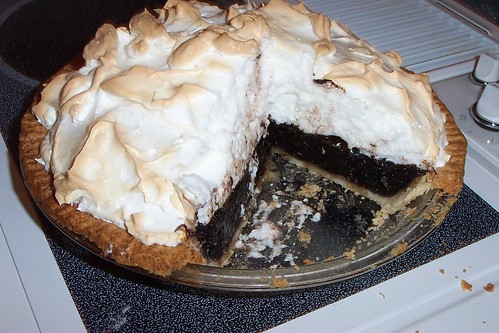
No Pudge Fudge Pie

I'm reaching waaaay into the archives with this recipe. It's one I definitely haven't made in a long time, so you won't find many vivid adjectives to desccribe this pie, but trust me it was GOOD! If you're a regular around here you know I've got a killer sweet tooth, and I'm a serious chocaholic. I don't experiment with the lower fat, more guiltless versions of recipes as much as I should, but you'll catch a few guiltless recipes around here from time to time. This yummy chocolate pie is one of those recipes.

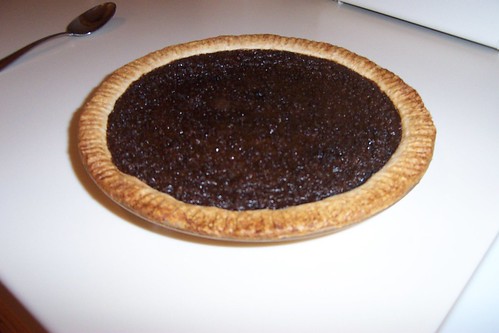
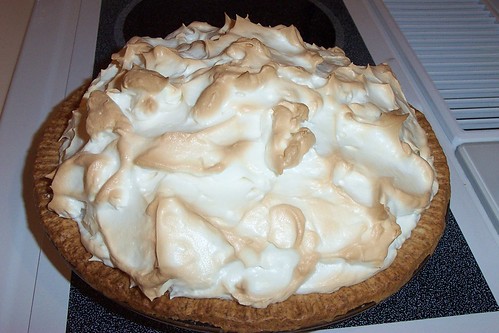
I found this recipe for Low-Fat Chocolate Fudge Pie on the Cooking Light website. I keep the recipe as written, with one minor change - instead of whipped cream, I wanted to top the pie off with some delicious, fluffy meringue. I love whipped cream, but the meringue was absolutely the perfect touch.

Chocolate Fudge Pie

Chocolate Fudge Pie Part 3

Chocolate Fudge Pie YUM

Low-Fat Chocolate Fudge Pie

1/2 (15-ounce) package refrigerated pie dough (such as Pillsbury)
1 cup packed brown sugar
1/2 cup unsweetened cocoa
1 tablespoon all-purpose flour
3/4 cup 2% reduced-fat milk
1/3 cup light-colored corn syrup
1 tablespoon butter, melted
1 teaspoon vanilla extract
2 large eggs
2 large egg whites
1 cup frozen fat-free whipped topping, thawed*
1/2 teaspoon unsweetened cocoa (optional)

*Substitute whipped topping for 1 recipe meringue (see recipe below)

Preheat oven to 350°.
Fit dough into a 9-inch pie plate. Fold edges under; flute. Place pie plate in freezer until ready to use.

Combine brown sugar, 1/2 cup cocoa, and flour in a large bowl. Combine milk and next 5 ingredients (milk through egg whites); stir with a whisk until well blended. Add milk mixture to brown sugar mixture; stir until combined.

Pour mixture into crust. Bake at 350° for 40 minutes or until just set. Cool on a wire rack to room temperature. Cover; chill at least 4 hours. Spread whipped topping evenly over filling; sprinkle with 1/2 teaspoon cocoa, if desired. (Or top with prepared meringue.)

Yield: 10 servings (serving size: 1 wedge)

FAT 8.6g per slice

Meringue

3 egg whites
1/4 teaspoon cream of tartar
3/4 cup white sugar

In large bowl, beat egg whites and cream of tartar with electric mixer until foamy. Gradually add sugar, beating until mixture forms stiff peaks.

To bake: Preheat oven to 350 degrees F (175 degrees C.) Bake pie in the preheated oven for 10 to 15 minutes, or until golden brown.

Labels: , , , , , ,

Sunday, March 02, 2008

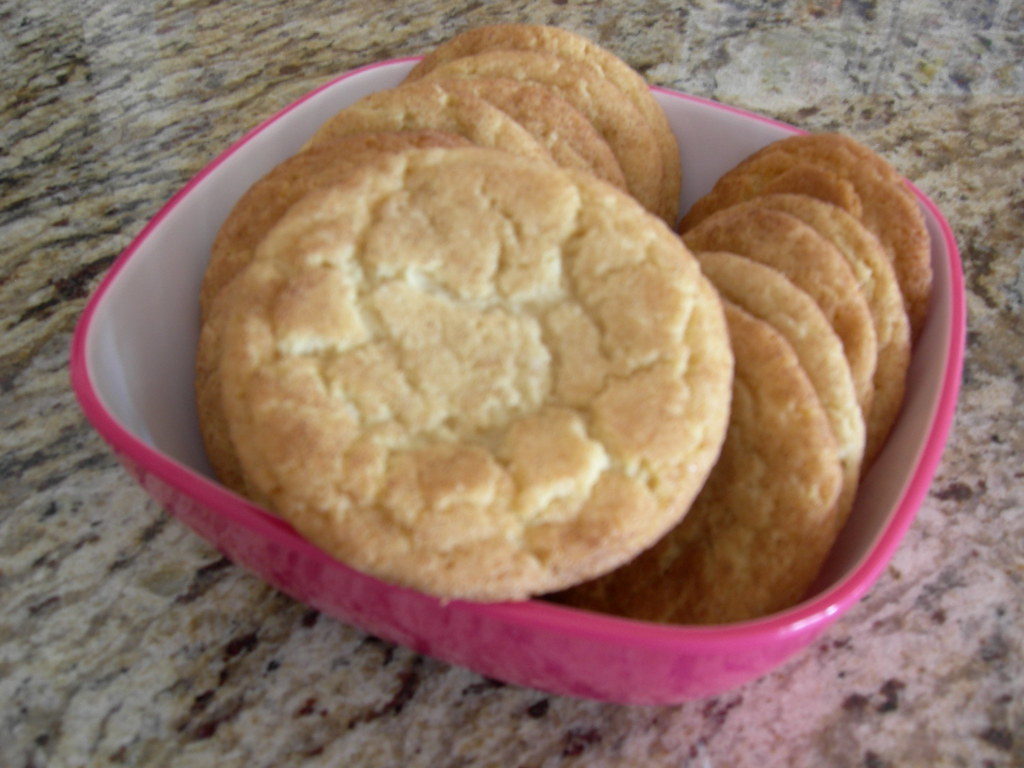
Snickety Snickerdoodles

I'm a sucker for a good cookie, and I'm always craving the adventure of a new recipe. I remember eating snickerdoodles as a kid, but my experience with them was minimal. Snickerdoodles just weren't a cookie we had around my house. I remember them as buttery, soft and chewy with a wonderful crispness on the outside from the cinnamon sugar that coats them. I've seen the recipe for "Mrs. Sigg's Snickerdoodles" over and over on allrecipes. When I see a recipe with a high rating from a huge number of people I figure it's probably pretty good and worth giving a try.

Overall I was pretty happy, they had a nice flavor, but weren't as buttery as I would like. I made an adjustment to the cinnamon sugar mixture. When mixing it looked like there wasn't nearly enough sugar so I doubled the amount and found that was perfect for me. I also refrigerated the dough for about 30 minutes before prepping it for the oven, since I was going to be rolling it in my hands I thought that would be a good idea.
Mrs. Sigg's Snickerdoodles


Snickety Snickerdoodles

1/2 cup butter, softened
1/2 cup shortening
1 1/2 cups white sugar
2 eggs
2 teaspoons vanilla extract
2 3/4 cups all-purpose flour
2 teaspoons cream of tartar
1 teaspoon baking soda
1/4 teaspoon salt
4 tablespoons white sugar
2 teaspoons ground cinnamon

Preheat oven to 400 degrees F (200 degrees C).

Cream together butter, shortening, 1 1/2 cups sugar, the eggs and the vanilla. Blend in the flour, cream of tartar, soda and salt. Shape dough by rounded spoonfuls into balls.

Mix the 3 tablespoons sugar and the cinnamon. Roll balls of dough in mixture. Place
2 inches apart on ungreased or parchment lined baking sheets.

Bake 8 to 10 minutes, or until set but not too hard. Remove immediately from baking sheets to cooling rack.

Makes approximately 48 cookies

Labels: , , , , ,

Tuesday, November 27, 2007

The Air Is Chili

Last week was miserably cold here, speaking as a southerner of course. When I say miserably cold, I mean that when you go outside your hands and feet get cold, and you really need to wear a coat at night. If I have to wear a coat that classifies as being miserably cold to me, and it's time to make something really warm and soothing for dinner.

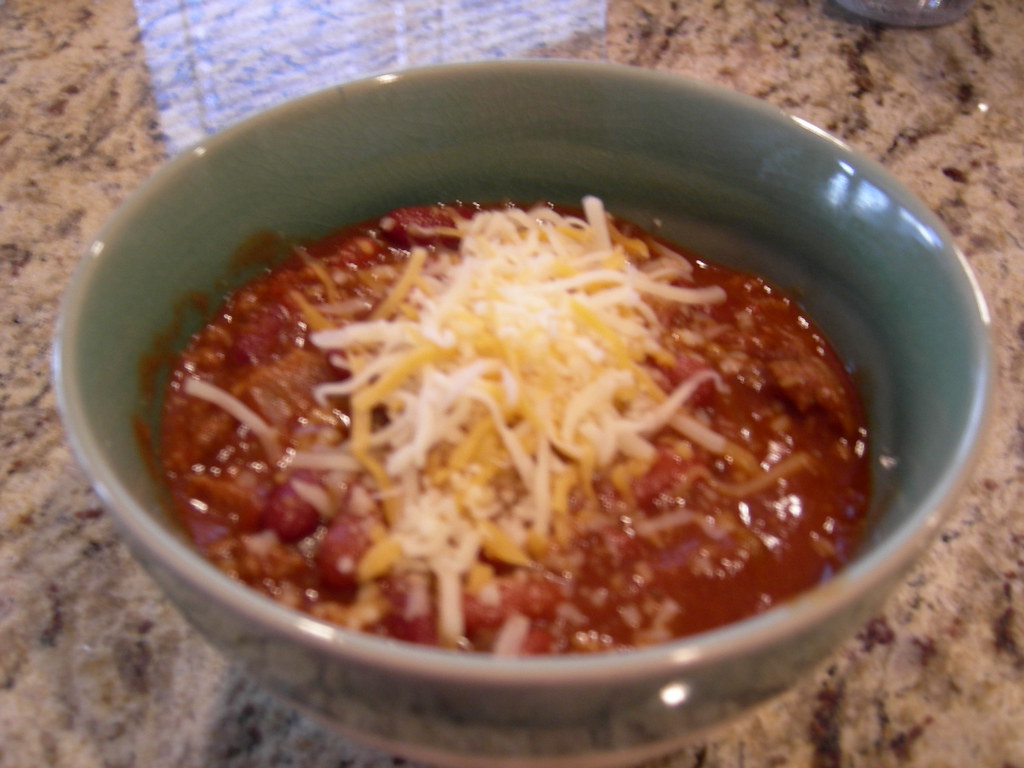
I'm still working on perfecting my chili, and I'm happy to say that I'm getting closer. My beef and beer chili had a good flavor, but not nearly the thickness I wanted so I studied and compared a few recipes and brought out the bits and pieces of each that I thought would bring me closer to my perfect chili. Taking a tip from my neighbor who recently entered and took something like fourth place in a local chili cookoff, I added tomato paste to thicken it up. And I've noticed a few recipes with cocoa powder on the ingredient lists, but cocoa powder in chili? What's that all about I wondered. I decided to find out, but I knew my Big, Bad Dad would have something to say about the addition. I figured if I could sneak it in he'd be none the wiser, and I was right. He didn't utter a word about tasting chocolate in his chili. I guess sometimes it pays to be sneaky because the addition of the cocoa powder seemed to add a nice depth of flavor.

thick & meaty chili


Thick and Meaty Chili

1 1/2 lb. lean ground beef
1 medium yellow onion, chopped
2 garlic cloves, crushed
2 Tbsp. chili powder
1/2 tsp. salt
2 tsp. ground cumin
1 tsp. dried oregano leaves
1 tsp. baking cocoa
1/2 tsp. red pepper sauce
1 can (28 oz.) diced tomatoes, undrained
1 small can tomato paste
2 cans (14 1/2 oz.) red kidney beans, undrained
Shredded Cheese (optional)


1. Cook ground beef in 3 quart saucepan over medium-high heat until beef is brown; Drain. Set aside and cook onions and garlic in same pot on medium-high heat, until onions are translucent. Return beef to pot.

2. Stir in remaining ingredients except tomato paste and beans. Heat to a boil; Reduce heat to low.

3. Add tomato paste, stir until completely combined. Add beans and stir in. Cover and simmer for 1 hour, stirring occasionally, until to desired thickness. Serve in a bowl with shredded cheese if desired.

Labels: , , , , , ,

Friday, November 16, 2007

Happy Fall Y'all!

While the beautiful and vibrant foliage has given the appearance of fall, the chilly, blustery weather typical of the season has been an on-again off-again thing for us over the past several weeks. But it seems that we are finally settling into the season, with nighttime temperatures starting to fall into the 30's and the North Carolina mountains receiving a rather abrupt snowfall just a few days ago. Can I just say, thank goodness I don't live in the mountains right about now?

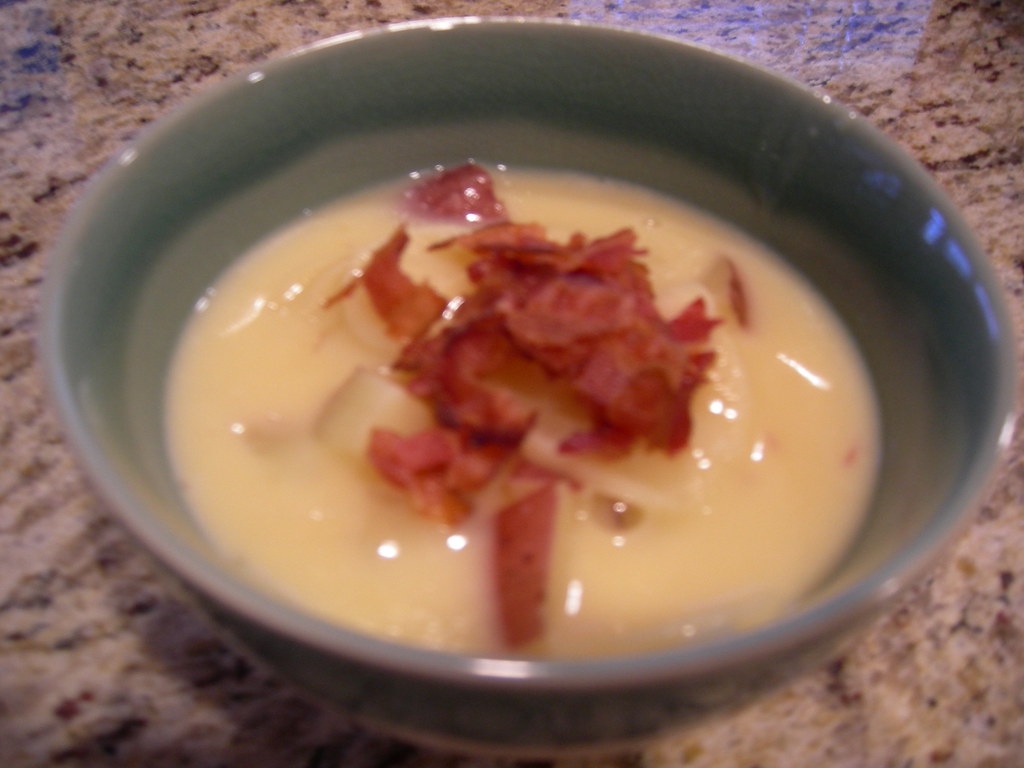
You may remember, a few weeks back I tested out Beef and Beer Chili in anticipation of the forthcoming chilly weather, no pun intended. Well, earlier this week as I started to accept the fact that I must begin waving a sad goodbye to my cute tank tops, shortsleeve blouses, adorable capris and oh-so loved shorts of summer and start dragging out my sweaters, scarves, gloves and other cold weather clothes I developed a craving for something hearty and warm you straight to the bone. I could think of nothing better than soup, so I whipped up a batch of my easy Au Gratin Potato Soup. My inspiration comes from a very similar recipe I found on Allrecipes. My changes were pretty simple and fairly minor but changed the flavor a bit and took away some of the fat and calories, but left the soup lacking nothing in my opinion. I don't think I'm too far off in saying that either, as I got no complaints or criticism from my Big, Bad Dad, he even went back for seconds.

au gratin potato soup


Au Gratin Potato Soup

4 medium red skinned potatoes, cubed
1 (5.5 ounce) package au gratin instant potato mix
1 (10.5 ounce) can condensed chicken broth
1 1/2 cups water
1 cup milk (2% is suitable)
crumbled cooked bacon (2 strips per bowl)

In a large saucepan or pot, combine potatoes, au gratin potato mix, chicken broth and water. Add more water to cover if necessary. Cook over medium heat, stirring occasionally, until potatoes are tender, about 40 minutes. Stir in cream and heat through. While soup is cooking, prepare bacon, drain grease and crumble. Serve with bacon crumbles on top.

Labels: , , , , ,

Tuesday, October 16, 2007

It's a boy!

After months of uber lovin and sometimes total chaos I think it's about time I share with you, my blogging buddies, the newest adventure in my life...

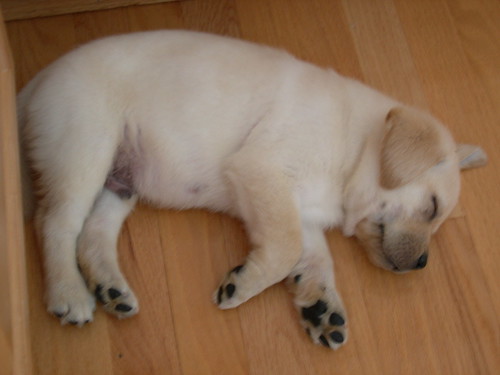
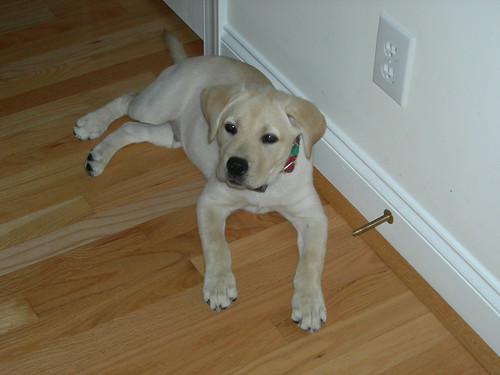
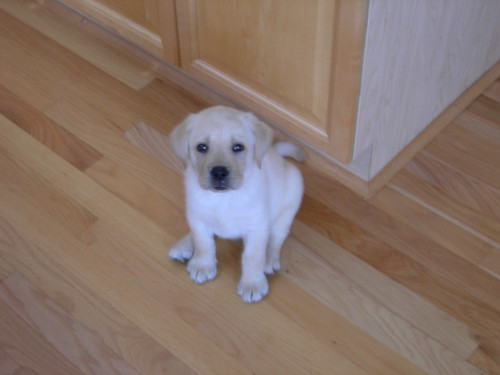
His name is Duncan, and although he's now more than three times the size he was in this photo, I look at his precious face everyday and remember him just as he was the day we brought him home, an innocent little ball of fur.

My entire life I've always, and I mean always had dogs. But I've never had a big dog, and I've always wanted a Labrador. I really fell in love with them this past winter during my two month long hospital stay. One of the things that helped me through those many long days were the therapy dogs, several of which were Retrievers, which occassionally came by my room for a visit, along with that, the thoughts of one day finally returning home to my two dogs. Upon returning home and slowly getting back on my feet, eventhough I was reunited with Sammy and Stumpy who I love more than I can even explain, my life still seemed to lack something, and as I tried to search and figure out what that was my thoughts always went back to those visits with the therapy dogs in the hospital. I knew I needed a Lab. And that's where Duncan came in.

After much searching we found him about a week after he was born. I held him before he was even able to open his eyes, but I knew I couldn't let him go, I was in love. Because he was so young, it was over a month before we could finally bring him home to join the family. Finally, he's here now, and I couldn't be happier. Duncan may have four legs and be covered in fur, but yanno what? He's my son and there is no doubt I'm his Momma. He's so smart, curious and full of energy. Sometimes he's almost more than I can handle, and I get so frustrated I want to either scream or cry, but that's how motherhood goes right? And can I just say, the boy's got good taste in shoes!!

Duncan - 8 weeks

Simple yet satisfying

Snuggled up with my Crocs

Dunky Monkey


Duncan - 8 weeks


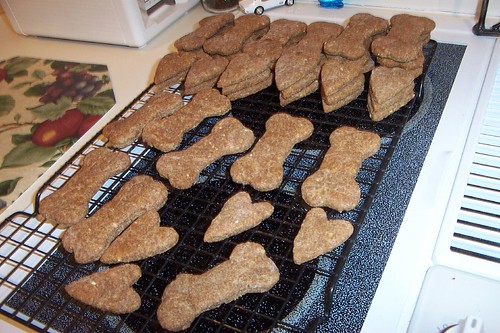
I figured since this is a food blog, while I'm being a doting mother I would share with the dog owners out there an easy treat for your fur-covered little ones.

Good Doggy Dog Biscuits


Good Dog Cookies

2 1/2 cups whole wheat flour
3/4 cup nonfat dry milk powder
1 egg, beaten
1/2 cup vegetable oil
2 cubes beef bouillon
3/4 cup boiling water
2 tablespoons brown sugar

Preheat oven to 300 degrees. Lightly grease cookie sheet.

Dissolve bouillon cubes in boiling water and allow to cool.

Combine flour, dry milk, egg, oil, beef broth and brown sugar. Mix well and knead dough for 1 minute.

On a floured surface, roll out dough to about 1/4 inch thickness. Cut out bones and place on cookie sheet.

Bake for 30 minutes and allow to cool.

Labels: , , , , ,

Friday, September 14, 2007

Who says you can't have your cake and eat it too?

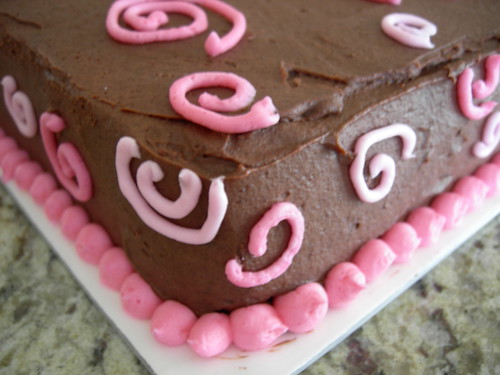
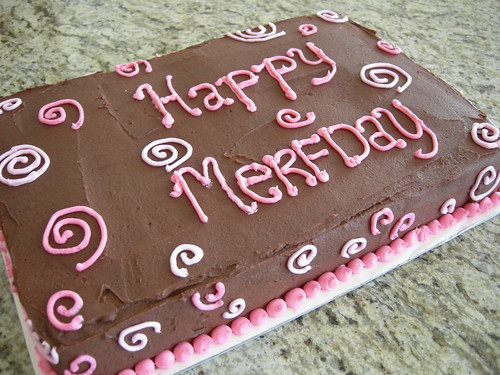
Double Chocolate Birthday Cake


"You can't have your cake and eat it too."


I understand the saying, and yeah I've experienced it plenty of times, like most people. But as a baker? Nope, doesn't happen. Well, except for the occassional failed recipe. But usually I can have my cake and eat it too. Just not too much or I'll have an expanding waistline, which I do NOT want.

If you are a chocolate lover like me and looking for a great chocolate cake you might want to give my go-to chocolate cake recipe a try. I searched high and low for what would become my "tried and true" chocolate cake recipe and wouldn't you know it was under my nose all along? On the back of the Hershey's Dutch Proccessed Cocoa container I found euphoria in the form of cake.

Want the ultimate sinfully delicious cake? Definitely top the cake off with my "tried and true" chocolate frosting - Fantastic Double Fudge Frosting.

Double Chocolate Birthday Cake


Hershey's "Especially Dark" Chocolate Cake

2 c. sugar
1 3/4 c. all-purpose flour
3/4 c. Hershey's Special Dark cocoa
1 1/2 tsp. baking powder
1 1/2 tsp. baking soda
1 tsp. salt
2 eggs
1 c. milk
1/2 c. vegetable oil
2 tsp. vanilla extract
1 c. boiling water

Heat oven to 350 degrees. Grease and flour two 9-inch round cake pans.

Stir together sugar, flour, cocoa, baking powder, baking soda and salt in large bowl. Add eggs, milk, oil and vanilla. Beat on medium speed for 2 minutes. Stir in boiling water (batter will be thin). Pour batter into prepared pans.

Bake 30 to 35 minutes or until wooden skewer inserted in center comes out clean. Cool 10 minutes; remove from pans to wire racks. Cool completely. Frost.

Makes 10 to 12 servings.

Fantastic Double Fudge Frosting

1 1/4 c. sugar
1 c. heavy cream
5 (1 oz each) squares unsweetened chocolate
1 stick unsalted butter
1 tsp. vanilla extract

Bring sugar and heavy cream to boil in a medium saucepan. Reduce heat and simmer for 5 minutes, stirring so that it doesn't boil over.

Remove pan from heat and add unsweetened chocolate, stir until completely dissolved. Add butter and stir until melted, then add vanilla, stir to combine. Refrigerate. When icing is cold, beat with an electric mixer or wooden spoon. Frost cake.

Frosts 1 2 layer cake or single layer medium size sheet cake.

*All credit goes to Ayun Halliday author of Dirty Sugar Cookies for original frosting recipe.

Oh, and if you're wondering if "Merfday" is some unusual little known holiday yet undiscovered by you, the answer is no. Well, sorta. I made the cake to celebrate my long-time friend Meredith's recent birthday. Together we're two very silly girls, always coming up with goofy nicknames for our friends and family, and for as long as I can remember we've all known her as Merf. Me? Well, I'll just leave y'all to wonder about my alias...

Labels: , , , , , , ,

Friday, September 07, 2007

A Chip Off The Ol' Block

Salsa is such a great summer food isn't it? I crave chips and salsa year round, but all those fresh veggies of summer just make me think about and crave it that much more during summer. It's not a constant craving though, and I think that is in large part due to my very specific guidelines for what makes for a GOOD salsa.

I love fresh salsa. Like I said, I'm pretty picky though. I've tried many, many varieties of store bought salsa, and the stuff from the jar just doesn't get it for me. Maybe there's a brand out there I haven't tasted yet that would suit me, if so I'd love to find it. I have found a few brands in the refrigerated section that that I liked. What makes a winning salsa to me? The fresh, natural flavor of simple ingredients: tomatoes, onion, peppers, cilantro and a little lime. Texture is a huge thing for me. I don't like chunky salsas, I want mine finely minced, almost pureed even. And nothing too spicy, I like a little bit of a kick, but nothing that makes me break into a sweat or leaves the outside of my mouth burning. That's just no fun!

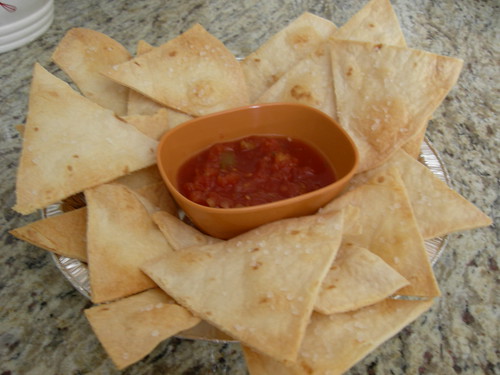
baked lime tortilla chips


One of my biggest culinary wishes is to master the art of making irresistable salsa and guacamole. I've tried making each one time and failed so badly with both that I've been intimadated by the idea of trying again. People swear it's so easy to make both, you just chop some ingredients up and throw them together. That's what I did, but somehow I found them both to leave so much to be desired it wasn't even funny.

Homemade tortilla chips? Those on the other hand I can whip up and willingly devour in a flash. I lucked up and found a totally tasty salsa on a recent shopping trip, so a batch of my homemade flour tortilla chips were in order. I love the restaurant tortilla chips that are loaded with salt and a hint of lime. If you haven't had them before and you've got a Qdoba Mexican Grill nearby, run, quickly and order up a batch. And eat some of their warm 3-cheese queso while you're at it. It's faaaantastic!

My homemade tortilla chips are hardly the same as those at Qboda - they're baked not fried, and the tortillas are much thicker, the ones at Qboda are paper thin. But mine are virtually guiltfree and still really good. Sometimes different is good right?


Baked Lime Tortilla Chips

4 10-inch flour tortillas
2-3 Tbsp vegetable oil
juice of 1 lime
kosher salt

Preheat oven to 350 degrees. Slice tortillas into 8 wedges and place on lined baking sheet. Brush top side of tortilla wedges lightly with oil. Drizzle evenly with lime juice and sprinkle with salt. Bake for 5 to 7 minutes. Rotate baking sheet and bake for an additional 5 minutes, or until tortillas start to crisp but do not turn brown.

Labels: , , , , ,

Tuesday, September 04, 2007

Best Brownies? Or is there one better?

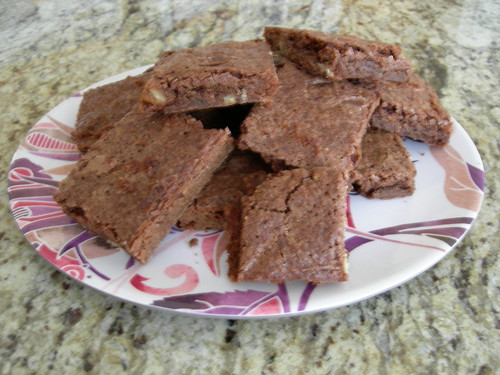
Continuing my search for my ideal brownie I tried out another recipe, this time for Allrecipes' Best Brownies. I often turn to the site when looking for a new recipe because I find the reader reviews and ratings to be helpful. But are they always accurate? I'm not so sure they are. Ever the chocolate lover, how did these brownies turn out? Well, for over 1,000 allrecipes members they are pretty fantastic, racking up a whopping 4 1/2 stars. The important question, how did these brownies rate with me? The recipe was easy enough and by all accounts a success. Still they are not my ideal brownie. The batter was nice and thick like a brownie batter should be, but the brownies themself were very thin. I also thought they were pretty sweet, which I'm not so much complaining about, but they weren't chocolatey enough for me. When I think of brownies I think of deep rich chocolate flavor, with a fudgy texture. This recipe falls somewhere nicely in the middle of cakey and fudgy, which was fine by me, but I definitely need a richer chocolate flavor. I generally don't add icing to my brownies, and since these were so thin I skipped icing. I'll likely give this recipe a shot again since the batter was mixed up and in the oven in less than 15 minutes, but next time I'll double the amount of batter used for the pan size and I'll use dutch process cocoa powder in place of regular cocoa powder.

"The Best" Brownies


Reviews: 1,611 Rating: 4 1/2 stars

Best Brownies

1/2 cup butter
1 cup white sugar
2 eggs
1 teaspoon vanilla extract
1/3 cup unsweetened cocoa powder
1/2 cup all-purpose flour
1/4 teaspoon salt
1/4 teaspoon baking powder

3 tablespoons butter, softened
3 tablespoons unsweetened cocoa powder
1 tablespoon honey
1 teaspoon vanilla extract
1 cup confectioners' sugar

Preheat oven to 350 degrees F (175 degrees C). Grease and flour an 8 inch square pan.

In a large saucepan, melt 1/2 cup butter. Remove from heat, and stir in sugar, eggs, and 1 teaspoon vanilla. Beat in 1/3 cup cocoa, 1/2 cup flour, salt, and baking powder. Spread batter into prepared pan.

Bake in preheated oven for 25 to 30 minutes. Do not overcook.

To Make Frosting: Combine 3 tablespoons butter, 3 tablespoons cocoa, 1 tablespoon honey, 1 teaspoon vanilla, and 1 cup confectioners' sugar. Frost brownies while they are still warm.

Labels: , , , ,

Sunday, August 26, 2007

Rachael Ray's Gigi's Apple Cake

Ok, I'm reaching into my archives with this one. I made this so long ago I can't even remember when, but for some reason I kept it a secret, never taking time enough to share it with y'all. Most people who know me know I'm not a Rachael Ray fan. I'm not a Rach-hater, I'm just not a Rach-lover. I do however really like her talkshow, and I love, love, triple lover her magazine, Everyday with Rachael Ray. I don't make too many of the recipes from the magazine, and I have yet to make a recipe from any of her shows, but I really dig the style of the magazine and Rach's talkshow.

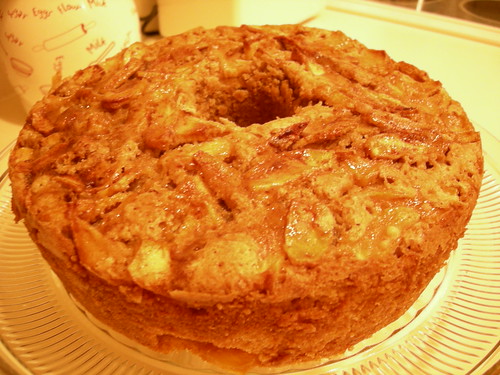
The recipes in the Sweet Spot section of the magazine always catch my eye and if I'm going to make one of the recipes from Everyday with Rachael Ray, that's 9 times out of 10 going to be the recipe. I found the recipe for Gigi's Apple Cake in the August/September issue. I have no idea who Gigi is, but the cake was gorgeous and sounded absolutely delicious. I love apples and the cake turned out great, nice and moist from the apples. My cake didn't turn out to look like the one in the magazine, but I'm sure it tasted just as good.

Apple Cake


Gigi's Apple Cake

1 cup canola oil, plus more for greasing
2½ cups all-purpose flour, plus more for dusting
2 teaspoons baking powder
3 teaspoons ground cinnamon
6 Granny Smith apples (about 1¼ pounds)-peeled, cored and thinly sliced
2¼ cups granulated sugar
4 large eggs
1/3 cup orange juice
2 teaspoons pure vanilla extract

Preheat the oven to 350°. Grease and flour a 12-cup Bundt or tube pan. In a medium bowl, combine the 2½ cups of flour with the baking powder and 2 teaspoons of the cinnamon. In a large bowl, toss the apples with ¼ cup of the sugar and the remaining 1 teaspoon of cinnamon and set aside.

In a standing mixed fitted with a paddle attachment, beat the 1 cup of oil with the eggs, orange juice, vanilla and the remaining 2 cups of sugar on medium speed for 1 minute. Add the flour in 3 batches, mixing until just combined. Add the apples and stir to combine. Transfer to the pan, leaving about an inch at the top, and bake until golden and a toothpick inserted into the cake comes out clean, about 1½ hours. Let the cake cool in the pan for about 30 minutes before unmolding it onto a rack to cool completely.

Labels: , , , , , ,

Wednesday, August 22, 2007

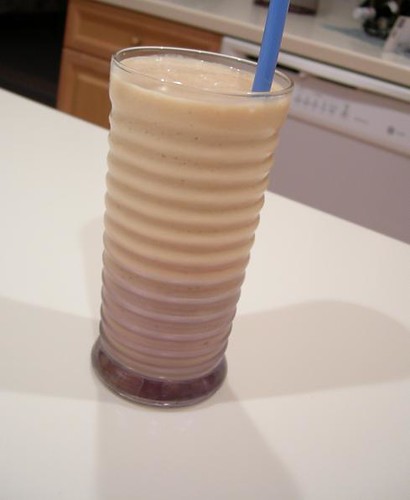
Coconut Cream Pie Coffee Cooler

I'm a coffee junkie, that just goes without saying. I don't drink it to wake up or even to stay awake, I drink it because it tastes good to me, simply put. I drink the majority of my coffee hot, but I love a good iced coffee with it's creamy sweetness. Yum! And frappaccinos? Love them! Making a run to Starbucks isn't always convenient though, not to mention it can get expensive! So with this super-duper summer heat I often find myself wanting to whip up my own iced coffee and blended coffee coolers to satisfy my cravings.

I've found that in order to build a nice creamy base that doesn't taste watered down using vanilla or other flavors of yogurt works best. And it's important that when brewing your coffee you brew it extra strong when making coffee coolers and iced coffee.

Coconut Cream Pie Coffee Cooler


Coconut Cream Pie Coffee Cooler

8 oz coconut cream pie flavored yogurt
3/4 cup crushed ice
2 tablespoons sugar, more or less to taste
1/2 cup strong brewed coffee, cooled
1/4 cup heavy cream or (fat free) half-and-half
2 graham crackers (usually half of a cookie sheet), crumbled

Put all ingredients except graham cracker crumbs into blender. Blend until combined and smooth. Break graham crackers into small pieces and add to blender. Pulse to mix.

Serve in a chilled glass with a straw.

Yields 1 large serving.


Stay tuned for my next coffee creation perfect for helping you beat the heat.

Labels: , , , ,

Thursday, August 16, 2007

Two Years Strong and Going

I'm a few days late celebrating the two year anniversary of the launch of my beloved blog. Okay, six days to be exact, but much better late than never right? I'm kind of sad that life is often so busy and rushed that milestone dates often slip my mind until after the fact. But I suppose a blog anniversary isn't quite the milestone that a wedding anniversary or a loved one's birthday is, so this isn't quite a tragedy.

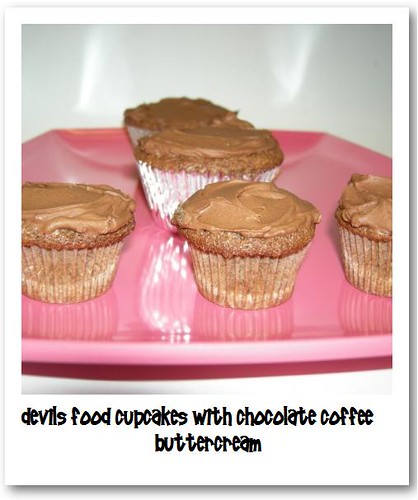
But, I digress. What better way to celebrate a birthday, anniversary or other special event than with cupcakes? Devils food cupcakes with chocolate coffee buttercream..I made these cupcakes for the first time last year as part of an article for A Nice Cuppa. The recipe comes from the book 500 Cupcakes. The book lives up to the name, but to my disappointment, most of those 500 cupcake recipes are slight, sometimes very slight, variations on a basic recipes.

After hitting the two year mark with my blog it makes me wonder what lies ahead. I hope that my blog will be here for many years to come, that my skills in the kitchen will continue to grow and grow. That I will be able to build party planning and catering business into everything I dream of. Only time will tell, but you my dear readers, I thank for the last two years with me, even during the slow times when it seemed that I may have disappeared.

Devils Food Cupcakes with Chocolate Coffee Buttercream


Devils Food Cupcakes

2 c self rising flour
1 tsp baking powder
1 cup brown sugar
2 sticks butter, softened
2 eggs seperated
3 1/2 oz semisweet choc, melted
1 tsp vanilla
1/2 cup milk

Preheat oven to 350 degrees. Line 18 medium size muffin cups with paper liners. Sift flour & baking powder together in medium bowl, set aside. In bowl of mixer, cream together sugar and butter. Add egg yolks, beat well. Add melted chocolate & vanilla, mixing well. Add flour & milk alternately, beating well with each addition. Beat egg whites in medium bowl until soft peaks form and gently fold into batter.

Spoon batter into cups filling 2/3 full. Bake for 20 minutes. Remove pans from oven & cool 5 minutes. Remove cupcakes from pan & cool on rack.

Chocolate Coffee Buttercream

1 stick butter, softened
1 tbsp milk
3 1/2 oz semisweet choc, melted
1 tsp vanilla
2 c confectioners sugar, sifted
1 tsp hot coffee + 2 tbsp instant coffee granules

Beat in milk until smooth. Stir in melted chocolate & vanilla. Beat in confectioners sugar until thick and creamy. Stir in cooled coffee mixture. Spread over cupcakes. Store unfrosted in airtight container for up to 2 days or freeze up to 3 months.

The original frosting recipe called for 3/4 c confectioners sugar, but the consistancy seemed a bit thin, and honestly I like a generous amount of frosting on my cupcakes. The cupcakes themselves were pretty good, but not as moist and dense and I like. And considering that I had to seperate the eggs, beat the egg whites then fold them in, I think next time I would opt to use another cupcake recipe.

Labels: , , , , , , ,

Monday, August 13, 2007

Puttin some 'nanas to good use

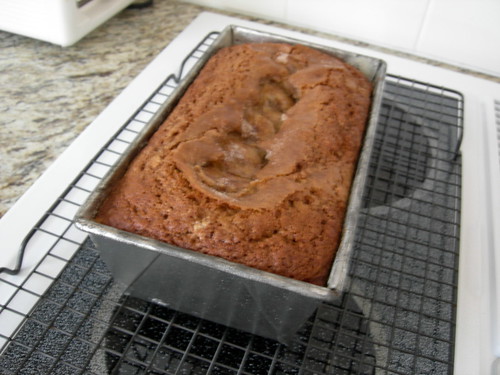
Who wants some banana bread? I decided I did! I make banana bread from time to time usually trying out some random recipe in hopes of finding the one that will end my search. This is supposedly a Paula Deen recipe, but I'm not absolutely sure. I looked on the FoodNetwork website and didn't find it there. I made a few changes - the addition of cinnamon in the batter, a few slices of bananas on top for appearance and some cinnamon sugar sprinkled on top. Yum, doesn't cinnamon make almost everything better?

This would be perfect with some nuts added in to make banana nut muffins...one of my favorite breakfast treats!

Banana Bread


Bodacious Banana Bread

1/2 cup (1 stick) butter, at room temperature
1 cup sugar
1/2 teaspoon salt
2 eggs
1 teaspoon vanilla extract
1-1/2 cups all-purpose flour
1 teaspoon baking soda
1 teaspoon baking powder
1 teaspoon cinnamon
3 ripe bananas, mashed (reserve 4 or 5 slices to add on top once the batter is in the pan)
1-2 Tbsp. cinnamon sugar


Preheat the oven to 350. Grease a 9x5 loaf pan. In a mixing bowl, combine the butter and sugar; mix well. Add the salt, eggs, vanilla, flour, baking soda, baking powder, cinnamon and bananas. Mix well. Pour the batter into the prepared pan, top with reserved banana slices and sprinkle with cinnamon sugar mixture. Bake for 50 minutes, or until wooden skewer inserted in center of loaf comes out clean. Cool 5 minutes and remove from pan to cooling rack.

Variation: For muffins fill regular size muffin cups 2/3 full, top each with a slice of banana and sprinkle with cinnamon sugar mixture. Bake for 25-30 minutes, until wooden skewer inserted in center comes out clean. Cool 5 minutes and remove from pan to cooling rack until completely cooled.

Labels: , , , , ,

Sunday, August 12, 2007

Summertime and the living is easy

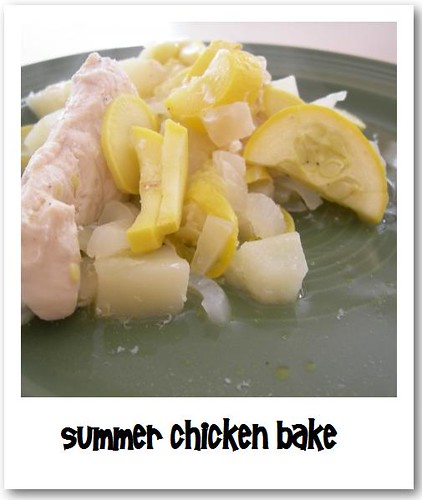
Summer is a time for easy living and carefree fun. It's also hot as heck, here anyway. I love summer not only for the beautiful, yet sweltering weather but for the amazingly fresh and delicious fruits and vegetables. In my family we're no longer blessed with the bounty of fresh homegrown vegetables: yellow crookneck squash, cucumbers, juicy red tomatoes, new potatoes, butterbeans and string beans as our greenthumb gardner, my beloved Pop, passed away several winters ago. Summers are still beautiful and my favorite season, but they just aren't the same anymore.

There is no more going to visit Nana and Pop, finding Pop hidden deep in his garden picking pans full of fresh veggies while Nana is inside canning tomatoes and beans or whipping up something fresh and delicious for dinner. I will always have the vivid memories of those summers to cherish for the rest of my life, along with a delicious recipe passed down by Nana for her Summer Chicken Bake. I remember it like it was yesterday, I think it was probably my eighth birthday dinner. We strayed from the norm of grilling burgers and she created this amazing dish for the first time. I've loved it ever since, and each summer look forward to making it myself. Preparing this recipe along with the others I've learned from Nana helps me feel like she's still here with us, and reminds me that a part of her will always live on, not just in my memories, but in the wonderful and beautiful parts of her that I see in myself.

Preparing the Summer Chicken Bake is super easy, with the hardest part being the wait for it to cook. Patience is a virtue that I do not have, I admit it. My measurements are a rough guess, and can be easily changed to suit your taste and the number of mouths you are feeding.

summer chicken bake


Summer Chicken Bake

1 lb skinless chicken breast
1 large yellow onion
1 lb yellow squash
2-3 medium size baking potatoes (or equivalent amount in weight of new/red potatoes)
salt and pepper to taste
1/4 - 1/2 stick butter

Preheat oven to 350 degrees. Slice vegetables into equal thickness slices. Starting with potatoes, layer vegetables and chicken in casserole dish. Season with salt and pepper. Cube butter into small pieces and scatter over top of chicken and vegetables. Cover with tinfoil and bake for 45 to 50 minutes. Uncover and bake for another 10 to 15 minutes, until vegetables are cooked and tender. Remove from oven and cool for 5 minutes.

*Can also be cooked on the grill by layering vegetables and one piece of chicken on large piece of tinfoil. Then season with salt and pepper and top with small pat of butter. Wrap foil to form a pouch. Place in middle of grill, and cover. Unfortunately I am not the grill master of the family and have not prepared this recipe on the grill myself, so I have no idea what the cooking time on the grill is. Sorry!

Labels: , , , , ,

Directory of Food/drink Blogs Food & Drink Blogs - Blog Top Sites